Startup
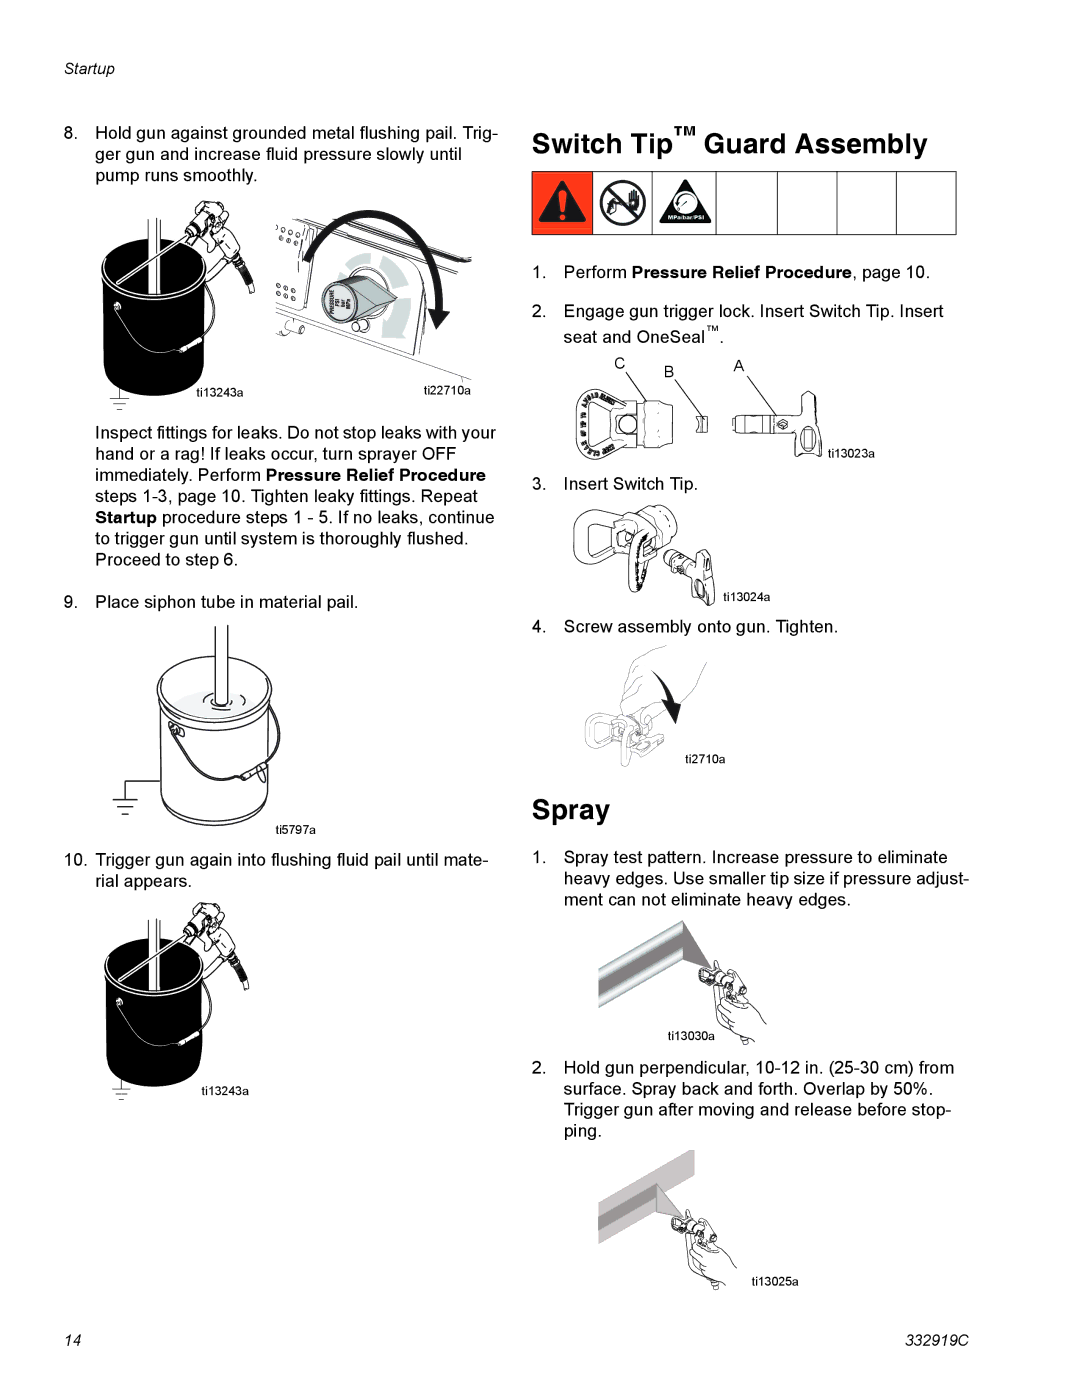
8.Hold gun against grounded metal flushing pail. Trig- ger gun and increase fluid pressure slowly until pump runs smoothly.
ti13243a | ti22710a |
Inspect fittings for leaks. Do not stop leaks with your hand or a rag! If leaks occur, turn sprayer OFF immediately. Perform Pressure Relief Procedure steps
9. Place siphon tube in material pail.
ti5797a
10.Trigger gun again into flushing fluid pail until mate- rial appears.
ti13243a
Switch Tip™ Guard Assembly
1.Perform Pressure Relief Procedure, page 10.
2.Engage gun trigger lock. Insert Switch Tip. Insert seat and OneSeal™.
C B A
![]()
![]()
![]()
![]()
![]()
![]()
![]() ti13023a
ti13023a
3. Insert Switch Tip.
ti13024a
4. Screw assembly onto gun. Tighten.
ti2710a
Spray
1.Spray test pattern. Increase pressure to eliminate heavy edges. Use smaller tip size if pressure adjust- ment can not eliminate heavy edges.
ti13030a
2.Hold gun perpendicular,
ti13025a
14 | 332919C |
