Accessory Assembly - 4” wide deck extension pan KIT
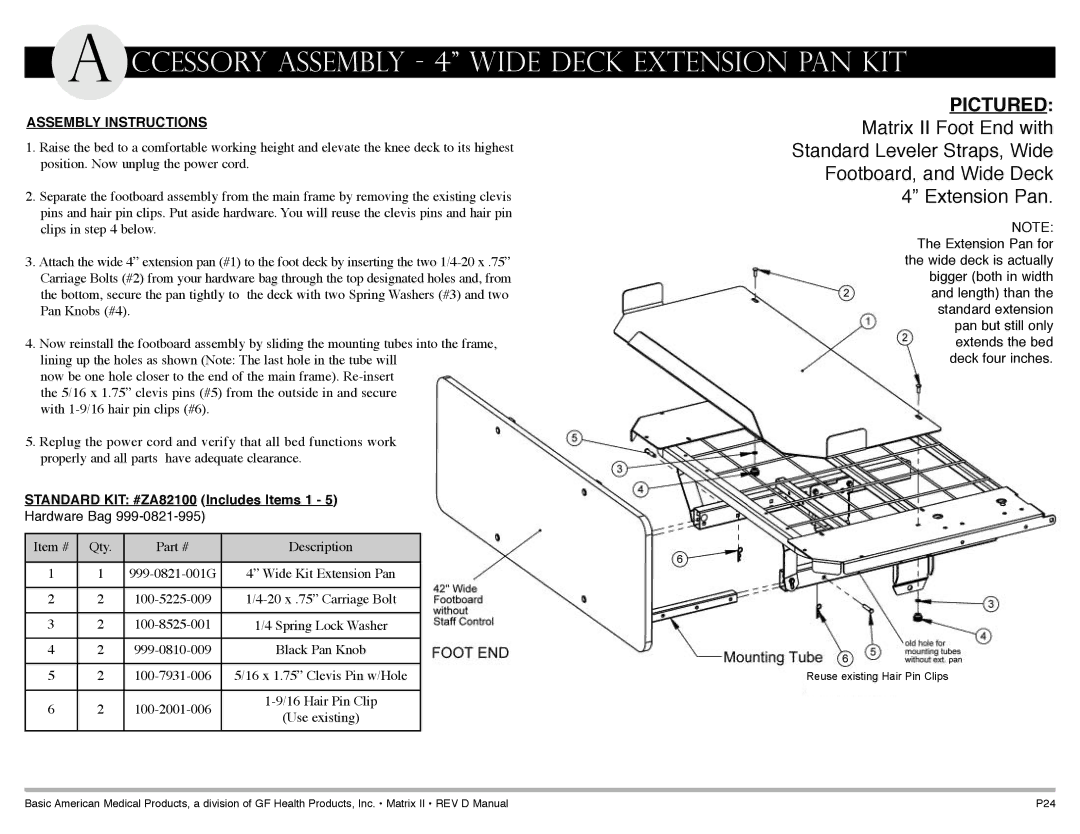
PIcTuRED:
ASSEMBLY INSTRucTIONS
1.Raise the bed to a comfortable working height and elevate the knee deck to its highest position. Now unplug the power cord.
2.Separate the footboard assembly from the main frame by removing the existing clevis pins and hair pin clips. Put aside hardware. You will reuse the clevis pins and hair pin clips in step 4 below.
3.Attach the wide 4” extension pan (#1) to the foot deck by inserting the two
4.Now reinstall the footboard assembly by sliding the mounting tubes into the frame, lining up the holes as shown (Note: The last hole in the tube will
now be one hole closer to the end of the main frame).
5.Replug the power cord and verify that all bed functions work properly and all parts have adequate clearance.
STANDARD KIT: #ZA82100 (Includes Items 1 - 5)
Hardware Bag 999-0821-995)
Item # | Qty. | Part # | Description | |
|
|
|
| |
1 | 1 | 4” Wide Kit Extension Pan | ||
|
|
|
| |
2 | 2 | |||
|
|
|
| |
3 | 2 | 1/4 Spring Lock Washer | ||
|
|
|
| |
4 | 2 | Black Pan Knob | ||
|
|
|
| |
5 | 2 | 5/16 x 1.75” Clevis Pin w/Hole | ||
|
|
|
| |
6 | 2 | |||
(Use existing) | ||||
|
|
| ||
|
|
|
|
Matrix II Foot end with standard Leveler straps, Wide Footboard, and Wide deck 4” extension pan.
note: the extension pan for the wide deck is actually bigger (both in width and length) than the standard extension pan but still only extends the bed deck four inches.
Reuse existing Hair Pin Clips
Basic American Medical products, a division of GF Health products, Inc. • Matrix II • rev d Manual | p24 |