Installing Enclosure Panels
Before installing the enclosure panels, make sure the hood is hung in position with all the ductwork attached, electrical connections and fire system connections completed.
1.Position the end enclosure panels on the hood, and clamp into place with clamps provided or
2.Fasten the end enclosure panels to the wall, method depends on wall construction. (Fasteners are not provided).
If the hood is a double island, bolt the end enclosure panels together. (Fasteners are not provided).
3.Position the front enclosure panel(s) on the hood, and bolt to the end enclosure panels with the 5/16 in. bolts provided in the hardware package.
4.
5.To allow for ease of cleaning, caulk the external seams with NSF Approved silicone caulk
(GE SCS1000, or its equivalent). The caulk is not provided.
Note: Installation instructions may not be applicable for concrete ceilings.
Installing End Skirts
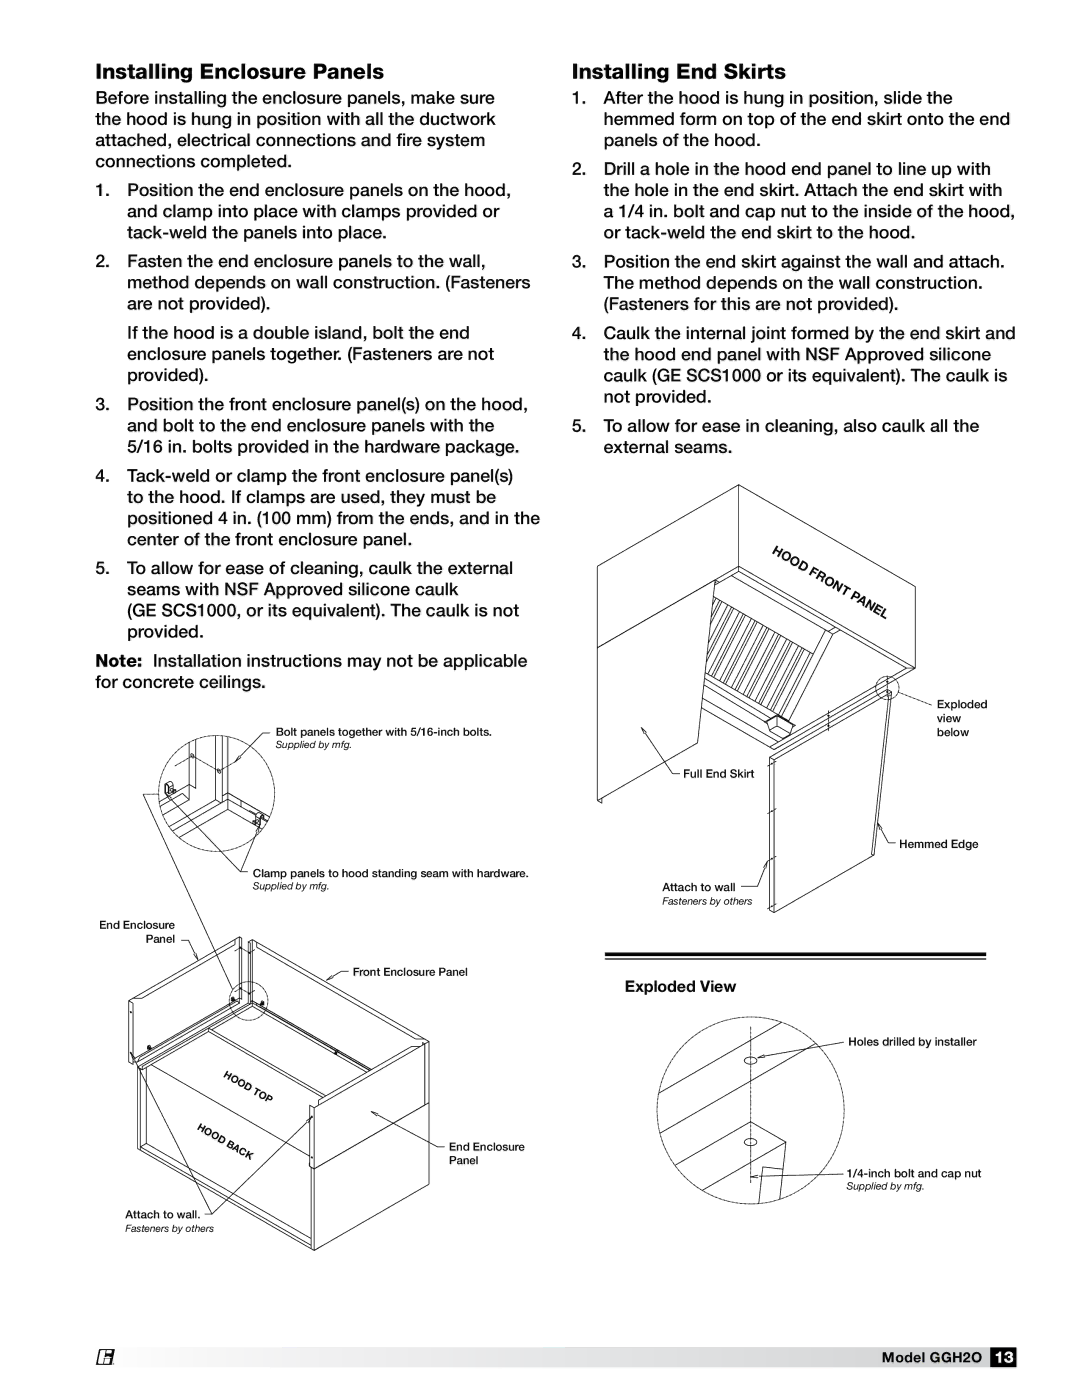
1.After the hood is hung in position, slide the hemmed form on top of the end skirt onto the end panels of the hood.
2.Drill a hole in the hood end panel to line up with the hole in the end skirt. Attach the end skirt with a 1/4 in. bolt and cap nut to the inside of the hood, or
3.Position the end skirt against the wall and attach. The method depends on the wall construction. (Fasteners for this are not provided).
4.Caulk the internal joint formed by the end skirt and the hood end panel with NSF Approved silicone caulk (GE SCS1000 or its equivalent). The caulk is not provided.
5.To allow for ease in cleaning, also caulk all the external seams.
H |
|
OODF |
|
R |
|
O | P |
N | |
T | A |
| |
| N |
| E |
| L |
End Enclosure Panel
Bolt panels together with
Supplied by mfg.
Clamp panels to hood standing seam with hardware.
Supplied by mfg.
![]() Front Enclosure Panel
Front Enclosure Panel
![]()
![]()
![]()
![]()
![]() Exploded view below
Exploded view below
Full End Skirt
![]() Hemmed Edge
Hemmed Edge
Attach to wall ![]()
Fasteners by others
Exploded View
Holes drilled by installer
H |
| O |
| |
O |
| D | T | |
|
|
| ||
|
|
|
| |
|
|
|
| O |
|
|
|
| P |
H |
|
|
|
|
O |
|
|
|
|
OD |
|
|
|
|
B |
|
| End Enclosure | |
| A |
| ||
|
| C |
| |
|
|
| K | Panel |
|
|
|
| |
Attach to wall.
Fasteners by others
![]()
![]()
Supplied by mfg.
®
Model GGH2O 13