Feed Belt
Replacement
Tools Needed: | Qty |
Wrench 12mm | 2 |
Hex Wrench 6mm | 1 |
An Assistant | 1 |
Replacing the feed belt is a simple process, but will require tensioning and tracking when com- pleted.
To replace the feed belt:
1.Disconnect power to the sander!
2.Use a permanent marker, paper correction fluid, or fingernail polish to mark the front of the feed belt tensioning bolt (Figure 39) on both sides. This step will aid you in returning the bolts to their original position, reducing the amount of tracking necessary.
3.Loosen the lock nuts shown in Figure 39 and turn both of the feed belt adjustment bolts counterclockwise one full turn at a time to release the tension from the feed belt.
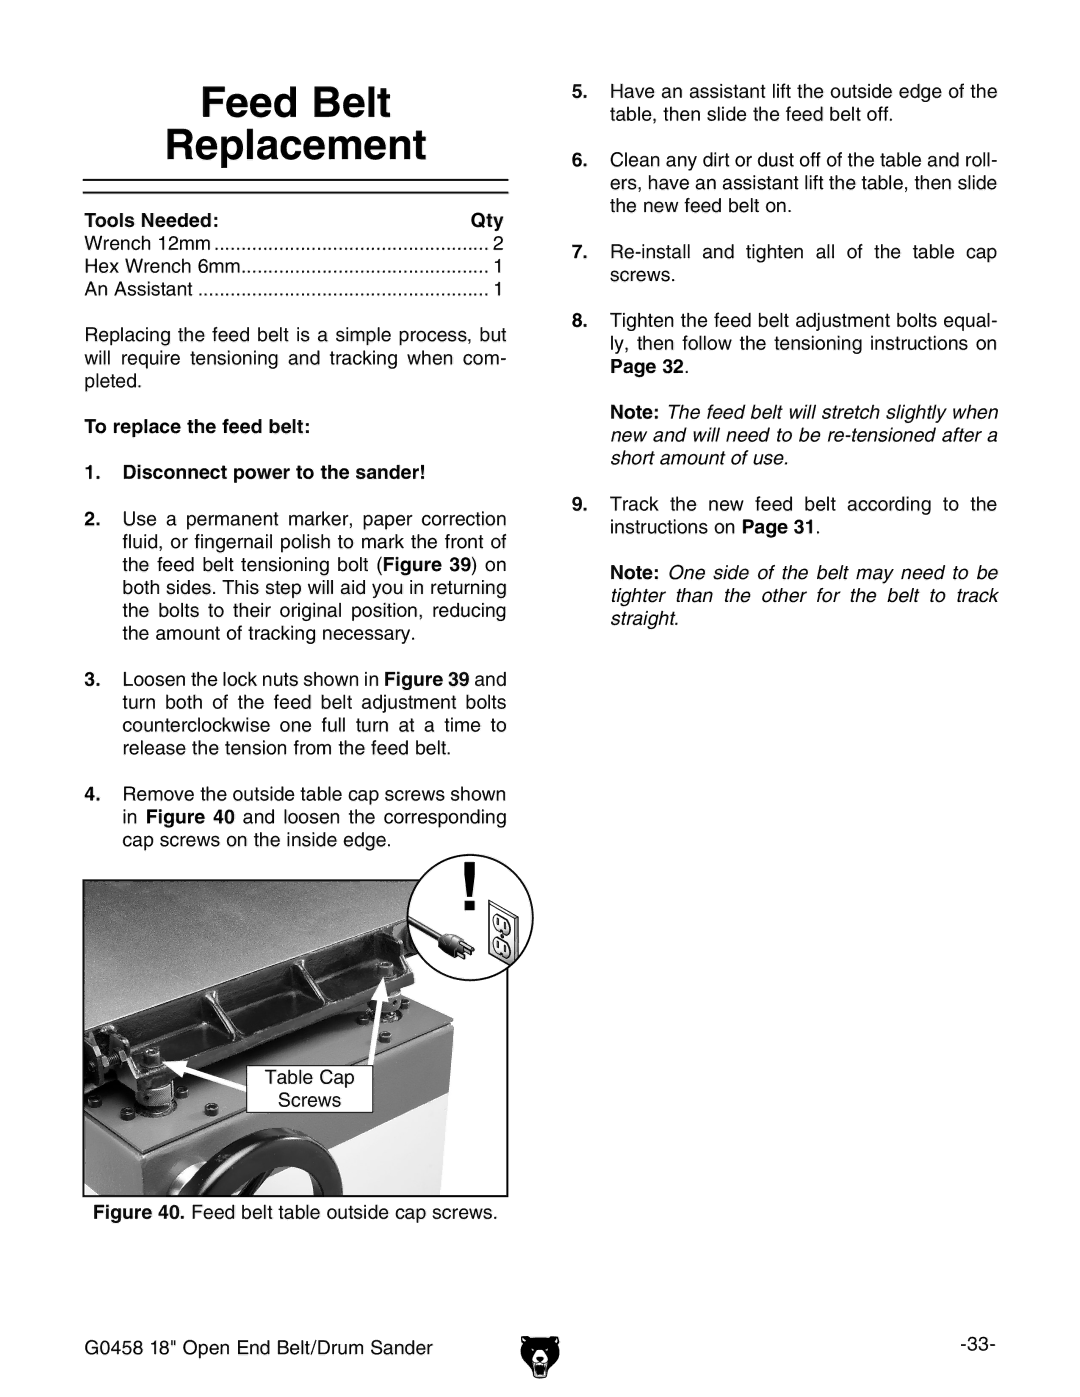
4.Remove the outside table cap screws shown in Figure 40 and loosen the corresponding cap screws on the inside edge.
Table Cap |
Screws |
Figure 40. Feed belt table outside cap screws.
5.Have an assistant lift the outside edge of the table, then slide the feed belt off.
6.Clean any dirt or dust off of the table and roll- ers, have an assistant lift the table, then slide the new feed belt on.
7.Re-install and tighten all of the table cap screws.
8.Tighten the feed belt adjustment bolts equal- ly, then follow the tensioning instructions on Page 32.
Note: The feed belt will stretch slightly when new and will need to be
9.Track the new feed belt according to the instructions on Page 31.
Note: One side of the belt may need to be tighter than the other for the belt to track straight.
G0458 18" Open End Belt/Drum Sander |
