5.Raise the table until the gauge blocks just touch the drum.
6.Find the largest size feeler gauge that can pass between the front pressure plate and your gauge block. (The feeler gauge should slide with moderate resistance, without forc- ing the drum to roll.)
To adjust the rear pressure plate:
1.Disconnect power to the sander!
2.Loosen the lock nuts and tighten the cap screws on both ends of the rear pressure plate shown in Figure 46 to raise the pres- sure plate, or loosen the cap screw to lower the pressure plate.
Rear | Rear Pressure |
Pressure | Plate Adjustment |
Plate | Cap Screw |
Lock Nut |
|
Figure 46. Rear pressure plate adjustments.
3.Adjust the rear pressure plate until it is equal to, or up to 0.004" (0.1mm) lower than the height of the drum.
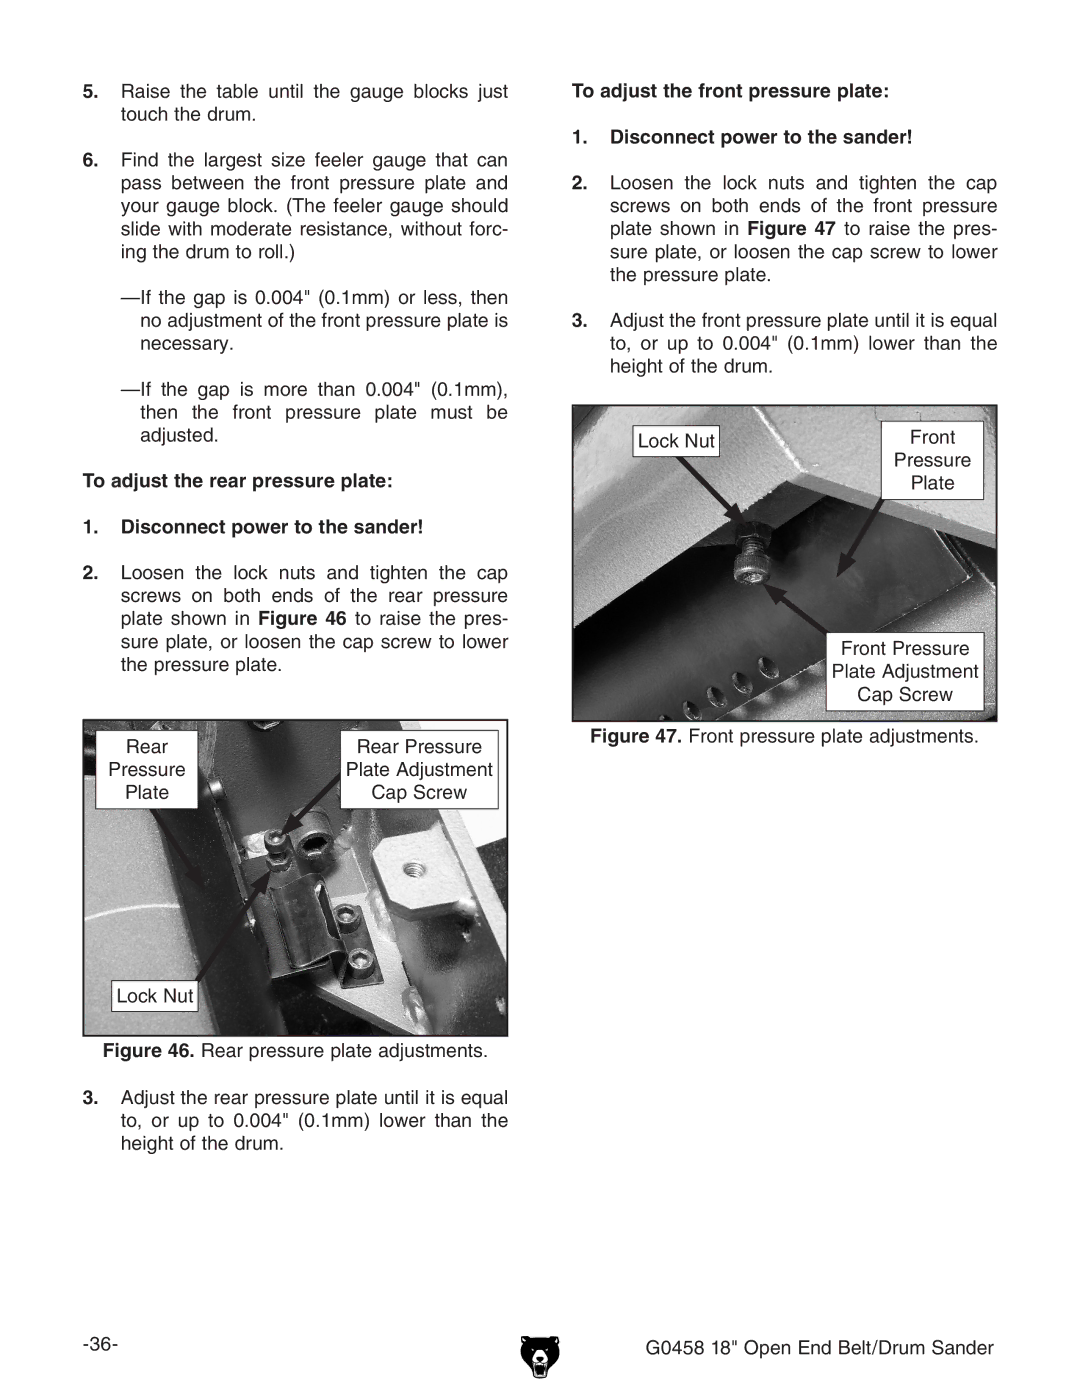
To adjust the front pressure plate:
1.Disconnect power to the sander!
2.Loosen the lock nuts and tighten the cap screws on both ends of the front pressure plate shown in Figure 47 to raise the pres- sure plate, or loosen the cap screw to lower the pressure plate.
3.Adjust the front pressure plate until it is equal to, or up to 0.004" (0.1mm) lower than the height of the drum.
Lock Nut | Front |
| Pressure |
| Plate |
| Front Pressure |
| Plate Adjustment |
| Cap Screw |
Figure 47. Front pressure plate adjustments.
G0458 18" Open End Belt/Drum Sander |