Blade Changes
Always disconnect power to the machine when changing blades. Failure to do this may result in serious person- al injury.
To remove the blade:
1.Unplug the bandsaw!
2.Release tension on the blade by turning the tension control knob
3.Remove the table insert and the table pin. Adjust the upper and lower guide blocks away from the blade.
4.Put on leather gloves to protect your hands from the sharp teeth of the blade.
5.Open the upper and lower wheel covers and slide the blade off both wheels. Use caution
— the blades are sharp!
6.Rotate the blade 90˚ so it will slide through the slot in the table.
Wear gloves and safety goggles when han- dling blades. Coiled blades spring open as they are uncoiled and could cause deep punctures or lacerations.
When removing or installing wide blades, it may be convenient to completely remove the upper and lower guide blocks. Be sure to replace them before cutting. To replace the blade:
1.Slide the blade through the table slot, ensur- ing that the teeth are pointing down toward the table.
If the teeth will not point downward in any ori- entation, the blade is
2.Slip the blade through the upper and lower guides, and mount it over the upper and lower wheels.
3.Apply tension, then check and adjust track- ing.
4.Adjust the upper and lower guide blocks and the support bearings.
5.Close and tighten the wheel covers.
6.Replace the table insert and table pin, being sure not to use excessive force when insert- ing the table pin.
Table Adjustments
The bandsaw table will tilt 5˚ left and 45˚ right from horizontal. There is an adjustable positive stop so the table can be reset perpendicular to the blade after tilting to the right. To tilt the table:
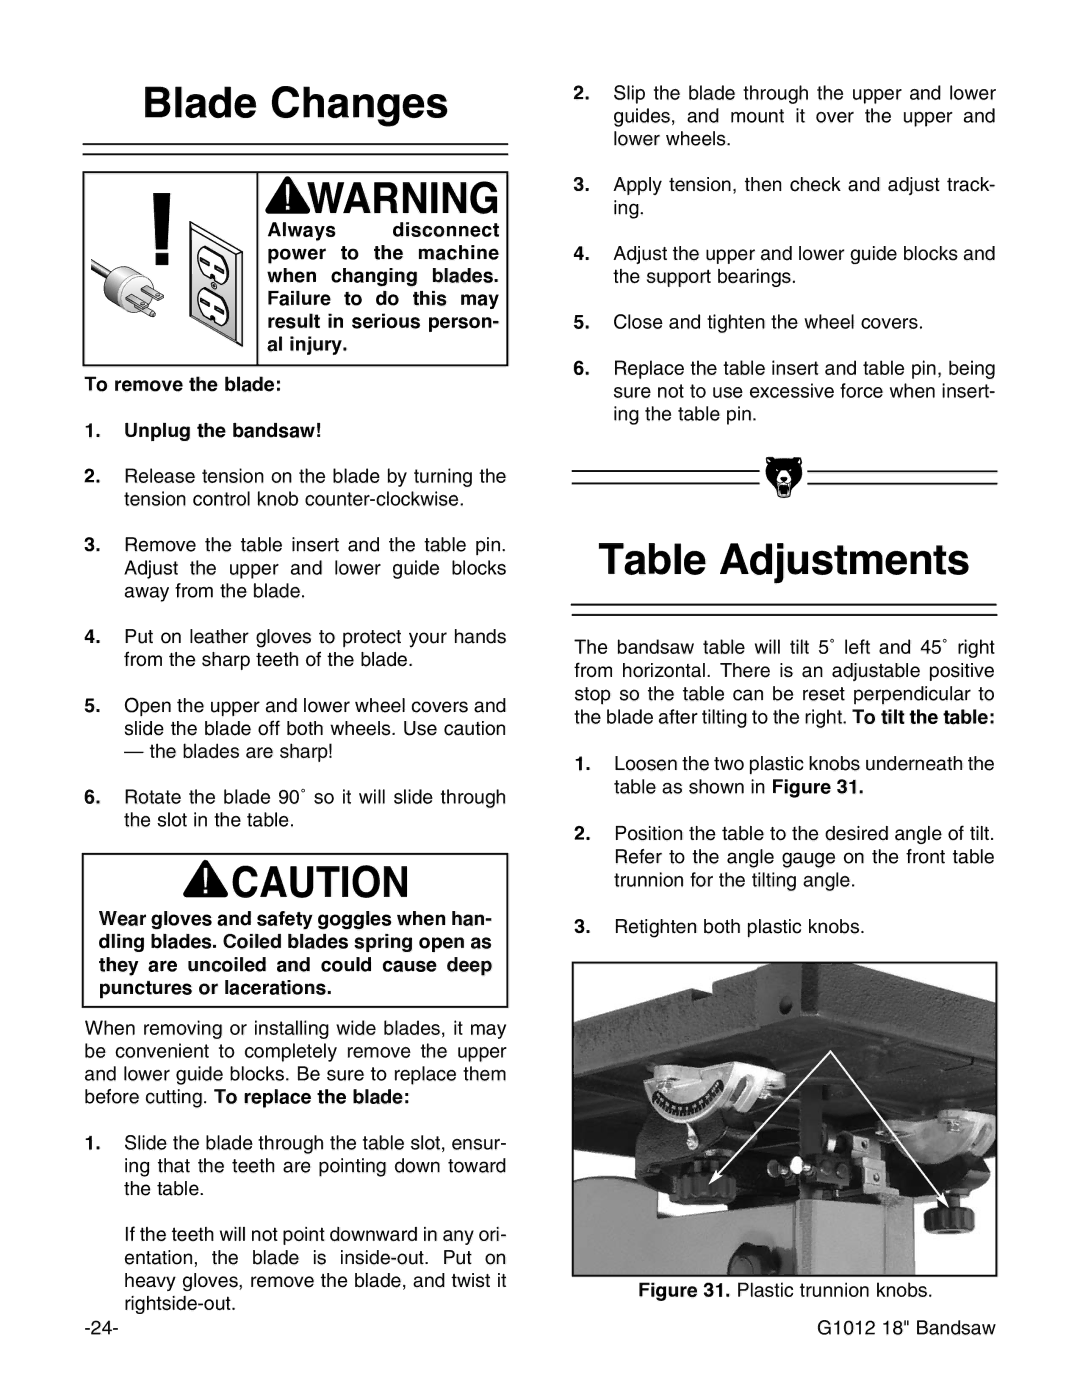
1.Loosen the two plastic knobs underneath the table as shown in Figure 31.
2.Position the table to the desired angle of tilt. Refer to the angle gauge on the front table trunnion for the tilting angle.
3.Retighten both plastic knobs.