Fence Adjustment |
| Blade Lead |
|
|
|
|
|
|
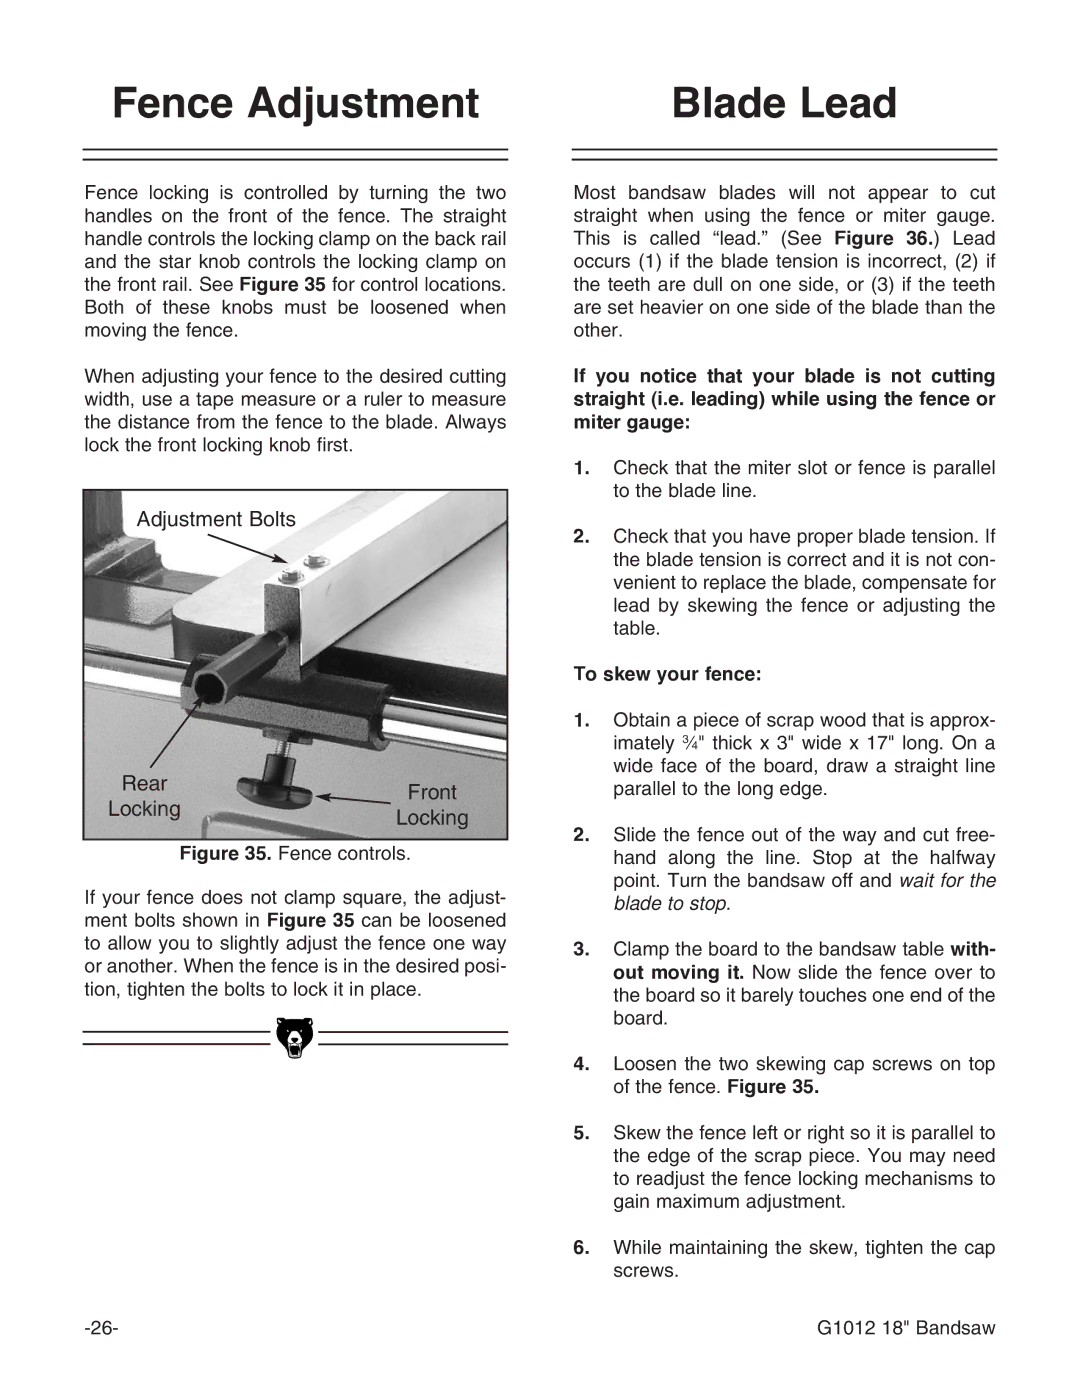
Fence locking is controlled by turning the two handles on the front of the fence. The straight handle controls the locking clamp on the back rail and the star knob controls the locking clamp on the front rail. See Figure 35 for control locations. Both of these knobs must be loosened when moving the fence.
When adjusting your fence to the desired cutting width, use a tape measure or a ruler to measure the distance from the fence to the blade. Always lock the front locking knob first.
Adjustment Bolts
Rear |
| Front | |
Locking | |||
Locking | |||
|
| ||
|
| ||
| Figure 35. Fence controls. | ||
If your fence does not clamp square, the adjust- ment bolts shown in Figure 35 can be loosened to allow you to slightly adjust the fence one way or another. When the fence is in the desired posi- tion, tighten the bolts to lock it in place.
Most bandsaw blades will not appear to cut straight when using the fence or miter gauge. This is called “lead.” (See Figure 36.) Lead occurs (1) if the blade tension is incorrect, (2) if the teeth are dull on one side, or (3) if the teeth are set heavier on one side of the blade than the other.
If you notice that your blade is not cutting straight (i.e. leading) while using the fence or miter gauge:
1.Check that the miter slot or fence is parallel to the blade line.
2.Check that you have proper blade tension. If the blade tension is correct and it is not con- venient to replace the blade, compensate for lead by skewing the fence or adjusting the table.
To skew your fence:
1.Obtain a piece of scrap wood that is approx- imately 3⁄4" thick x 3" wide x 17" long. On a wide face of the board, draw a straight line parallel to the long edge.
2.Slide the fence out of the way and cut free- hand along the line. Stop at the halfway point. Turn the bandsaw off and wait for the blade to stop.
3.Clamp the board to the bandsaw table with- out moving it. Now slide the fence over to the board so it barely touches one end of the board.
4.Loosen the two skewing cap screws on top of the fence. Figure 35.
5.Skew the fence left or right so it is parallel to the edge of the scrap piece. You may need to readjust the fence locking mechanisms to gain maximum adjustment.
6.While maintaining the skew, tighten the cap screws.
G1012 18" Bandsaw |