NOTICE
If setting table tilt to the left, it will be nec- essary to remove the positive stop.
To adjust the positive stop so the table will be 90° to the blade:
1.Loosen the two plastic knobs and
2.Raise the upper blade guide assembly and place a 6" machinist’s square or
Figure 32. Squaring table to blade.
3.Secure the plastic knobs and lock the posi- tive stop adjusting bolt by tightening the check-nut. Ensure that the bolt does not turn while tightening the check-nut.
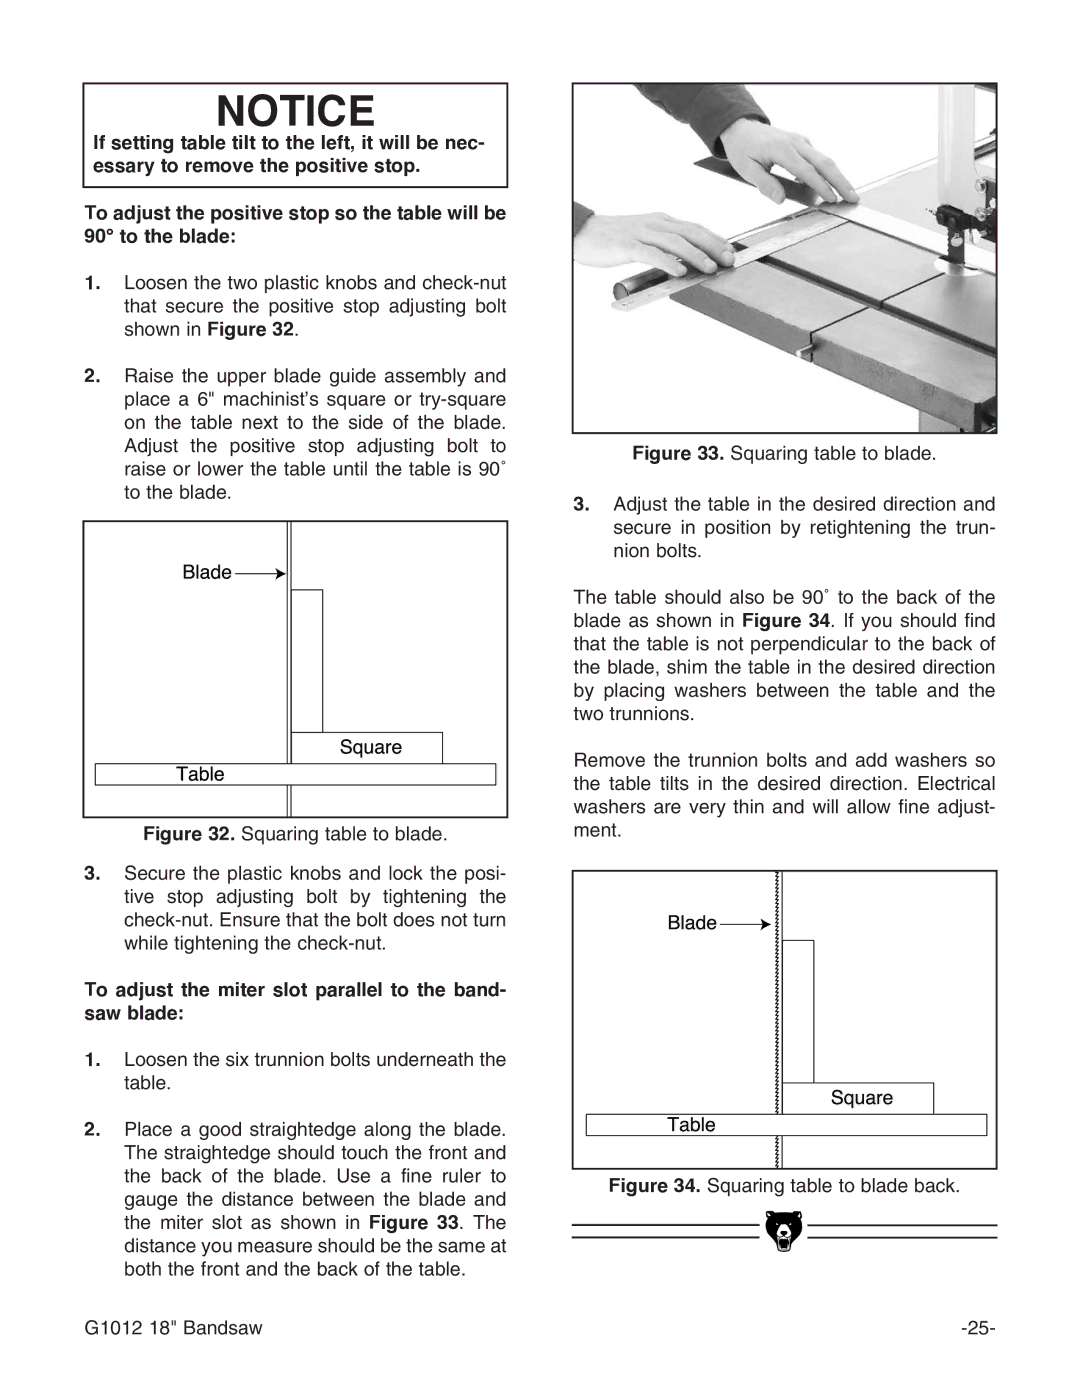
To adjust the miter slot parallel to the band- saw blade:
1.Loosen the six trunnion bolts underneath the table.
2.Place a good straightedge along the blade. The straightedge should touch the front and the back of the blade. Use a fine ruler to gauge the distance between the blade and the miter slot as shown in Figure 33. The distance you measure should be the same at both the front and the back of the table.
Figure 33. Squaring table to blade.
3.Adjust the table in the desired direction and secure in position by retightening the trun- nion bolts.
The table should also be 90˚ to the back of the blade as shown in Figure 34. If you should find that the table is not perpendicular to the back of the blade, shim the table in the desired direction by placing washers between the table and the two trunnions.
Remove the trunnion bolts and add washers so the table tilts in the desired direction. Electrical washers are very thin and will allow fine adjust- ment.
Figure 34. Squaring table to blade back.
G1012 18" Bandsaw |