6.Attach the right angle brace to the bottom of the top panel using (2)
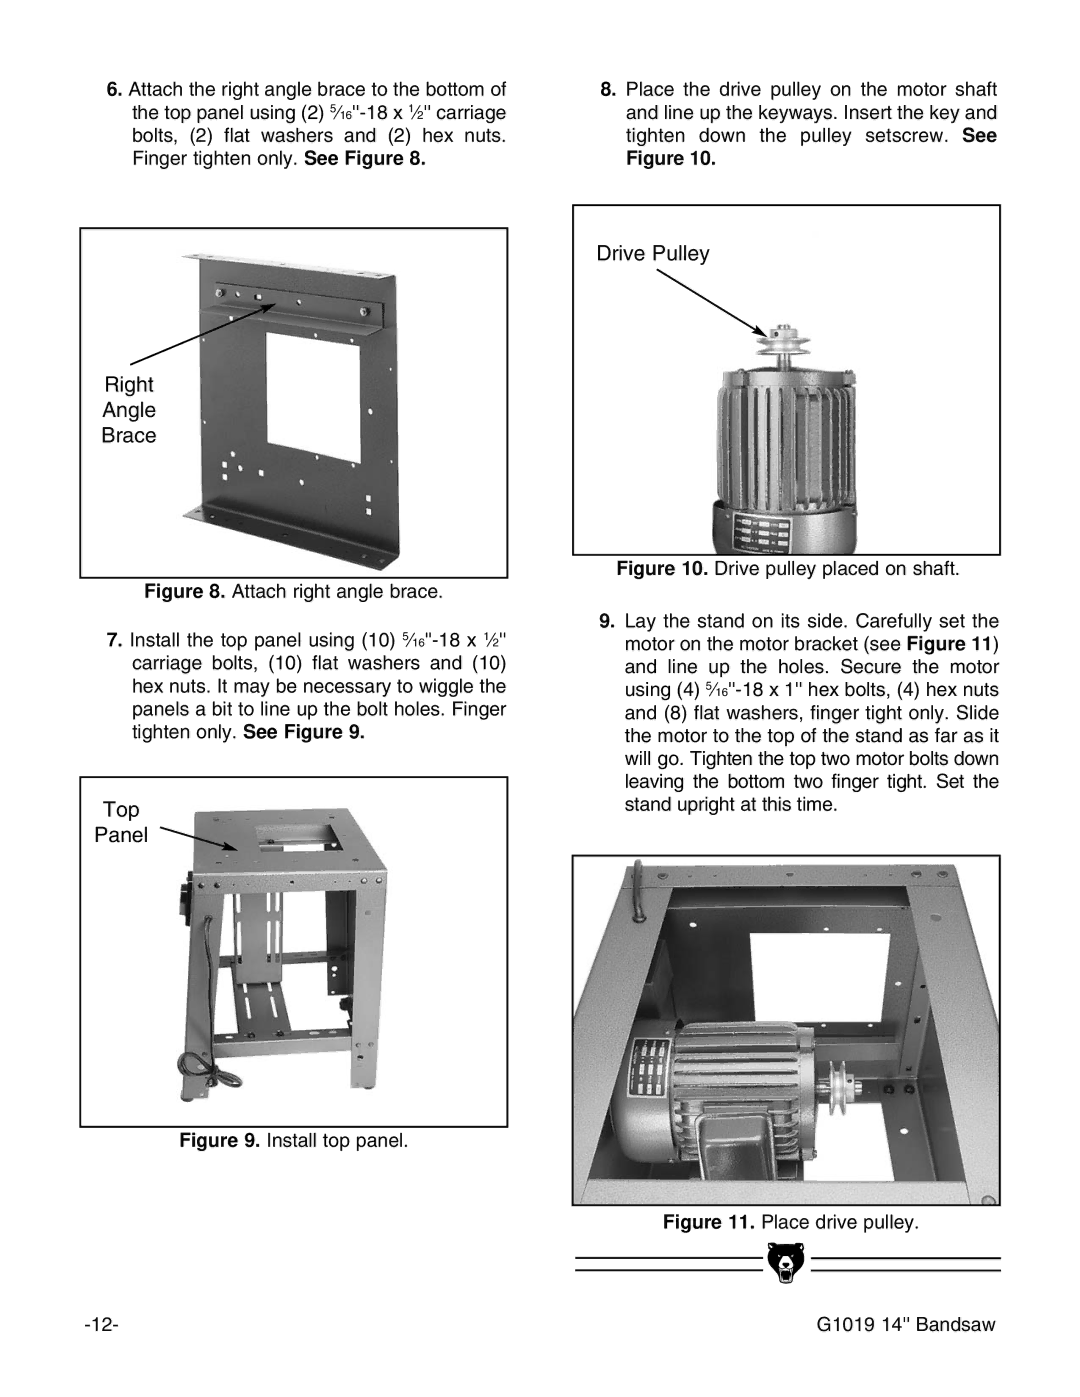
8.Place the drive pulley on the motor shaft and line up the keyways. Insert the key and tighten down the pulley setscrew. See
Figure 10.
Right
Angle
Brace
Figure 8. Attach right angle brace.
7.Install the top panel using (10) 5⁄16''-18 x 1⁄2'' carriage bolts, (10) flat washers and (10) hex nuts. It may be necessary to wiggle the panels a bit to line up the bolt holes. Finger tighten only. See Figure 9.
Top
Panel ![]()
Figure 9. Install top panel.
Drive Pulley
Figure 10. Drive pulley placed on shaft.
9.Lay the stand on its side. Carefully set the motor on the motor bracket (see Figure 11) and line up the holes. Secure the motor using (4) 5⁄16''-18 x 1'' hex bolts, (4) hex nuts and (8) flat washers, finger tight only. Slide the motor to the top of the stand as far as it will go. Tighten the top two motor bolts down leaving the bottom two finger tight. Set the stand upright at this time.
Figure 11. Place drive pulley.
G1019 14'' Bandsaw |