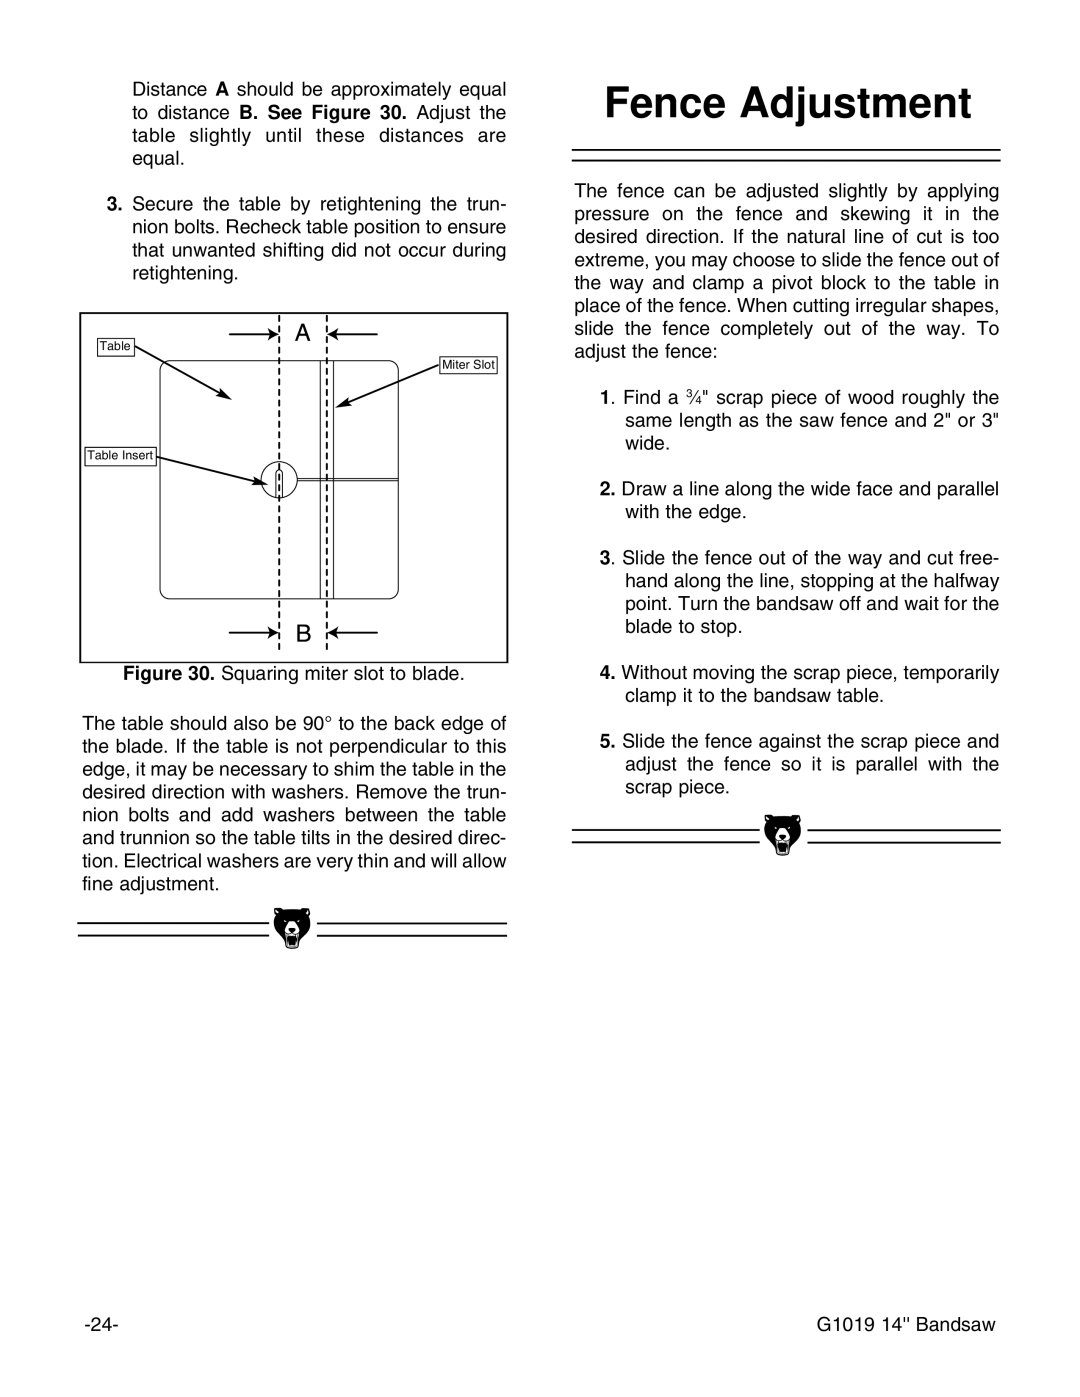
Distance A should be approximately equal to distance B. See Figure 30. Adjust the table slightly until these distances are equal.
3.Secure the table by retightening the trun- nion bolts. Recheck table position to ensure that unwanted shifting did not occur during retightening.
Table |
Miter Slot |
Table Insert |
Figure 30. Squaring miter slot to blade.
The table should also be 90° to the back edge of the blade. If the table is not perpendicular to this edge, it may be necessary to shim the table in the desired direction with washers. Remove the trun- nion bolts and add washers between the table and trunnion so the table tilts in the desired direc- tion. Electrical washers are very thin and will allow fine adjustment.
Fence Adjustment
The fence can be adjusted slightly by applying pressure on the fence and skewing it in the desired direction. If the natural line of cut is too extreme, you may choose to slide the fence out of the way and clamp a pivot block to the table in place of the fence. When cutting irregular shapes, slide the fence completely out of the way. To adjust the fence:
1. Find a 3⁄4" scrap piece of wood roughly the same length as the saw fence and 2" or 3" wide.
2.Draw a line along the wide face and parallel with the edge.
3. Slide the fence out of the way and cut free- hand along the line, stopping at the halfway point. Turn the bandsaw off and wait for the blade to stop.
4.Without moving the scrap piece, temporarily clamp it to the bandsaw table.
5.Slide the fence against the scrap piece and adjust the fence so it is parallel with the scrap piece.
G1019 14'' Bandsaw |