INITIAL SETUP
Note:
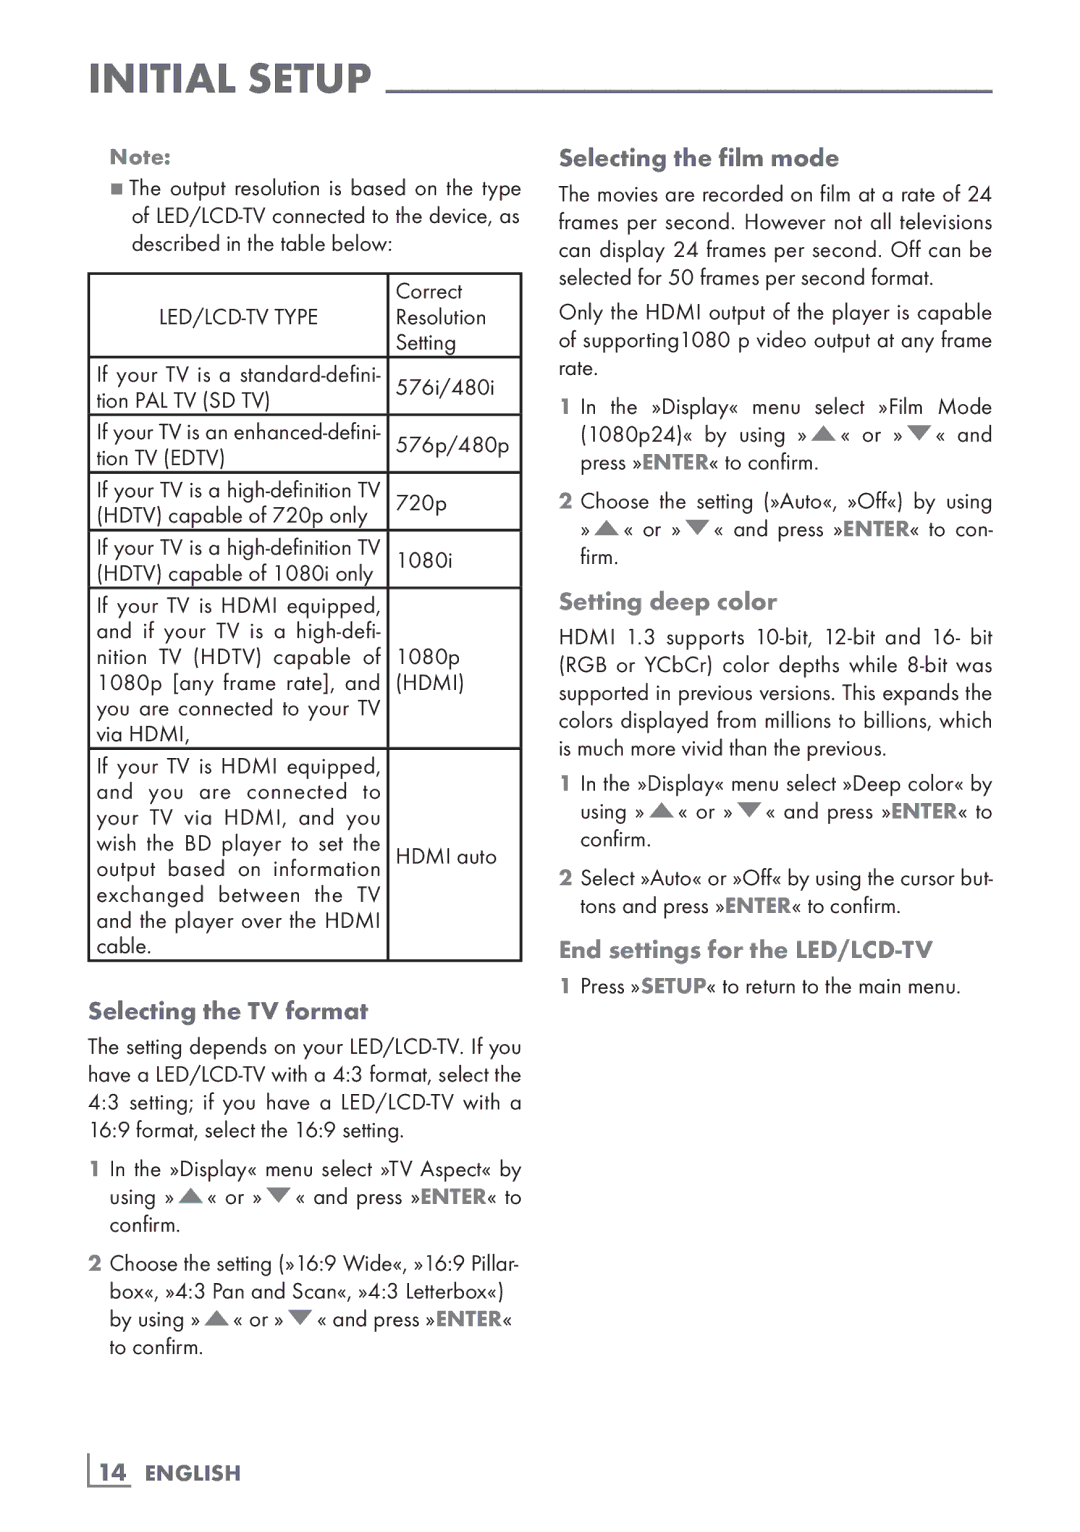
7The output resolution is based on the type of
| Correct |
| Resolution |
| Setting |
If your TV is a | 576i/480i |
tion PAL TV (SD TV) |
|
If your TV is an | 576p/480p |
tion TV (EDTV) |
|
If your TV is a | 720p |
(HDTV) capable of 720p only |
|
If your TV is a | 1080i |
(HDTV) capable of 1080i only | |
If your TV is HDMI equipped, |
|
and if your TV is a |
|
nition TV (HDTV) capable of | 1080p |
1080p [any frame rate], and | (HDMI) |
you are connected to your TV |
|
via HDMI, |
|
If your TV is HDMI equipped, |
|
and you are connected to |
|
your TV via HDMI, and you |
|
wish the BD player to set the | HDMI auto |
output based on information | |
exchanged between the TV |
|
and the player over the HDMI |
|
cable. |
|
Selecting the TV format
The setting depends on your
1 In the »Display« menu select »TV Aspect« by using »A« or »S« and press »ENTER« to confirm.
2Choose the setting (»16:9 Wide«, »16:9 Pillar- box«, »4:3 Pan and Scan«, »4:3 Letterbox«) by using »A« or »S« and press »ENTER« to confirm.
Selecting the film mode
The movies are recorded on film at a rate of 24 frames per second. However not all televisions can display 24 frames per second. Off can be selected for 50 frames per second format.
Only the HDMI output of the player is capable of supporting1080 p video output at any frame rate.
1 In the »Display« menu select »Film Mode (1080p24)« by using »A« or »S« and press »ENTER« to confirm.
2 Choose the setting (»Auto«, »Off«) by using »A« or »S« and press »ENTER« to con- firm.
Setting deep color
HDMI 1.3 supports
1 In the »Display« menu select »Deep color« by using »A« or »S« and press »ENTER« to confirm.
2Select »Auto« or »Off« by using the cursor but- tons and press »ENTER« to confirm.
End settings for the
1Press »SETUP« to return to the main menu.