CONNECTION AND PREPARATION_______________________________________
Connecting the antennas
R | TV |
|
|
|
|
|
|
|
|
| COAXIAL OUT | VIDEO OUT |
|
|
| ||
|
|
|
|
| R |
|
| L |
|
| FM ANT |
|
|
| AUDIO OUT |
| |
|
|
| S VIDEO OUT |
|
|
| ||
|
|
| Y | Pb/Cb | Pr/Cr |
| ||
|
|
|
| COAXIAL OUT | VIDEO OUT |
| ||
|
|
|
|
|
|
|
| R |
|
|
| FM ANT |
|
|
|
|
|
|
|
|
| S VIDEO OUT | Y | P | ||
|
|
|
|
|
|
| ||
|
| AM ANT |
|
|
|
|
|
|
|
|
| EURO AV | TV |
|
|
| |
| AM | A |
|
|
|
|
|
|
| LOOPANTENN |
|
|
|
|
|
| |
|
| TO SUBWOOFER | FL | SL | SUB |
|
|
|
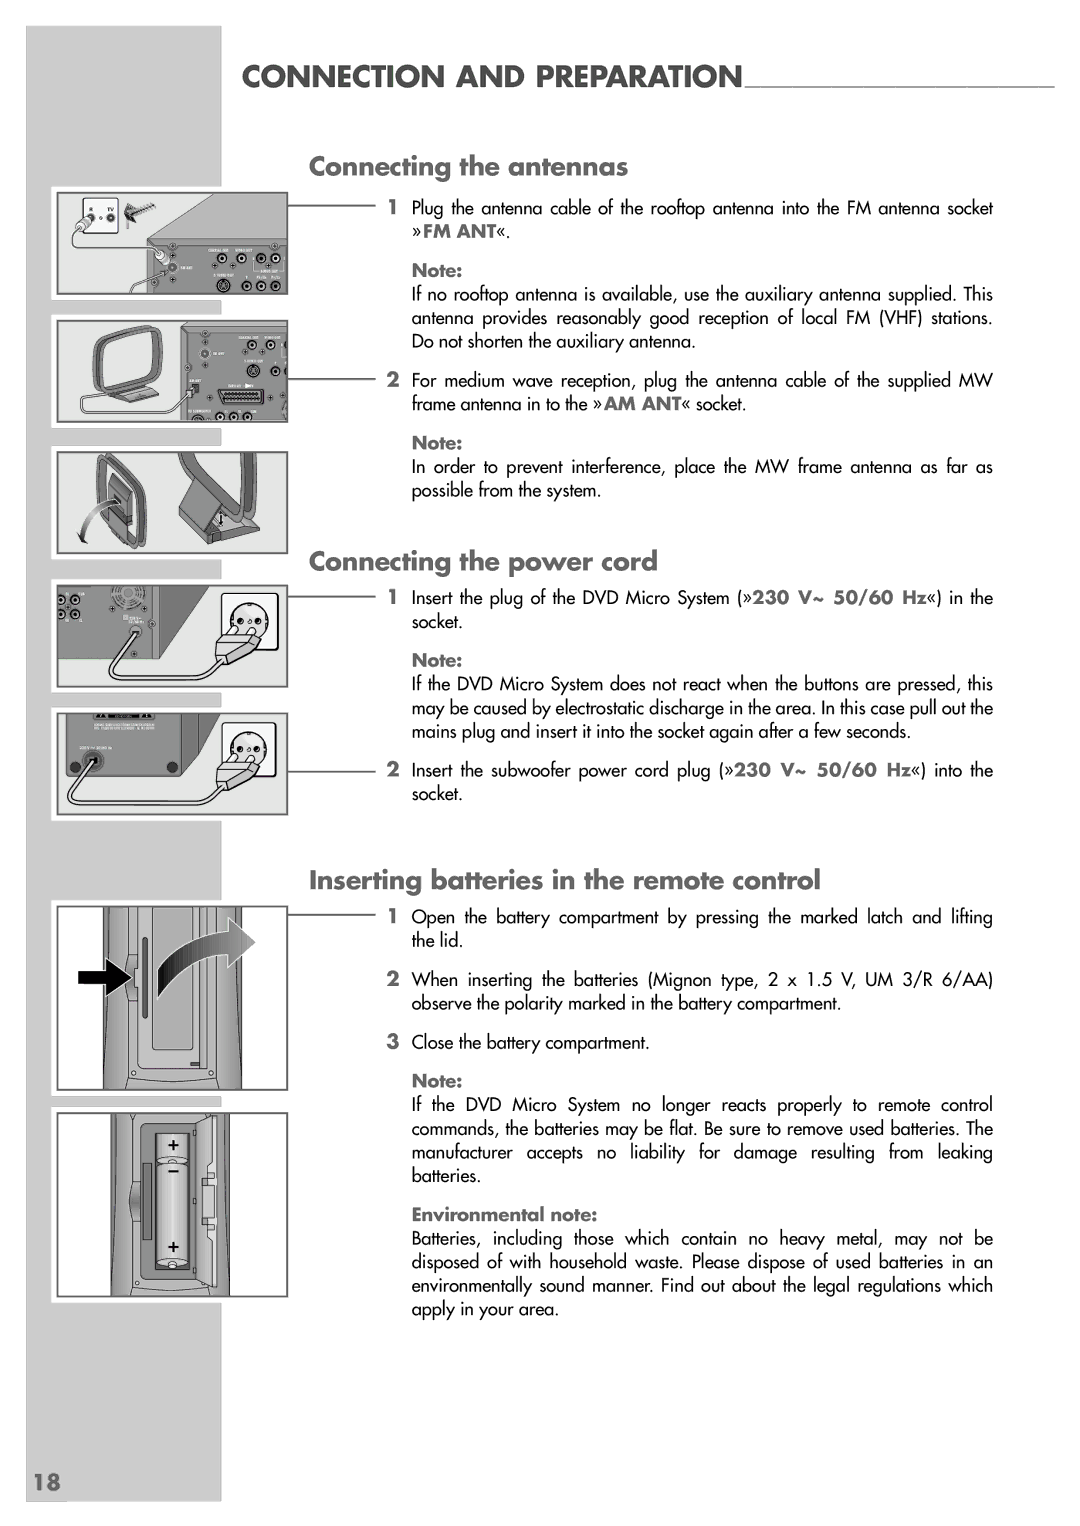
1Plug the antenna cable of the rooftop antenna into the FM antenna socket » FM ANT«.
Note:
If no rooftop antenna is available, use the auxiliary antenna supplied. This antenna provides reasonably good reception of local FM (VHF) stations. Do not shorten the auxiliary antenna.
2For medium wave reception, plug the antenna cable of the supplied MW frame antenna in to the » AM ANT« socket.
Note:
In order to prevent interference, place the MW frame antenna as far as possible from the system.
SL | SUB |
|
SR | CL | 230 V~ |
50/60 Hz |
| RISK OF ELECTRIC SHOCK |
| DO NOT OPEN |
| ACHTUNG: GEHÄUSE NICHT ÖFFNEN STROMSCHLAGGEFAHR |
| AVIS: RISQUE DE CHOC ÉLECTRIQUE - NE PAS OUVRIR |
230 V | 50/60 Hz |
Connecting the power cord
1Insert the plug of the DVD Micro System (»230 V~ 50/60 Hz«) in the socket.
Note:
If the DVD Micro System does not react when the buttons are pressed, this may be caused by electrostatic discharge in the area. In this case pull out the mains plug and insert it into the socket again after a few seconds.
2Insert the subwoofer power cord plug (»230 V~ 50/60 Hz«) into the socket.
Inserting batteries in the remote control
1Open the battery compartment by pressing the marked latch and lifting the lid.
2When inserting the batteries (Mignon type, 2 x 1.5 V, UM 3/R 6/AA) observe the polarity marked in the battery compartment.
3Close the battery compartment.
Note:
If the DVD Micro System no longer reacts properly to remote control commands, the batteries may be flat. Be sure to remove used batteries. The manufacturer accepts no liability for damage resulting from leaking batteries.
Environmental note:
Batteries, including those which contain no heavy metal, may not be disposed of with household waste. Please dispose of used batteries in an environmentally sound manner. Find out about the legal regulations which apply in your area.
18
