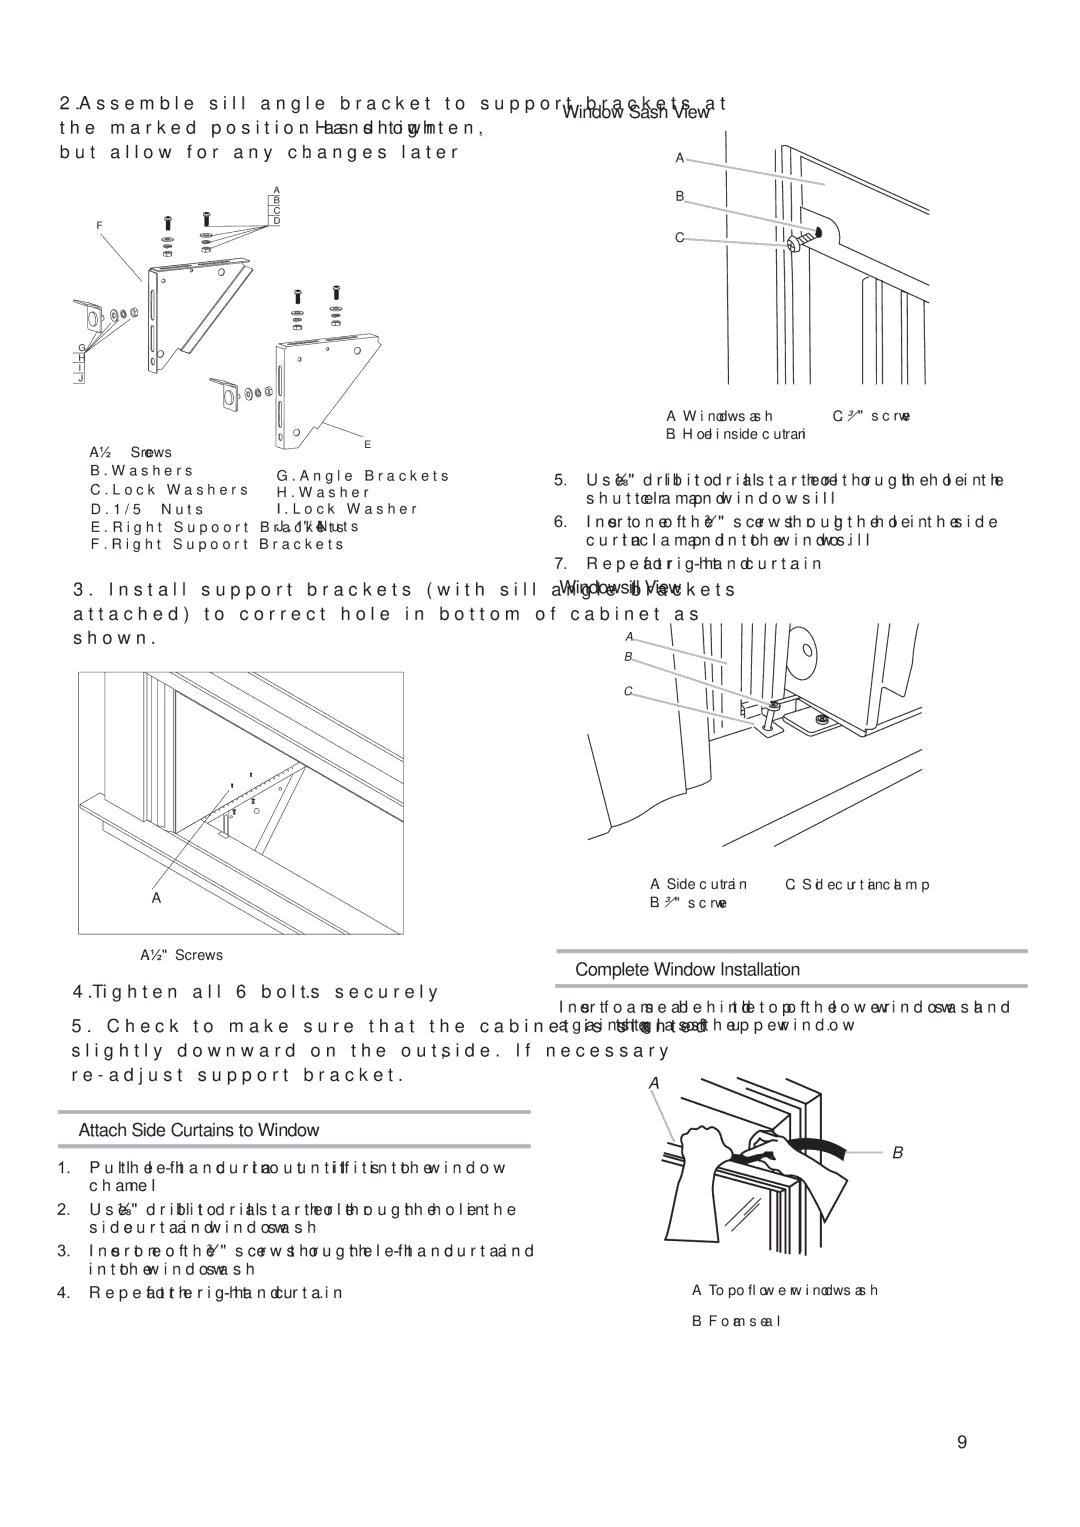
2.Assemble sill angle bracket to support brackets at the marked position as shown. Hand tighten,
but allow for any changes later.
Window Sash View
A
F
G
H
I
J
A
B
C
D
E
B
C ![]()
A. Window sash | C. ³⁄₄" screw |
B. Hole in side curtain
A.½” Screws
B.Washers | G.Angle Brackets |
|
C.Lock Washers | H.Washer |
D.1/5” Nuts | I.Lock Washer |
E.Right Supoort Brackets | J.1/4" Nuts |
F.Right Supoort Brackets |
|
3.Install support brackets (with sill angle brackets attached) to correct hole in bottom of cabinet as shown.
A |
A.½" Screws
4.Tighten all 6 bolts securely.
5.Check to make sure that the cabinet is slanted slightly downward on the outside. If necessary,
Attach Side Curtains to Window
1.Pull the
2.Use ¹⁄₈" drill bit to drill a starter hole through the hole in the side curtain and window sash.
3.Insert one of the ³⁄₄" screws through the
4.Repeat for the
5.Use ¹⁄₈" drill bit to drill a starter hole through the hole in the shutter clamp and windowsill.
6.Insert one of the ³⁄₄" screws through the hole in the side curtain clamp and into the windowsill.
7.Repeat for
Windowsill View
A
B
C
A. Side curtain | C. Side curtain clamp |
B. ³⁄₄" screw
Complete Window Installation
Insert foam seal behind the top of the lower window sash and against the glass of the upper window.
A
B
A. Top of lower window sash
B. Foam seal
9