Window Installation-Prepare the Cabinet
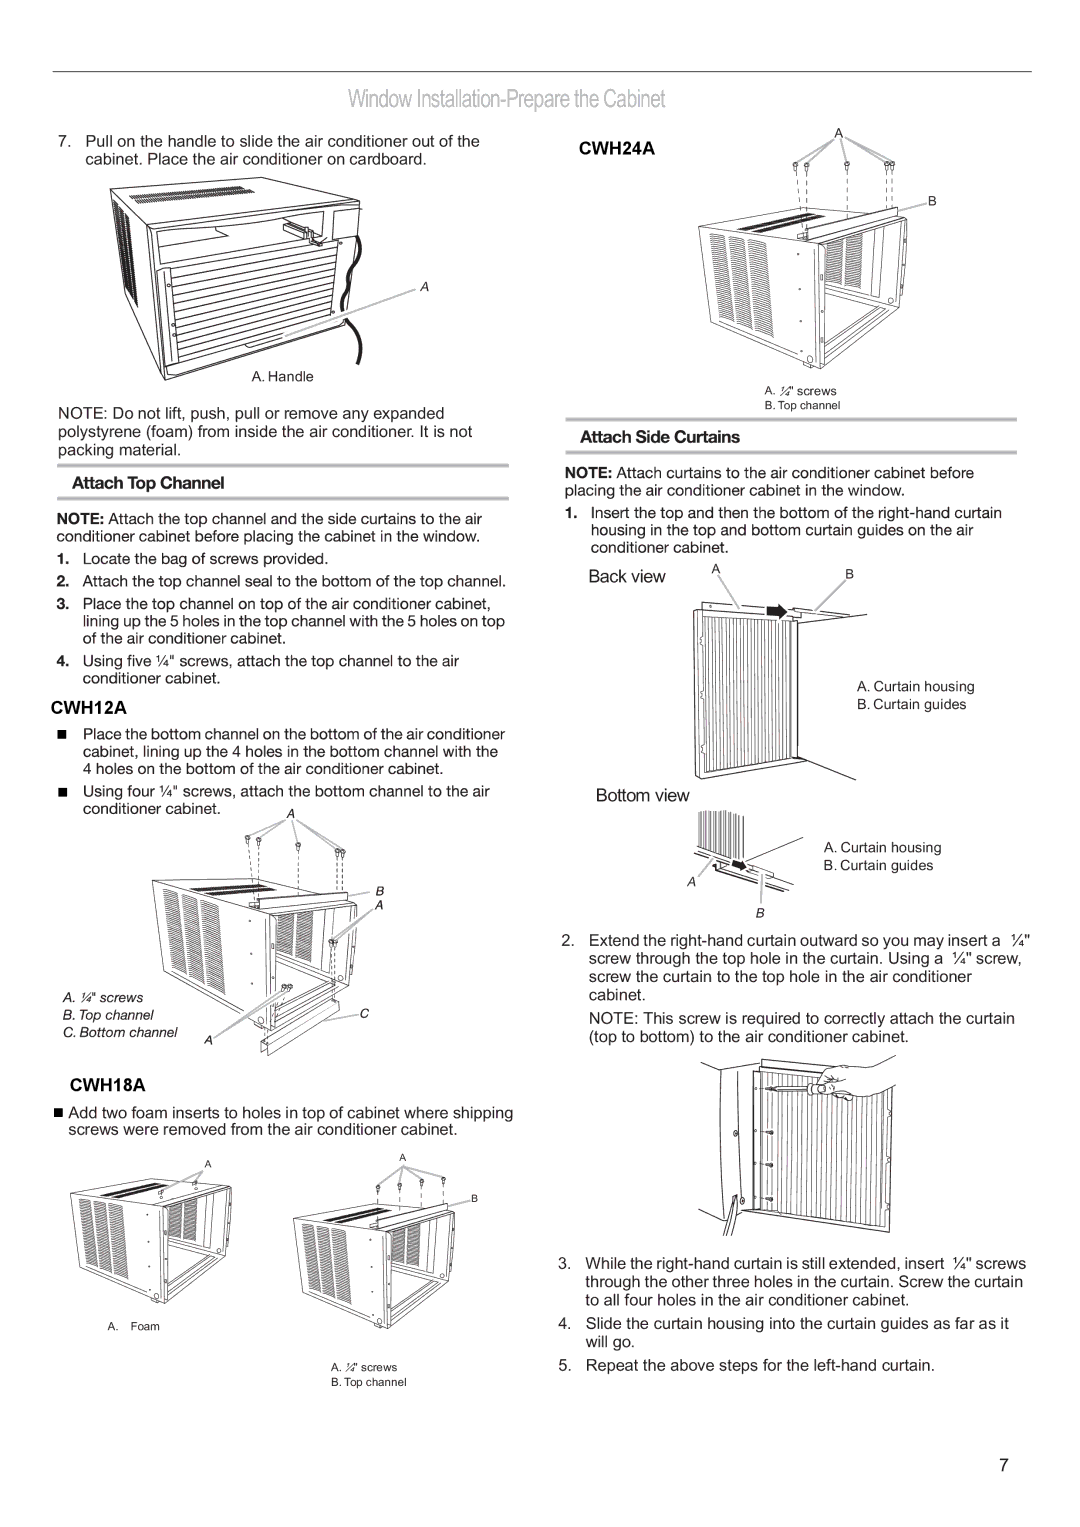
7. Pull on the handle to slide the air conditioner out of the | CWH24A | A |
| ||
cabinet. Place the air conditioner on cardboard. |
|
|
B
A
A. Handle
NOTE: Do not lift, push, pull or remove any expanded polystyrene (foam) from inside the air conditioner. It is not packing material.
A.¹⁄₄" screws
B.Top channel
Back view | A | B |
|
CWH12A
■
■
CWH18A
■Add two foam inserts to holes in top of cabinet where shipping screws were removed from the air conditioner cabinet.
A
A
B
A.Foam
A. ¹⁄₄" screws
B. Top channel
A. Curtain housing
B. Curtain guides
Bottom view
A. Curtain housing
B. Curtain guides
A
B
2.Extend the
NOTE: This screw is required to correctly attach the curtain (top to bottom) to the air conditioner cabinet.
3.While the
4.Slide the curtain housing into the curtain guides as far as it will go.
5.Repeat the above steps for the
7
