Set up
IMPORTANT: Before mounting any of the cameras, test the unit by hooking up all the connections as shown below, and testing all the features to insure the unit is working properly. There are two 6mm cameras for longer range, and two 3.6mm cameras for wider angle, shorter range, viewing. Test the cameras for the best location before installing. Each camera is labeled on the side of the unit.
1.Designate a work area that is clean and
2.Route the power cord and all cabling along a safe route without creating a tripping hazard or exposing the cord and cables to possible damage.
3.Use a surge protector (sold separately) to help guard against electrical power fluctuations.
Cable Connections
You will initially need to connect the DVR to a TV monitor in order to adjust the settings, regardless of your final intended set up.
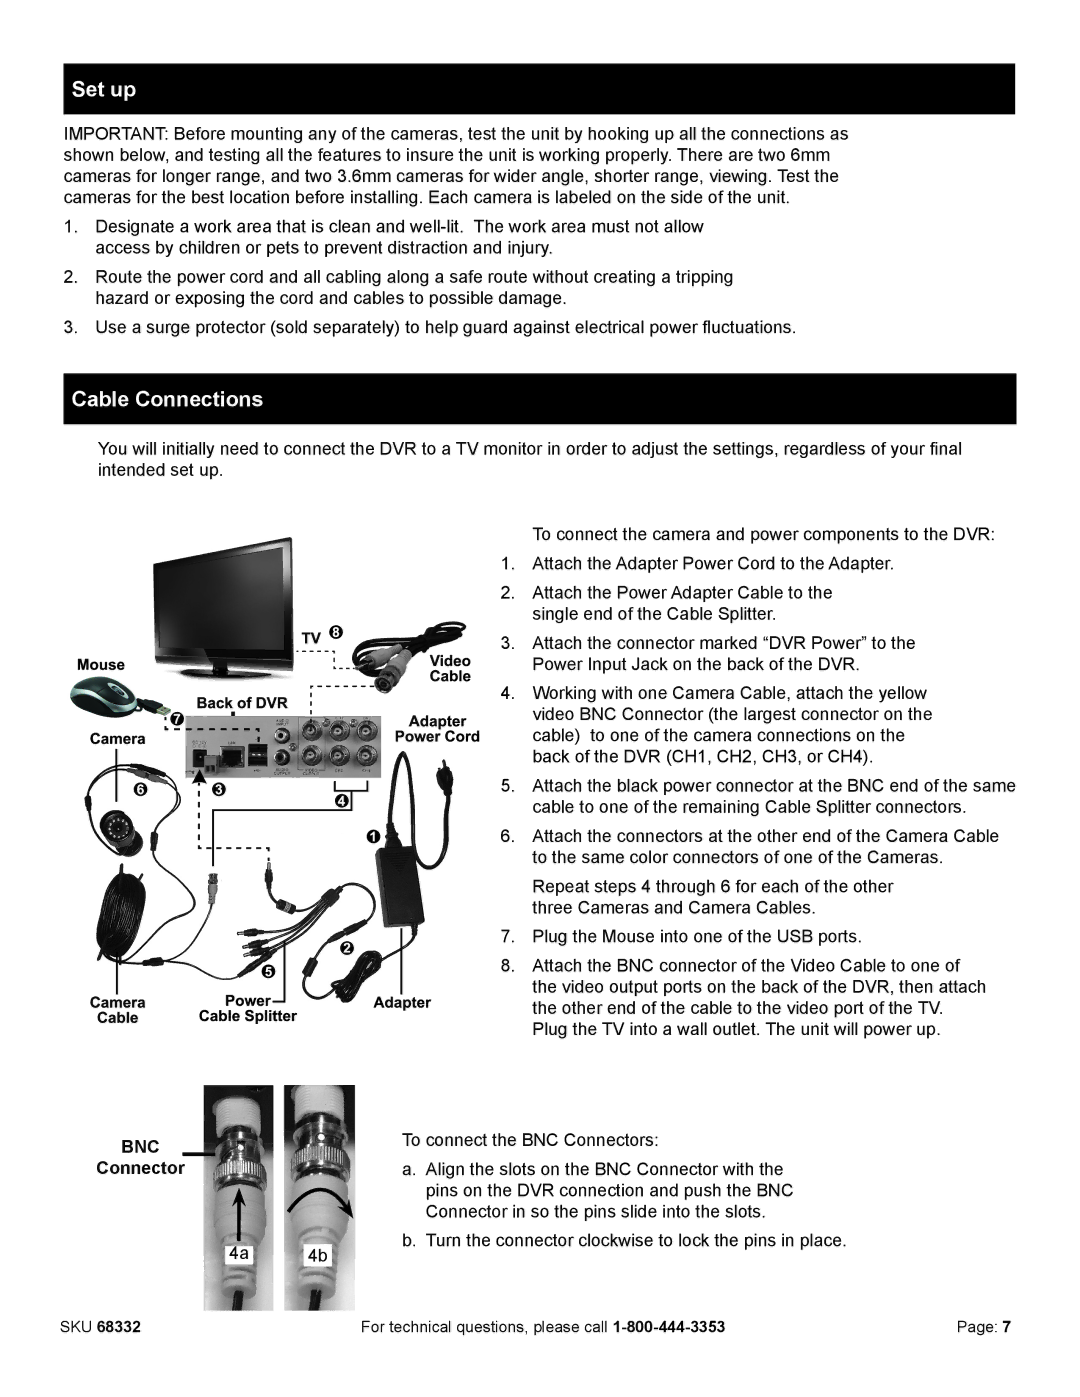
BNC
Connector
To connect the camera and power components to the DVR:
1.Attach the Adapter Power Cord to the Adapter.
2.Attach the Power Adapter Cable to the single end of the Cable Splitter.
3. Attach the connector marked “DVR Power” to the Power Input Jack on the back of the DVR.
4.Working with one Camera Cable, attach the yellow video BNC Connector (the largest connector on the
cable) to one of the camera connections on the back of the DVR (CH1, CH2, CH3, or CH4).
5. Attach the black power connector at the BNC end of the same cable to one of the remaining Cable Splitter connectors.
6. Attach the connectors at the other end of the Camera Cable to the same color connectors of one of the Cameras.
Repeat steps 4 through 6 for each of the other three Cameras and Camera Cables.
7.Plug the Mouse into one of the USB ports.
8.Attach the BNC connector of the Video Cable to one of the video output ports on the back of the DVR, then attach
the other end of the cable to the video port of the TV. Plug the TV into a wall outlet. The unit will power up.
To connect the BNC Connectors:
a.Align the slots on the BNC Connector with the pins on the DVR connection and push the BNC
Connector in so the pins slide into the slots.
4a | 4b | b. Turn the connector clockwise to lock the pins in place. |
|
SKU 68332 | For technical questions, please call | Page: 7 |