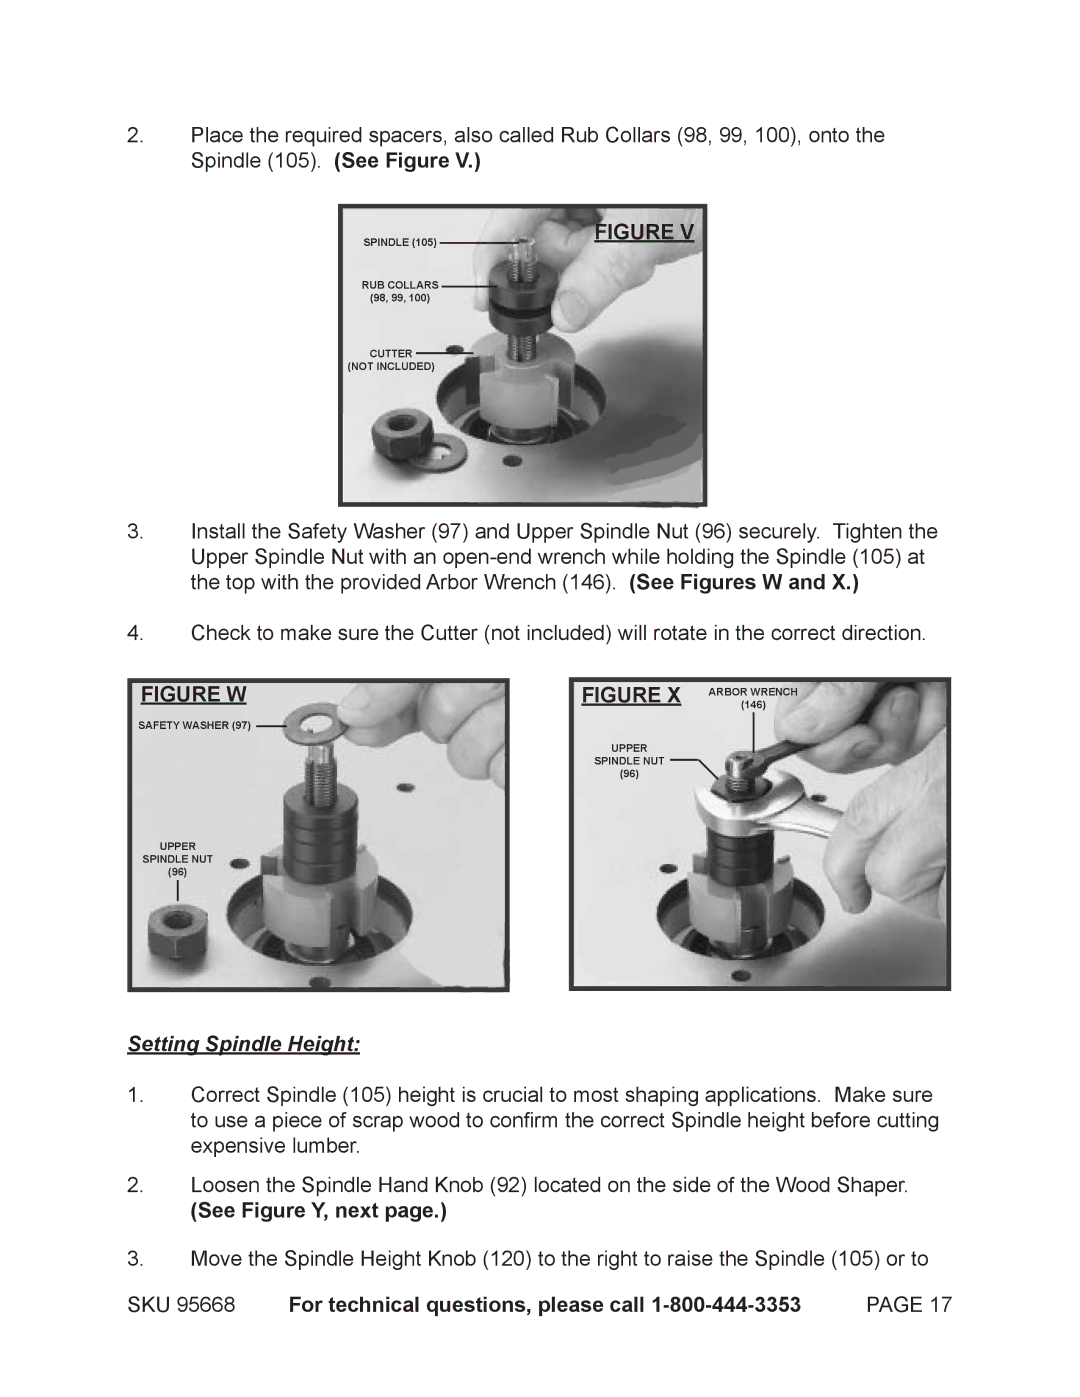
2.Place the required spacers, also called Rub Collars (98, 99, 100), onto the Spindle (105). (See Figure V.)
SPINDLE (105)
RUB COLLARS
(98, 99, 100)
CUTTER
(NOT INCLUDED)
FIGURE V
3.Install the Safety Washer (97) and Upper Spindle Nut (96) securely. Tighten the Upper Spindle Nut with an
4.Check to make sure the Cutter (not included) will rotate in the correct direction.
FIGURE W |
| FIGURE X | (146) | ||
|
|
|
| ARBOR WRENCH | |
SAFETY WASHER (97) |
| UPPER |
|
| |
|
|
| |||
|
|
| |||
|
|
|
| ||
|
| SPINDLE NUT |
|
|
|
|
|
|
|
| |
| (96) |
|
|
| |
UPPER |
|
|
|
|
|
SPINDLE NUT |
|
|
|
|
|
(96) |
|
|
|
|
|
Setting Spindle Height:
1.Correct Spindle (105) height is crucial to most shaping applications. Make sure to use a piece of scrap wood to confirm the correct Spindle height before cutting expensive lumber.
2.Loosen the Spindle Hand Knob (92) located on the side of the Wood Shaper.
(See Figure Y, next page.)
3.Move the Spindle Height Knob (120) to the right to raise the Spindle (105) or to
SKU 95668 | For technical questions, please call | PAGE 17 |
