UNPACKING
When unpacking, check to make sure all the parts shown on the Parts Lists on pages 27 and 28 are included. If any parts are missing or broken, please call Harbor Freight Tools at the number shown on the cover of this manual as soon as possible.
ASSEMBLY INSTRUCTIONS
1.CAUTION! Always make sure the Power Switch (5) of the Wood Shaper is in its “OFF” position and the unit is unplugged from its electrical outlet prior to performing any assembly procedures.
Stand Assembly:
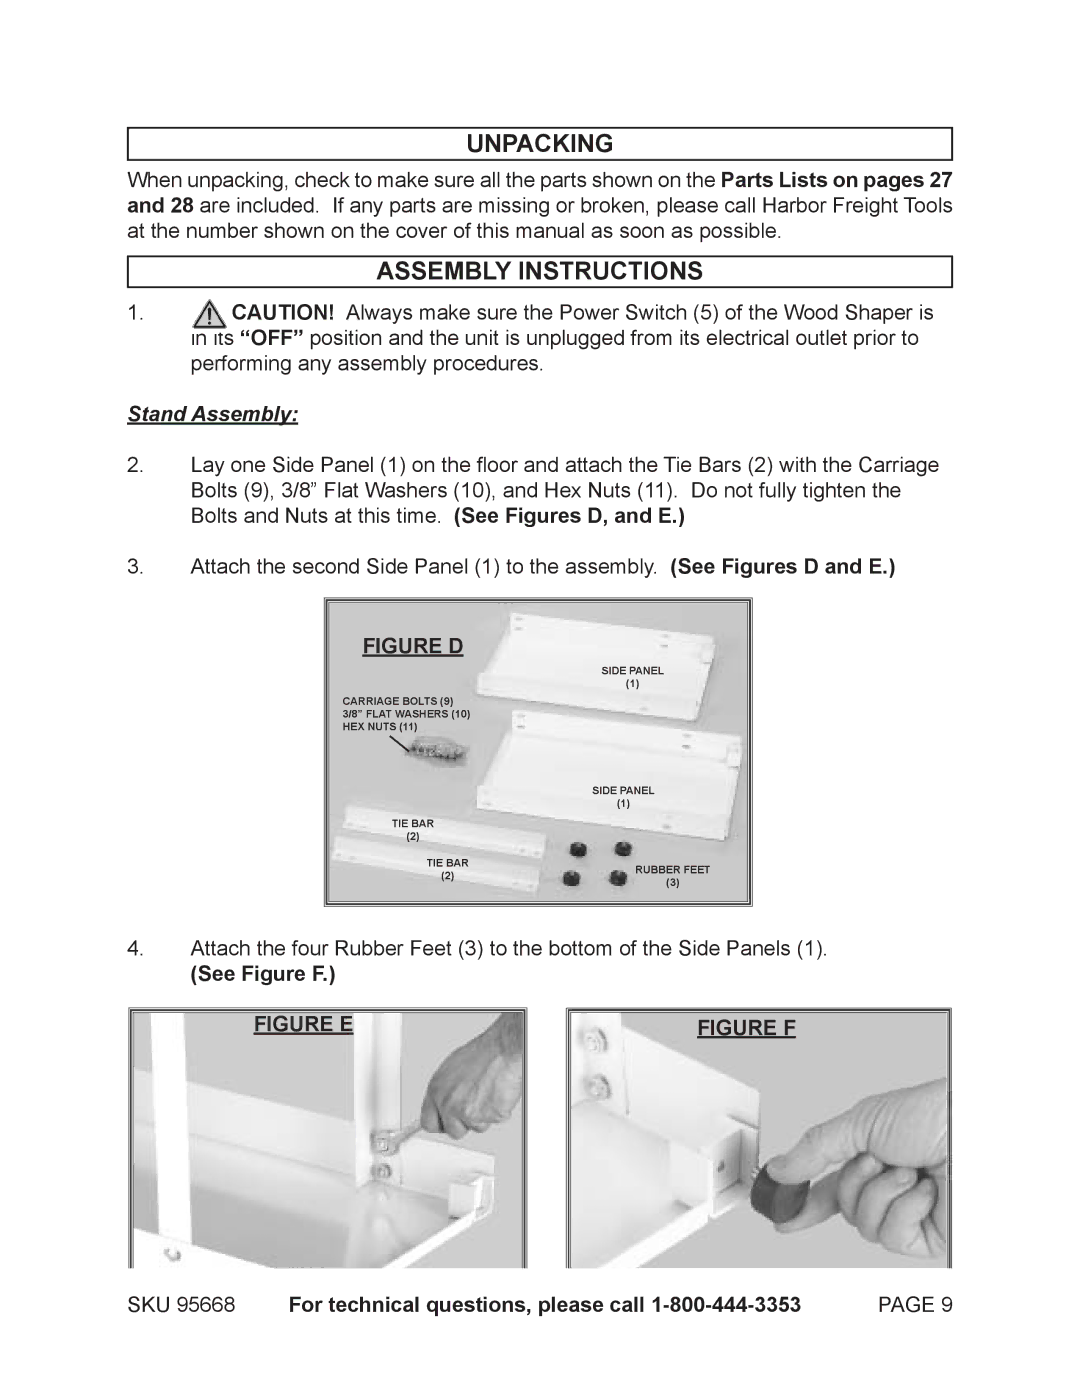
2.Lay one Side Panel (1) on the floor and attach the Tie Bars (2) with the Carriage Bolts (9), 3/8” Flat Washers (10), and Hex Nuts (11). Do not fully tighten the Bolts and Nuts at this time. (See Figures D, and E.)
3.Attach the second Side Panel (1) to the assembly. (See Figures D and E.)
FIGURE D
| SIDE PANEL | |
| (1) | |
CARRIAGE BOLTS (9) |
| |
3/8” FLAT WASHERS (10) |
| |
HEX NUTS (11) |
| |
| SIDE PANEL | |
| (1) | |
TIE BAR |
| |
(2) |
| |
TIE BAR | RUBBER FEET | |
(2) | ||
(3) | ||
|
4.Attach the four Rubber Feet (3) to the bottom of the Side Panels (1).
(See Figure F.)
FIGURE E | FIGURE F |
SKU 95668 | For technical questions, please call | PAGE 9 |
