FRONT-PANEL CONTROLS
B | C | D | � |
260
AVR | Info | Resolution |
| Audio Effects | Video Modes | Surround Modes |
| Back/Exit | M | N | OK | L | K | Source List | |
|
|
|
|
|
|
|
|
|
|
|
|
|
|
|
|
|
|
|
|
|
|
|
|
|
|
|
|
|
|
|
|
Composite Analog
2 1 6 7 8 9 A E F 4 5 | J |
3 G H I
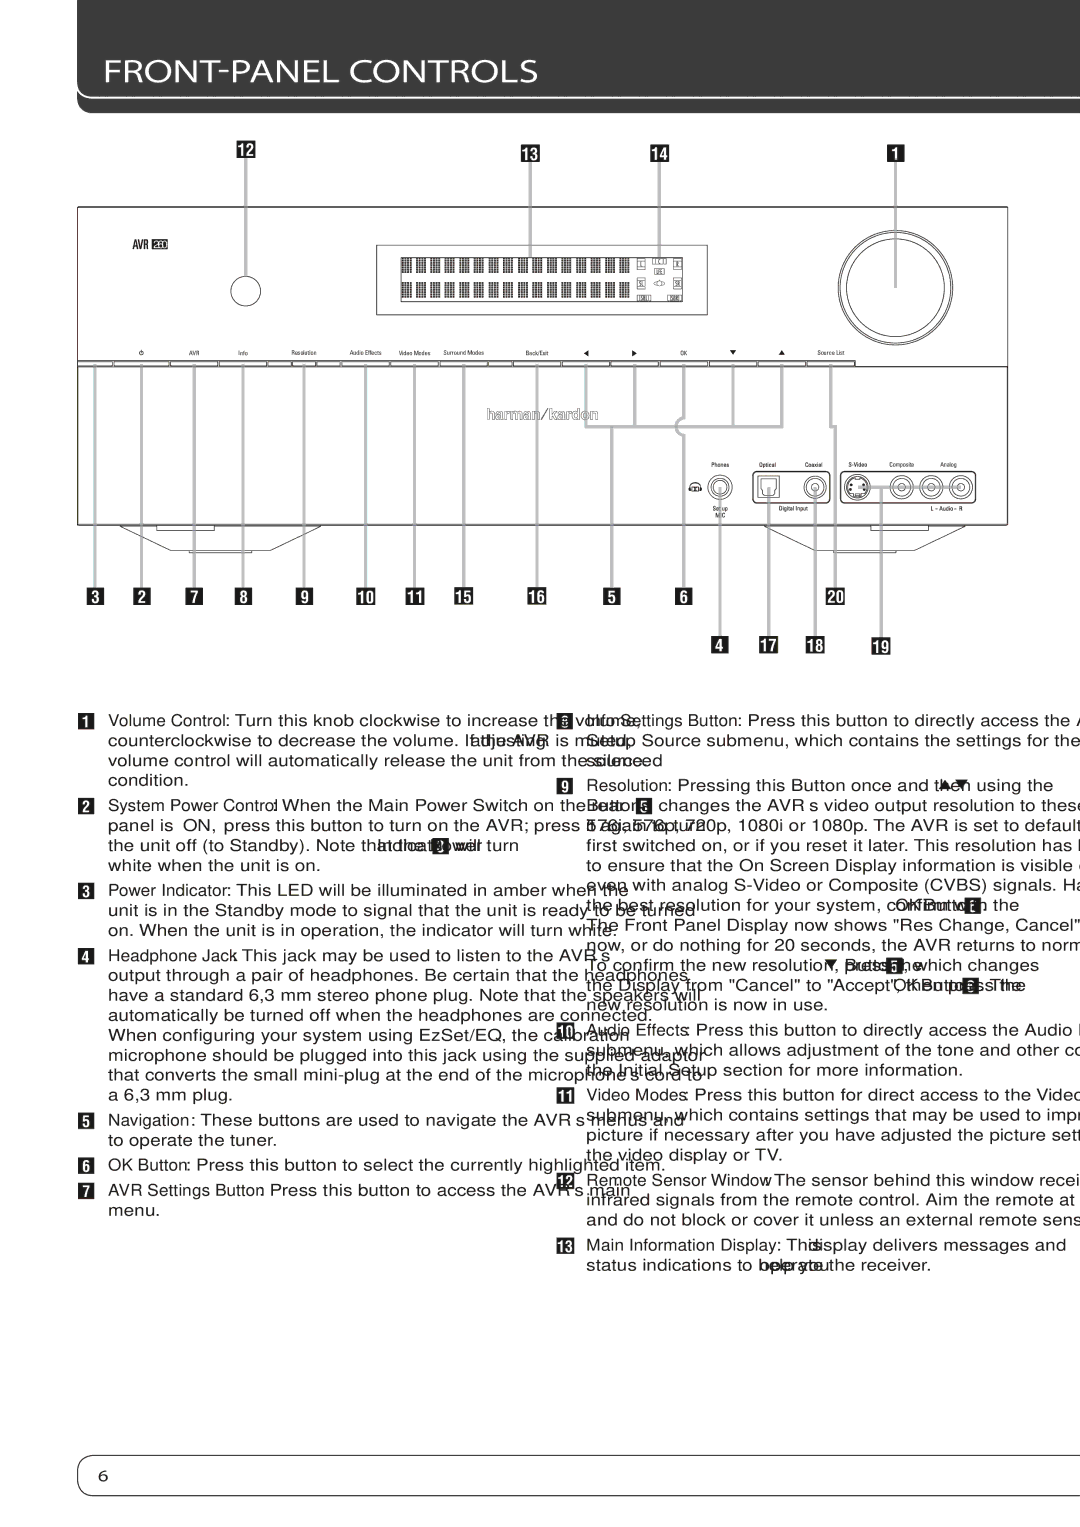
0Volume Control: Turn this knob clockwise to increase the volume, counterclockwise to decrease the volume. If the AVR is muted, adjusting volume control will automatically release the unit from the silenced condition.
1System Power Control: When the Main Power Switch on the rear panel is “ON,” press this button to turn on the AVR; press it again to turn the unit off (to Standby). Note that the Power Indicator 2will turn white when the unit is on.
2Power Indicator: This LED will be illuminated in amber when the unit is in the Standby mode to signal that the unit is ready to be turned on. When the unit is in operation, the indicator will turn white.
3Headphone Jack: This jack may be used to listen to the AVR’s output through a pair of headphones. Be certain that the headphones have a standard 6,3 mm stereo phone plug. Note that the speakers will automatically be turned off when the headphones are connected. When configuring your system using EzSet/EQ, the calibration microphone should be plugged into this jack using the supplied adaptor that converts the small
4Navigation: These buttons are used to navigate the AVR’s menus and to operate the tuner.
5OK Button: Press this button to select the currently highlighted item.
6AVR Settings Button: Press this button to access the AVR’s main menu.
7Info Settings Button: Press this button to directly access the AVR’s Setup Source submenu, which contains the settings for the current source.
8Resolution: Pressing this Button once and then using the KL Buttons 4changes the AVR’s video output resolution to these settings: 576i, 576p, 720p, 1080i or 1080p. The AVR is set to default to 576i when first switched on, or if you reset it later. This resolution has been chosen to ensure that the On Screen Display information is visible on your TV even with analog
9Audio Effects: Press this button to directly access the Audio Effects submenu, which allows adjustment of the tone and other controls. See the Initial Setup section for more information.
AVideo Modes: Press this button for direct access to the Video Modes submenu, which contains settings that may be used to improve the picture if necessary after you have adjusted the picture settings using the video display or TV.
BRemote Sensor Window: The sensor behind this window receives infrared signals from the remote control. Aim the remote at this area and do not block or cover it unless an external remote sensor is installed.
CMain Information Display: This display delivers messages and
status indications to help you operate the receiver.
6