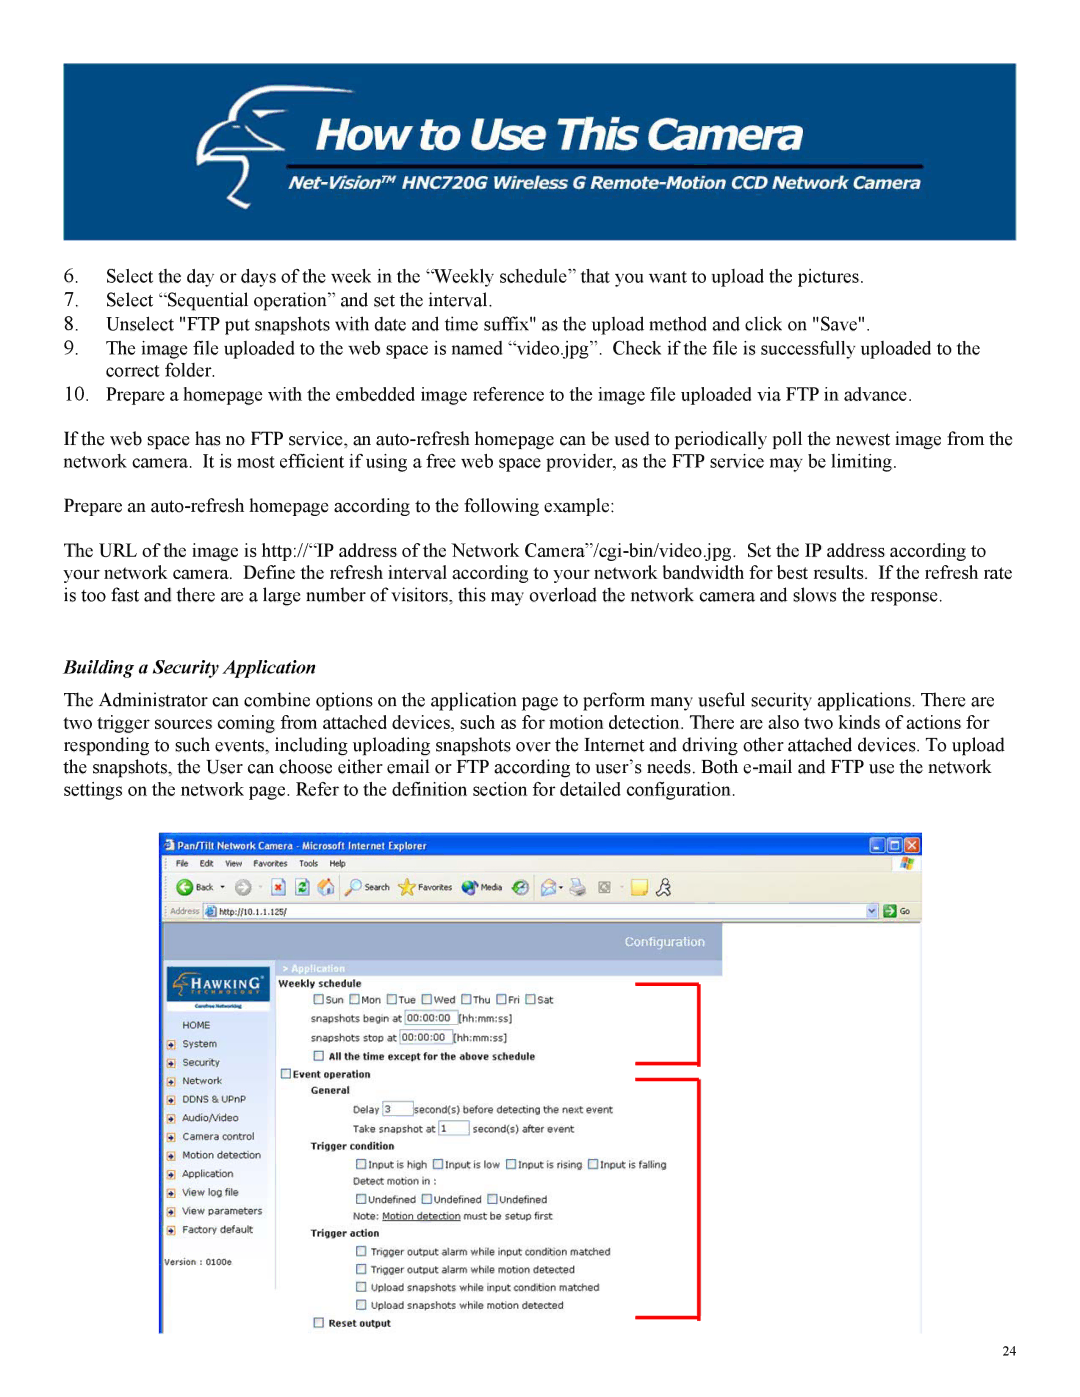
6.Select the day or days of the week in the “Weekly schedule” that you want to upload the pictures.
7.Select “Sequential operation” and set the interval.
8.Unselect "FTP put snapshots with date and time suffix" as the upload method and click on "Save".
9.The image file uploaded to the web space is named “video.jpg”. Check if the file is successfully uploaded to the correct folder.
10.Prepare a homepage with the embedded image reference to the image file uploaded via FTP in advance.
If the web space has no FTP service, an
Prepare an
The URL of the image is http://“IP address of the Network
Building a Security Application
The Administrator can combine options on the application page to perform many useful security applications. There are two trigger sources coming from attached devices, such as for motion detection. There are also two kinds of actions for responding to such events, including uploading snapshots over the Internet and driving other attached devices. To upload the snapshots, the User can choose either email or FTP according to user’s needs. Both
24