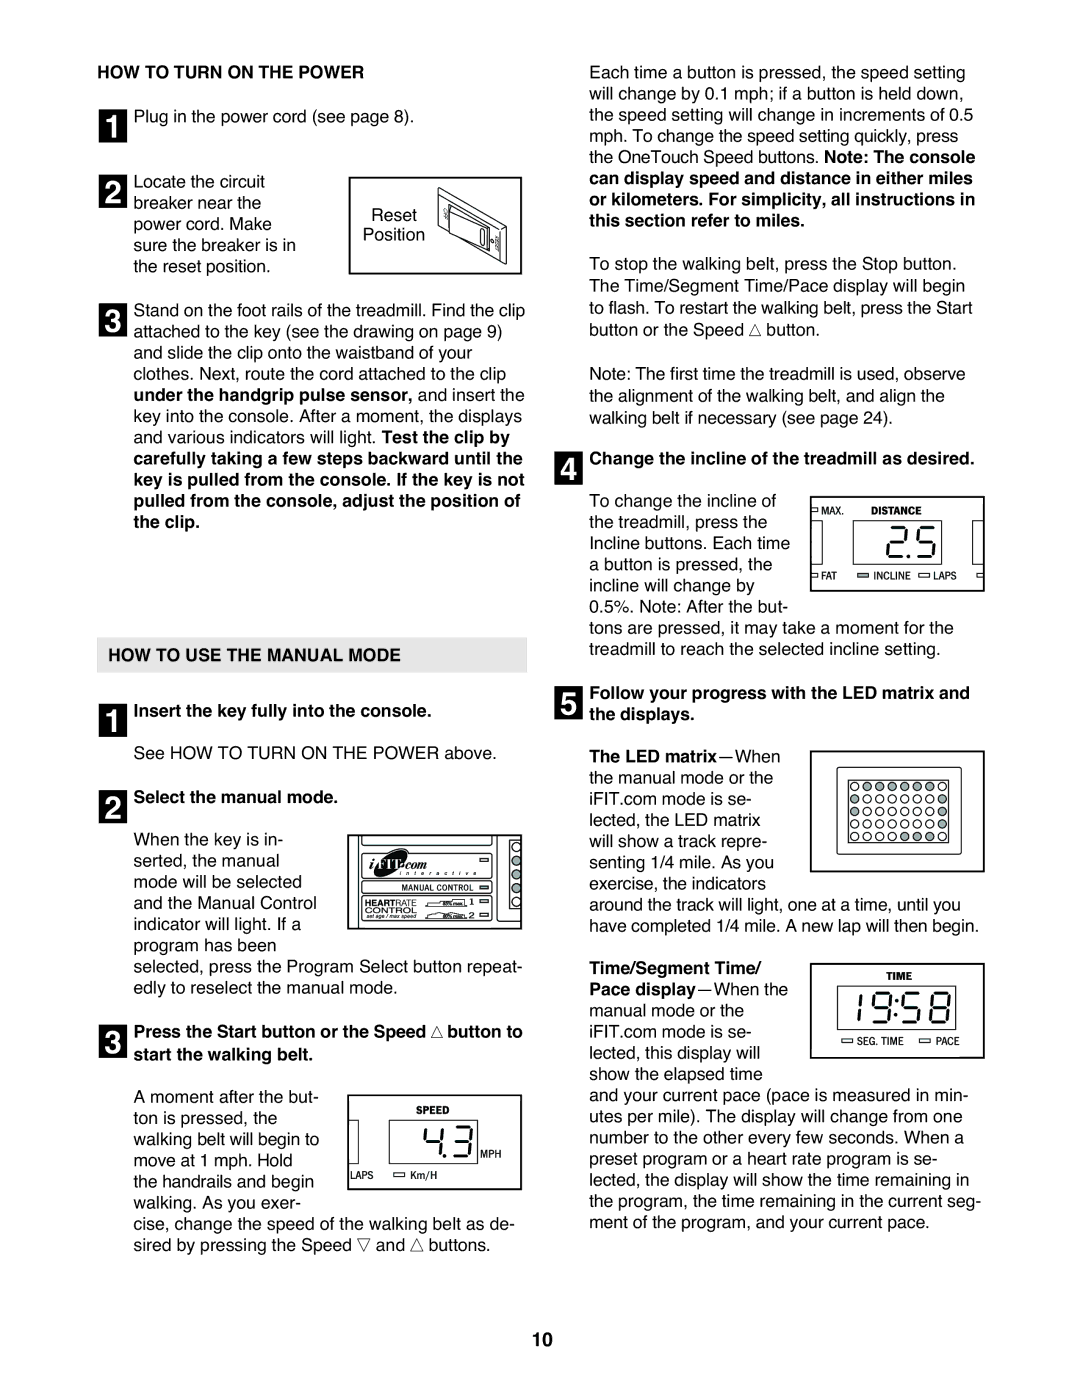
HOW TO TURN ON THE POWER

1Plug in the power cord (see page 8).

2

Locate the circuit


breaker near the


Reset


power cord. Make


Position


sure the breaker is in


the reset position.


Stand on the foot rails of the treadmill. Find the clip

3 attached to the key (see the drawing on page 9)

and slide the clip onto the waistband of your clothes. Next, route the cord attached to the clip under the handgrip pulse sensor, and insert the key into the console. After a moment, the displays and various indicators will light. Test the clip by carefully taking a few steps backward until the key is pulled from the console. If the key is not pulled from the console, adjust the position of the clip.

HOW TO USE THE MANUAL MODE

1Insert the key fully into the console.

See HOW TO TURN ON THE POWER above.

2Select the manual mode.

When the key is in- serted, the manual mode will be selected and the Manual Control indicator will light. If a program has been

selected, press the Program Select button repeat- edly to reselect the manual mode.

3 Press the Start button or the Speed button to start the walking belt.

A moment after the but- ton is pressed, the

walking belt will begin to move at 1 mph. Hold the handrails and begin walking. As you exer-

cise, change the speed of the walking belt as de- sired by pressing the Speed and buttons.

Each time a button is pressed, the speed setting will change by 0.1 mph; if a button is held down, the speed setting will change in increments of 0.5 mph. To change the speed setting quickly, press the OneTouch Speed buttons. Note: The console can display speed and distance in either miles or kilometers. For simplicity, all instructions in this section refer to miles.

To stop the walking belt, press the Stop button. The Time/Segment Time/Pace display will begin to flash. To restart the walking belt, press the Start button or the Speed button.

Note: The first time the treadmill is used, observe the alignment of the walking belt, and align the walking belt if necessary (see page 24).

4Change the incline of the treadmill as desired.

To change the incline of the treadmill, press the Incline buttons. Each time a button is pressed, the

incline will change by 0.5%. Note: After the but-

tons are pressed, it may take a moment for the treadmill to reach the selected incline setting.

5 Follow your progress with the LED matrix and the displays.

The LED matrix—When the manual mode or the

iFIT.com mode is se- lected, the LED matrix will show a track repre- senting 1/4 mile. As you

exercise, the indicators

around the track will light, one at a time, until you have completed 1/4 mile. A new lap will then begin.

Time/Segment Time/

Pace display—When the manual mode or the iFIT.com mode is se-

lected, this display will show the elapsed time

and your current pace (pace is measured in min- utes per mile). The display will change from one number to the other every few seconds. When a preset program or a heart rate program is se- lected, the display will show the time remaining in the program, the time remaining in the current seg- ment of the program, and your current pace.

10

Page 10
Image 10
Healthrider HRT12920 manual HOW to Turn on the Power, HOW to USE the Manual Mode

HRT12920 specifications

The Healthrider HRT12920 is a versatile piece of fitness equipment designed to provide an effective full-body workout while ensuring comfort and user-friendliness. This model stands out in the market due to its blend of advanced technology, ergonomic design, and innovative features.

One of the notable main features of the HRT12920 is its adjustable incline settings. Users can change the incline to target different muscle groups, enhancing workout variety and promoting better overall fitness. The machine allows for a more engaging workout experience, as users can switch between flat and inclined positions seamlessly.

The HRT12920 is equipped with a robust resistance system that caters to individuals of varying fitness levels. This system enables users to gradually increase resistance, allowing for a progressive training approach that supports muscle strength and endurance development. Whether you are a beginner or an experienced athlete, this machine adapts to your needs.

In terms of technology, the Healthrider HRT12920 features an intuitive LCD display that provides real-time workout feedback. Users can track essential metrics such as time, distance, speed, and calories burned, fostering a sense of achievement and encouraging adherence to fitness goals. This feedback is crucial for individuals striving to monitor their progress and make informed adjustments to their routines.

The HRT12920 also incorporates a variety of built-in workout programs designed to keep users motivated. These programs are tailored to target specific fitness goals, such as weight loss, endurance building, or muscle toning. The diversity of these workouts helps prevent monotony and encourages consistent use.

Comfort is a priority for Healthrider, and the HRT12920 reflects this philosophy. The machine features a padded seat and handlebars, designed to provide support during workouts and reduce strain on the body. Additionally, the compact design makes it suitable for home use, fitting seamlessly into various living spaces without compromising functionality.

Overall, the Healthrider HRT12920 is an excellent choice for anyone looking to integrate a powerful workout tool into their fitness routine. With its adjustable incline, robust resistance, user-friendly technology, and comfort-focused design, this model offers an effective solution for achieving a healthier lifestyle.