ASSEMBLY |
|
|
|
|
| |
• To hire a service technician to assemble this | • | To identify small parts, see page 6. | ||||
product in your home, call | • Assembly requires the following tools: | |||||
• Assembly requires two persons. | ||||||
| the included hex keys |
|
| |||
• Place all parts in a cleared area and remove the |
|
|
| |||
packing materials. Do not dispose of the pack- |
| one adjustable wrench |
|
| ||
ing materials until you finish assembly. |
| one Phillips screwdriver |
| |||
• The underside of the walking belt is coated with |
|
| ||||
| scissors |
|
|
| ||
may be some lubricant on top of the walking belt |
| needlenose pliers |
|
| ||
or on the shipping carton. This is normal. If there |
|
|
| |||
is lubricant on top of the walking belt, wipe it |
| To avoid damaging parts, do not use power | ||||
off with a soft cloth and a mild, |
| |||||
cleaner. |
| tools for assembly. |
|
| ||
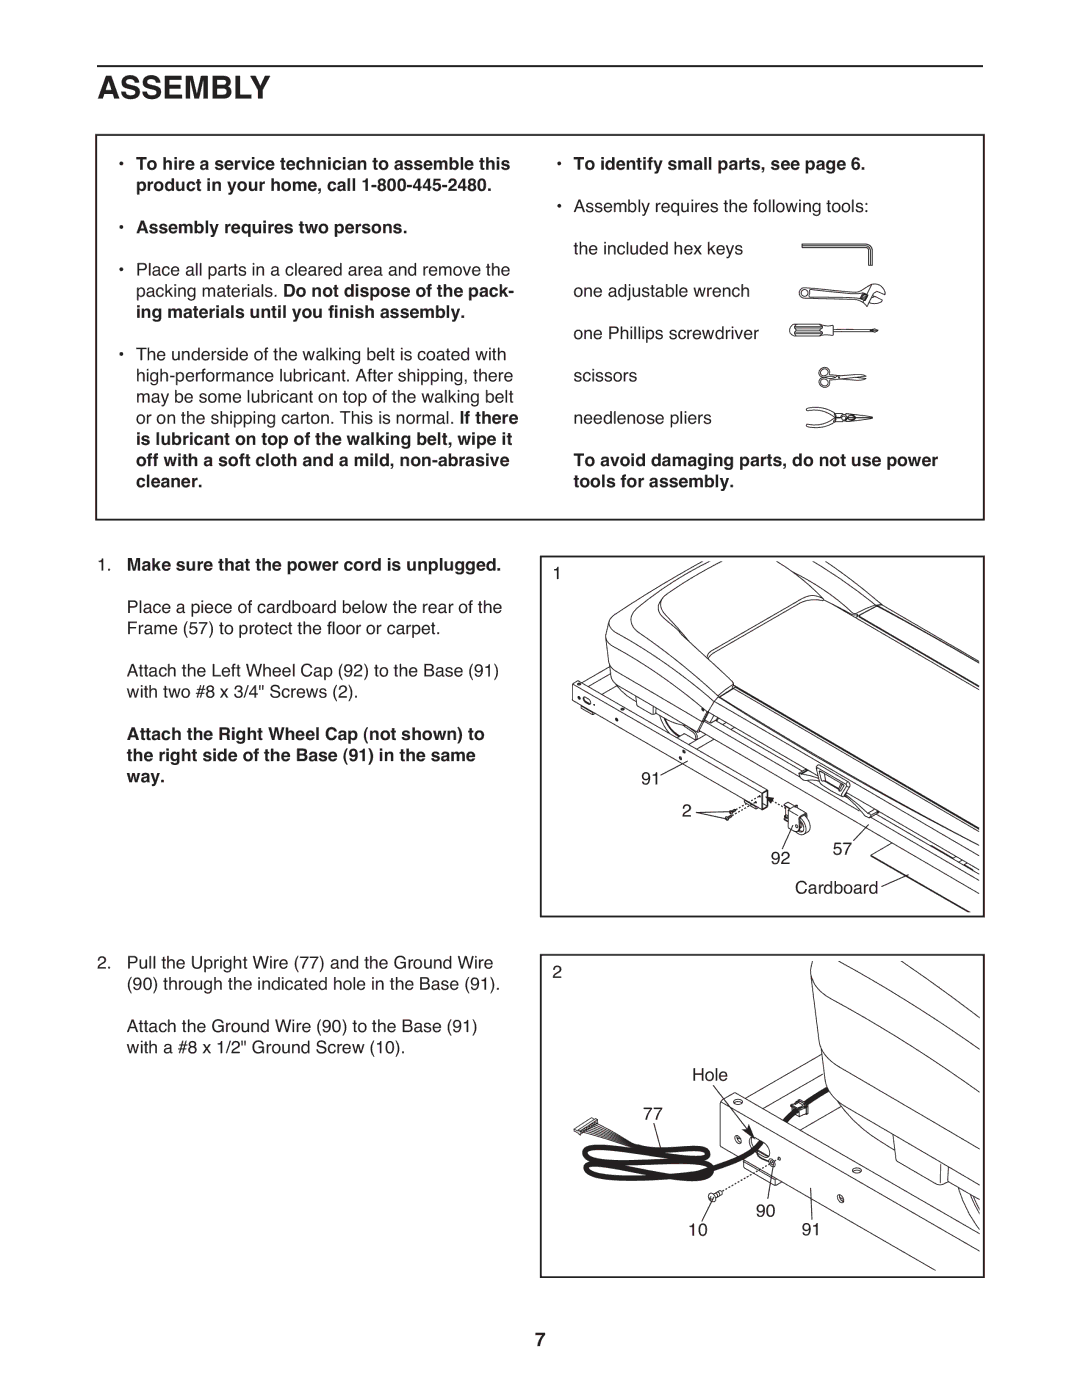
Make sure that the power cord is unplugged. | 1 |
|
|
|
| |
Place a piece of cardboard below the rear of the |
|
|
|
|
| |
Frame (57) to protect the floor or carpet. |
|
|
|
|
| |
Attach the Left Wheel Cap (92) to the Base (91) |
|
|
|
|
| |
with two #8 x 3/4" Screws (2). |
|
|
|
|
| |
Attach the Right Wheel Cap (not shown) to |
|
|
|
|
| |
the right side of the Base (91) in the same |
| 91 |
|
|
| |
way. |
| 2 |
|
| ||
|
|
|
| 57 | ||
|
|
|
|
| ||
|
|
|
| 92 Cardboard | ||
2. Pull the Upright Wire (77) and the Ground Wire | 2 |
|
|
|
| |
(90) through the indicated hole in the Base (91). |
|
|
|
| ||
Attach the Ground Wire (90) to the Base (91) |
|
|
|
|
| |
with a #8 x 1/2" Ground Screw (10). |
|
| Hole |
|
| |
|
| 77 |
|
| ||
|
|
|
|
| ||
|
|
| 10 | 90 | 91 | |
|
|
|
| |||
| 7 |
|
|
|
| |