North Star
EPA Certified Fireplace
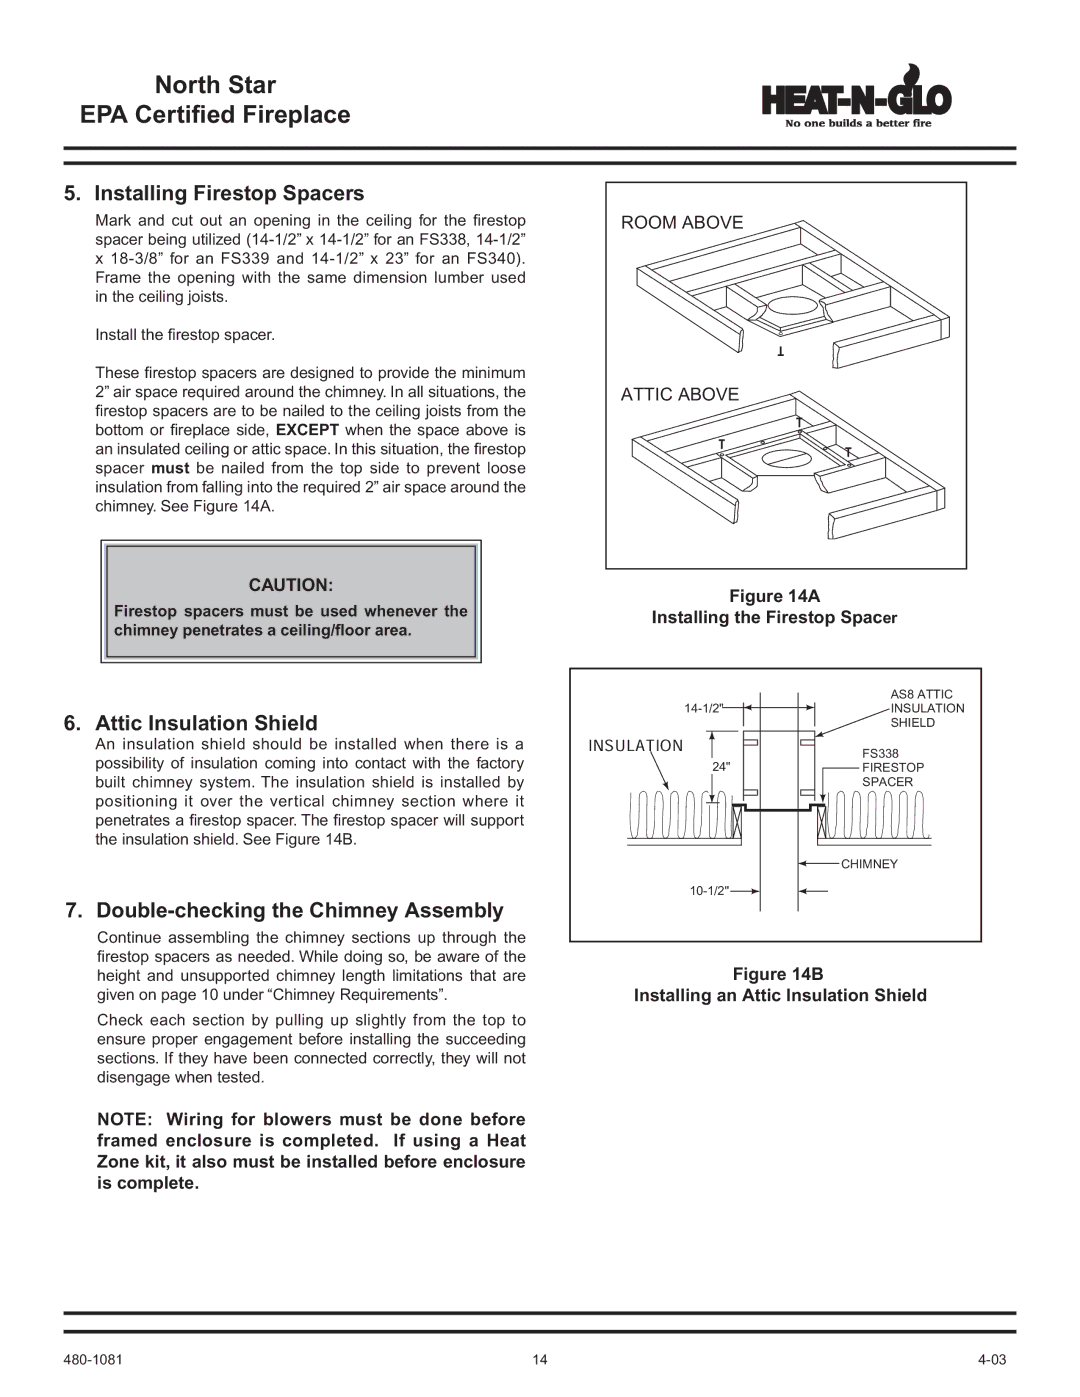
5. Installing Firestop Spacers
Mark and cut out an opening in the ceiling for the firestop spacer being utilized
x
Install the firestop spacer.
These firestop spacers are designed to provide the minimum 2” air space required around the chimney. In all situations, the firestop spacers are to be nailed to the ceiling joists from the bottom or fireplace side, EXCEPT when the space above is an insulated ceiling or attic space. In this situation, the firestop spacer must be nailed from the top side to prevent loose insulation from falling into the required 2” air space around the chimney. See Figure 14A.
CAUTION:
Firestop spacers must be used whenever the chimney penetrates a ceiling/floor area.
6. Attic Insulation Shield
An insulation shield should be installed when there is a possibility of insulation coming into contact with the factory built chimney system. The insulation shield is installed by positioning it over the vertical chimney section where it penetrates a firestop spacer. The firestop spacer will support the insulation shield. See Figure 14B.
7. Double-checking the Chimney Assembly
Continue assembling the chimney sections up through the firestop spacers as needed. While doing so, be aware of the height and unsupported chimney length limitations that are given on page 10 under “Chimney Requirements”.
Check each section by pulling up slightly from the top to ensure proper engagement before installing the succeeding sections. If they have been connected correctly, they will not disengage when tested.
NOTE: Wiring for blowers must be done before framed enclosure is completed. If using a Heat Zone kit, it also must be installed before enclosure is complete.
ROOM ABOVE |
ATTIC ABOVE |
Figure 14A
Installing the Firestop Spacer
AS8 ATTIC
![]()
![]() INSULATION SHIELD
INSULATION SHIELD
INSULATION
FS338
24"FIRESTOP SPACER
![]() CHIMNEY
CHIMNEY
Figure 14B
Installing an Attic Insulation Shield
14 |