C. Connecting Vent Pipe
Reference instructions in the termination kit.
•Install the
•Secure the exhaust flexible vent pipe to the 3 foot section stainless steel flexible vent pipe using the factory- installed
•Secure the stainless flexible vent pipe to the exhaust starting collar on top of the appliance with three screws and seal with stove cement rated for continuous exposure to 1200ºF or higher.
•Use 3 screws to attach the section of inlet air vent to the inlet collar on the collar slide plate and seal with stove cement rated for continuous exposure to 1200ºF or higher. See Figure 8.1. NOTE: The collar slide plate may be removed from appliance to aid installation.
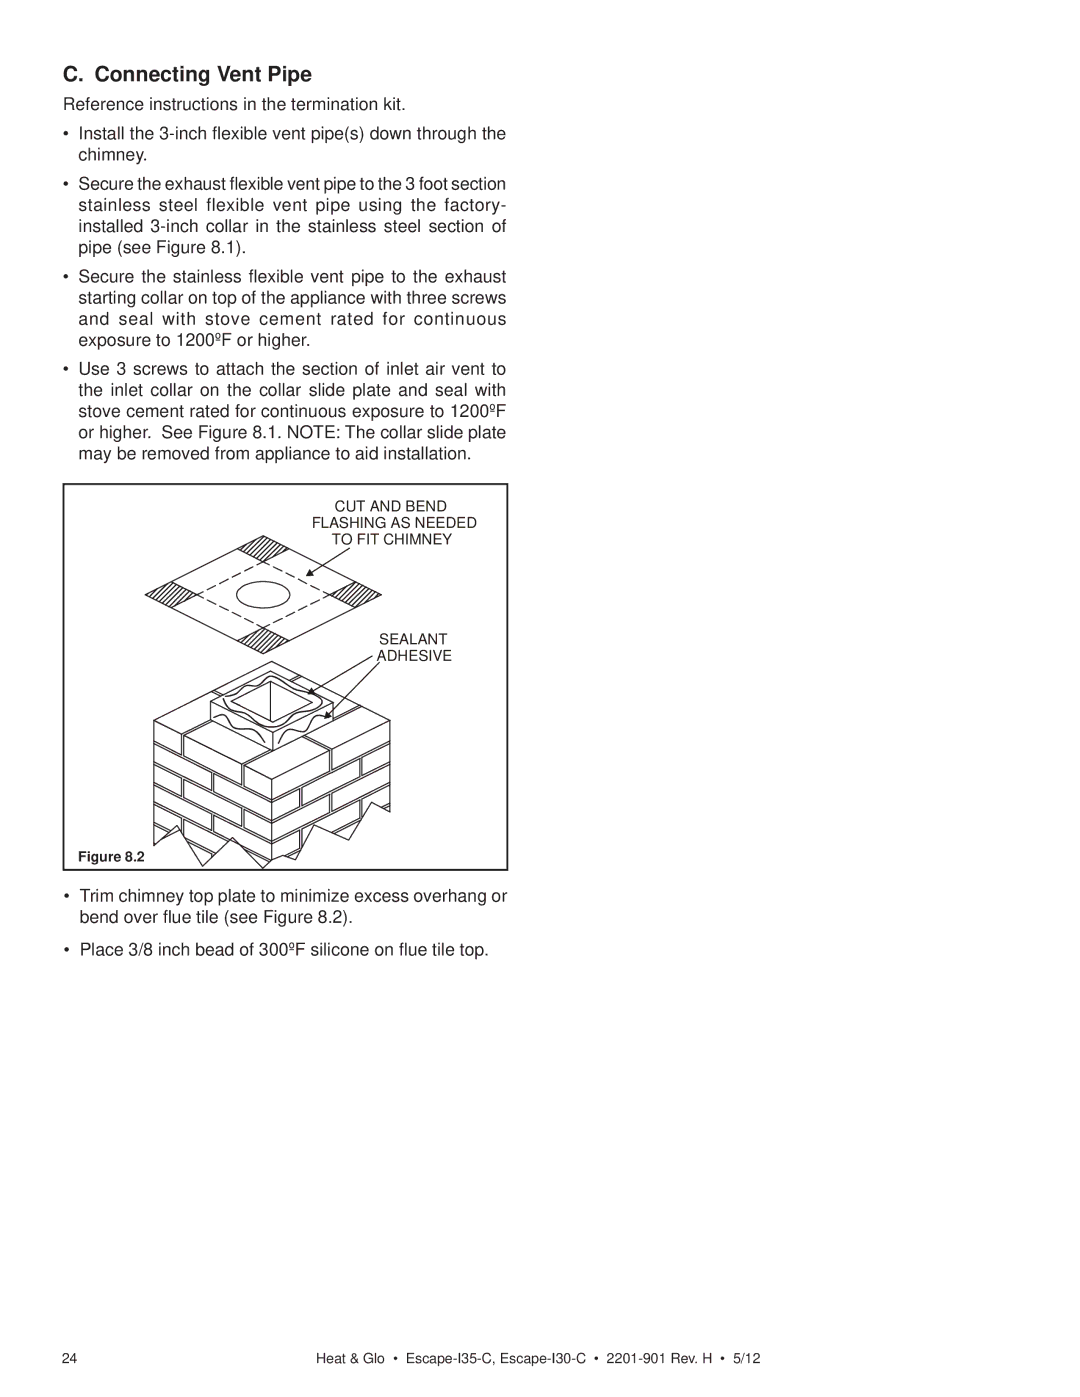
CUT AND BEND
FLASHING AS NEEDED
TO FIT CHIMNEY
SEALANT
ADHESIVE
Figure 8.2
•Trim chimney top plate to minimize excess overhang or bend over flue tile (see Figure 8.2).
•Place 3/8 inch bead of 300ºF silicone on flue tile top.
24 | Heat & Glo • |