9 Electrical Information
A. Wiring the Appliance | Appliance Requirements |
Note: Electrical wiring must be installed by a licensed electrician.
Note: This appliance must be electrically wired and grounded in accordance with local codes or, in the absence of local codes, with National Electric Code ANSI/NFPA
•A
•This appliance DOES NOT require
•It is recommended that a 110 VAC junction box be connected for use with fan or remote control. (See Figure 9.2 for junction box wiring).
![]() WARNING
WARNING
Wire 110V to electrical junction box.
Do NOT wire 110V to valve.
Do NOT wire 110V to wall switch.
•Incorrect wiring will damage millivolt valves.
•Incorrect wiring will override IPI safety lockout and may cause explosion.
CAUTION
•Prevent accidental appliance operation when not attended.
•Unplug or remove batteries from remote control if absent or if appliance will not be used for an extended period of time.
•Property damage possible from elevated temperatures.
ON/OFF Switch
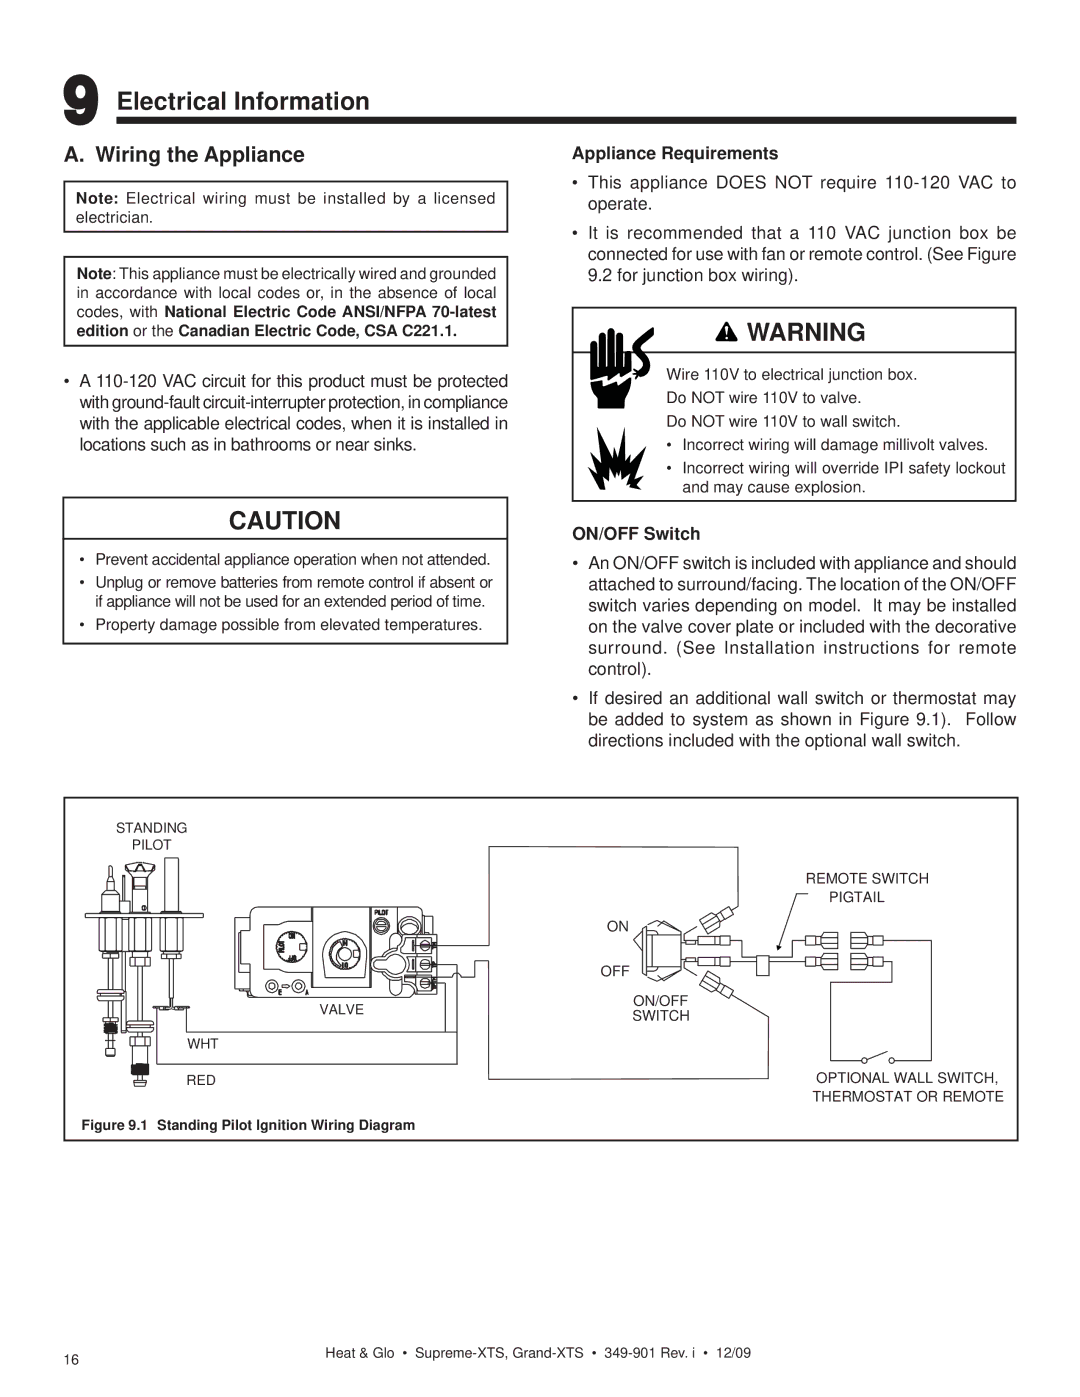
•An ON/OFF switch is included with appliance and should attached to surround/facing. The location of the ON/OFF switch varies depending on model. It may be installed on the valve cover plate or included with the decorative surround. (See Installation instructions for remote control).
•If desired an additional wall switch or thermostat may be added to system as shown in Figure 9.1). Follow directions included with the optional wall switch.
STANDING |
| |
PILOT |
| |
|
| REMOTE SWITCH |
|
| PIGTAIL |
|
| ON |
|
| OFF |
| VALVE | ON/OFF |
| SWITCH | |
|
| |
| WHT |
|
| RED | OPTIONAL WALL SWITCH, |
|
| THERMOSTAT OR REMOTE |
Figure 9.1 | Standing Pilot Ignition Wiring Diagram |
|
16 | Heat & Glo • |
|
