
VRT-BZ-P-AUB, VRT-GY-N-AUB, VRT-BZ-N-AUB, VRT-GY-P-AUB specifications
Heat & Glo is renowned for its innovative fireplace solutions, and the LifeStyle series, including models VRT-BZ-N-AUB, VRT-GY-N-AUB, VRT-BZ-P-AUB, and VRT-GY-P-AUB, exemplifies the brand's commitment to quality and style. These contemporary fireplaces blend modern aesthetics with advanced technology, making them an ideal addition to any living space.One of the standout features of these models is their versatile design that allows for seamless integration into any room. The LifeStyle series boasts multiple finish options, including a sleek bronze and an elegant gray, giving homeowners the flexibility to match their fireplace with their interior decor. The linear design not only promotes a minimalist look but also enhances the ambiance of any environment, serving as a captivating focal point.
In terms of technology, these fireplaces are equipped with advanced control systems, allowing users to adjust flame height, heat output, and ambiance with minimal effort. The intuitive controls can often be managed via a remote or smartphone app, providing convenience and flexibility for the modern homeowner.
Safety is also a key consideration in the LifeStyle series. With features such as automatic shut-off mechanisms and safety screens, these fireplaces prioritize user safety without compromising on style. The combustion technology employed ensures efficient heating and reduced emissions, making the LifeStyle series an environmentally conscious choice.
Additionally, with various installation options available, including built-in and wall-mounted configurations, these fireplaces can be customized to fit different spaces and preferences. This flexibility makes them perfect for both renovations and new constructions alike.
The LifeStyle series is designed for ease of maintenance, with accessible components that simplify cleaning and upkeep. This aspect is especially beneficial for busy homeowners who desire a stylish focal point in their homes without the burden of extensive maintenance demands.
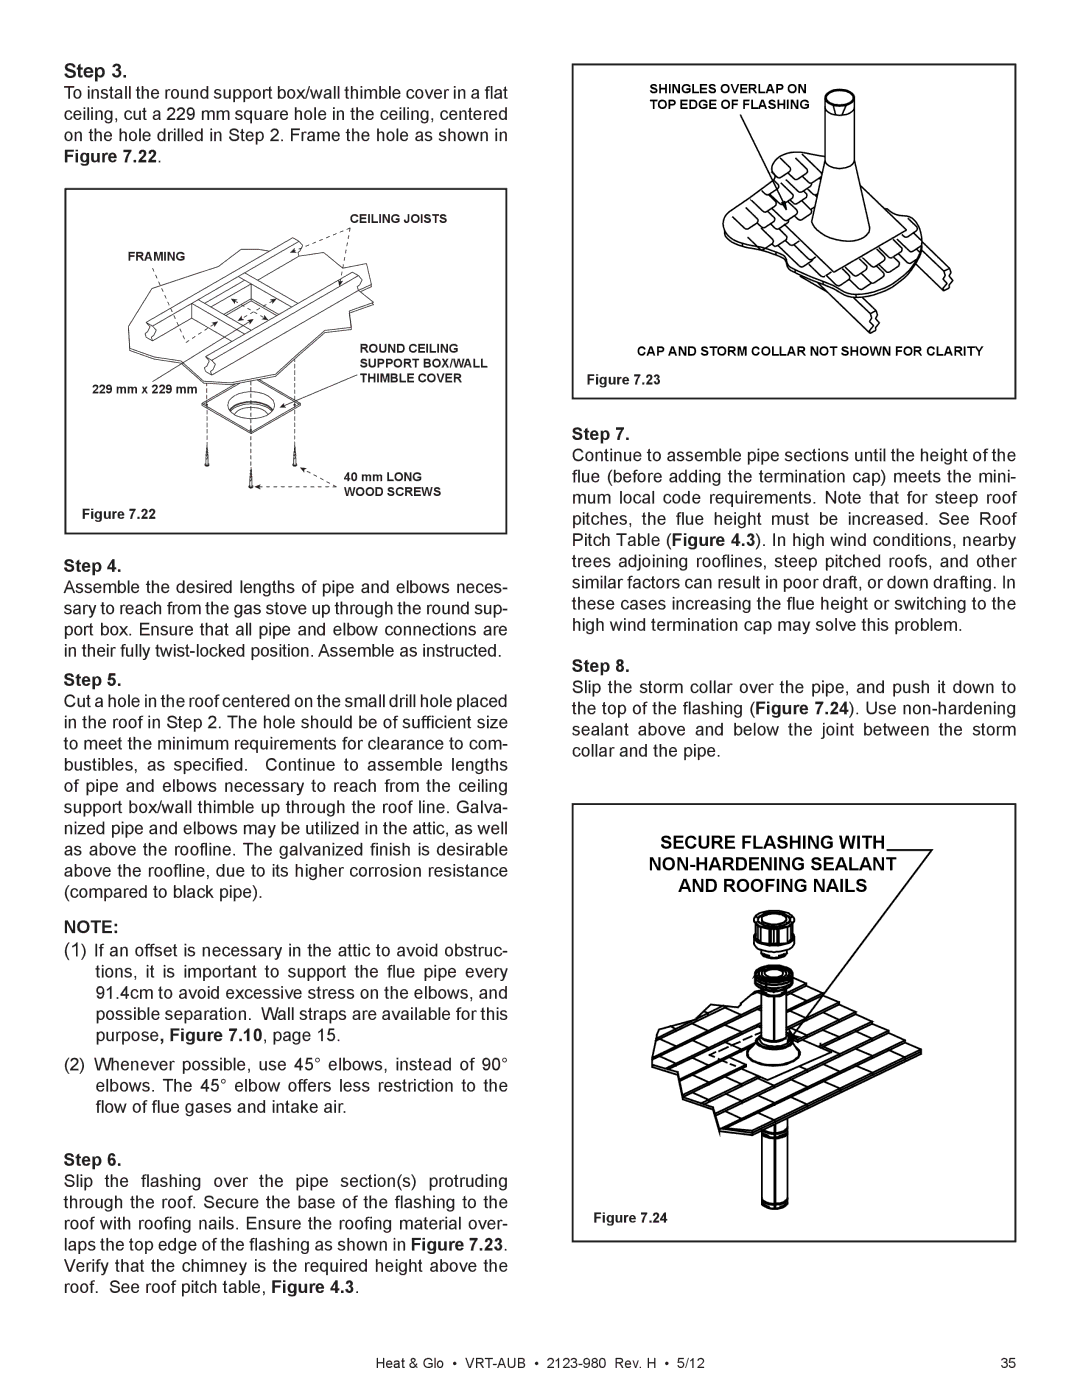
In conclusion, Heat & Glo's LifeStyle VRT-BZ-N-AUB, VRT-GY-N-AUB, VRT-BZ-P-AUB, and VRT-GY-P-AUB models offer a unique combination of contemporary design, advanced technology, and user-friendly features. Whether for cozy evenings or entertaining guests, these fireplaces elevate any space while providing warmth and comfort.