Installation


 How
How to
to Install


Window Requirements | INNER |
| SILL |
NOTICE All supporting parts should be secured to firm wood, masonry, or metal.
1.This unit is designed for installation in standard double hung windows with actual opening widths of 22" to 36". The upper and lower sash must open sufficiently to allow a clear vertical opening of 15" from the bottom of the sash to the window stool.
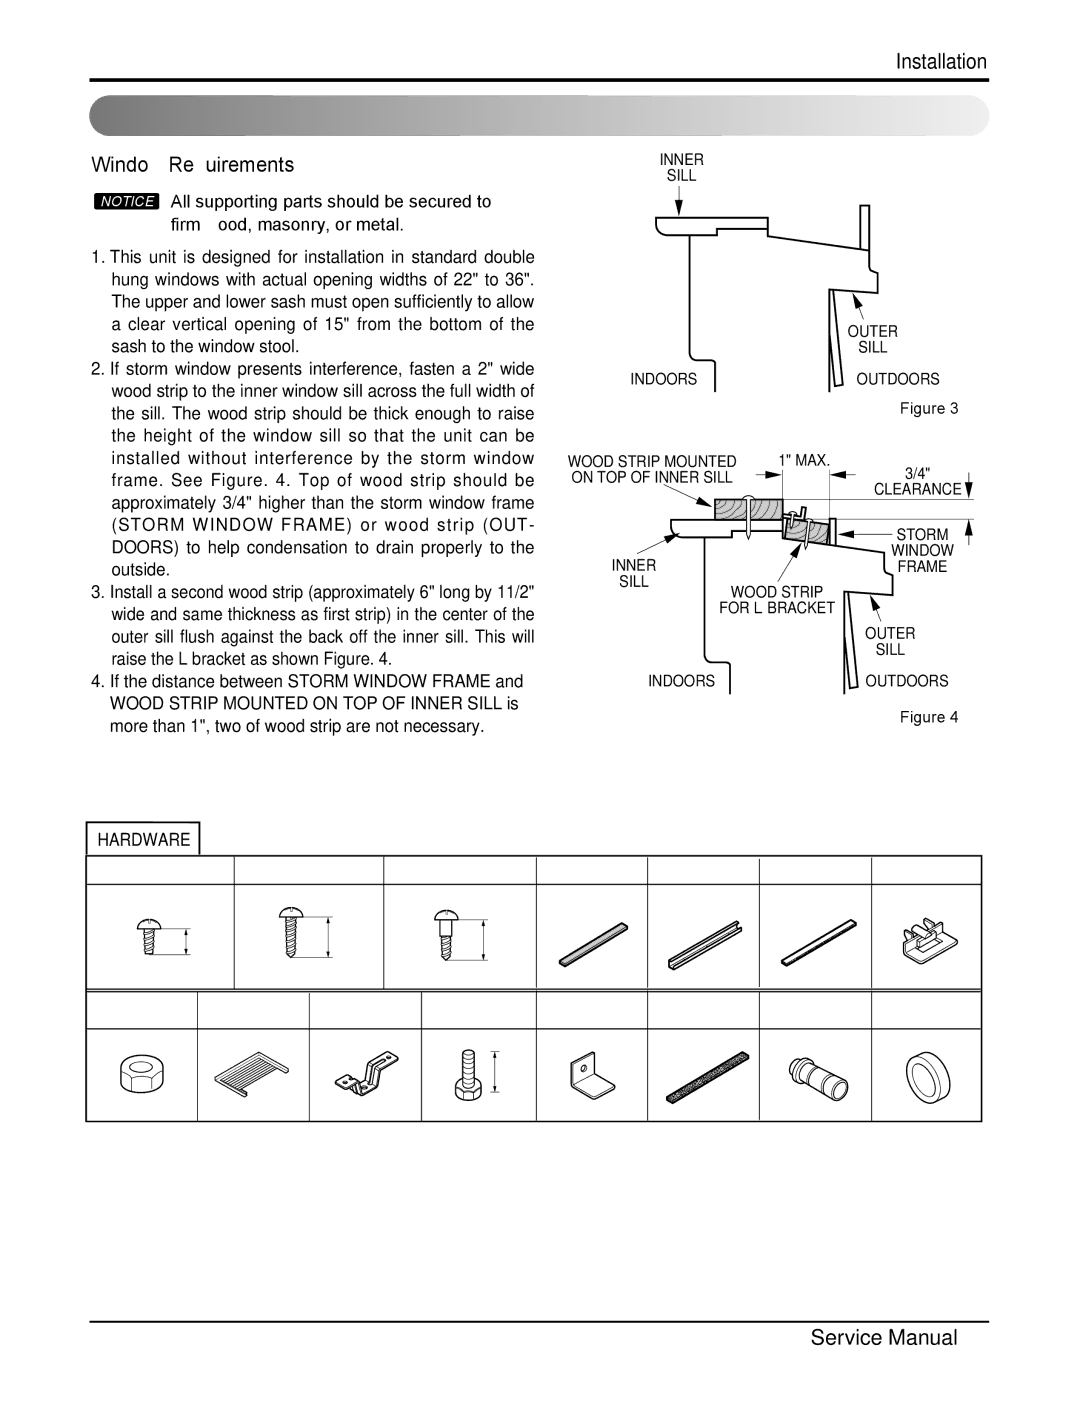
2.If storm window presents interference, fasten a 2" wide wood strip to the inner window sill across the full width of the sill. The wood strip should be thick enough to raise the height of the window sill so that the unit can be installed without interference by the storm window frame. See Figure. 4. Top of wood strip should be approximately 3/4" higher than the storm window frame (STORM WINDOW FRAME) or wood strip (OUT- DOORS) to help condensation to drain properly to the outside.
3.Install a second wood strip (approximately 6" long by 11/2" wide and same thickness as first strip) in the center of the outer sill flush against the back off the inner sill. This will raise the L bracket as shown Figure. 4.
4.If the distance between STORM WINDOW FRAME and WOOD STRIP MOUNTED ON TOP OF INNER SILL is more than 1", two of wood strip are not necessary.
| OUTER |
| SILL |
INDOORS | OUTDOORS |
| Figure 3 |
WOOD STRIP MOUNTED | 1" MAX. |
ON TOP OF INNER SILL | 3/4" |
| CLEARANCE |
| STORM |
INNER | WINDOW |
FRAME | |
SILL |
|
WOOD STRIP | |
FOR L BRACKET | |
| OUTER |
| SILL |
INDOORS | OUTDOORS |
Figure 4
Installation
HARDWARE
Type A:16EA | Type B:3EA | Type C:5EA | Type H:1EA | Type I:1EA | Type J:1EA | Type K:2EA |
(SCREW) | (SCREW) | (SCREW) | (UPPER GUIDE) |
10mm | 16mm | 16mm |
Type D:2EA
(NUT)
Type E:2EA
(FRAME CURTAIN)
Type F:2EA
(SILL SUPPORT)
Type G:2EA
(BOLT)
Type L:1EA
(WINDOWLOCKINGBRACKET)
Type M:1EA
Type N:1EA
(DRAIN JOINT PIPE)
Type O:1EA
(DRAIN WASHER)
10
Service Manual 11