Installation
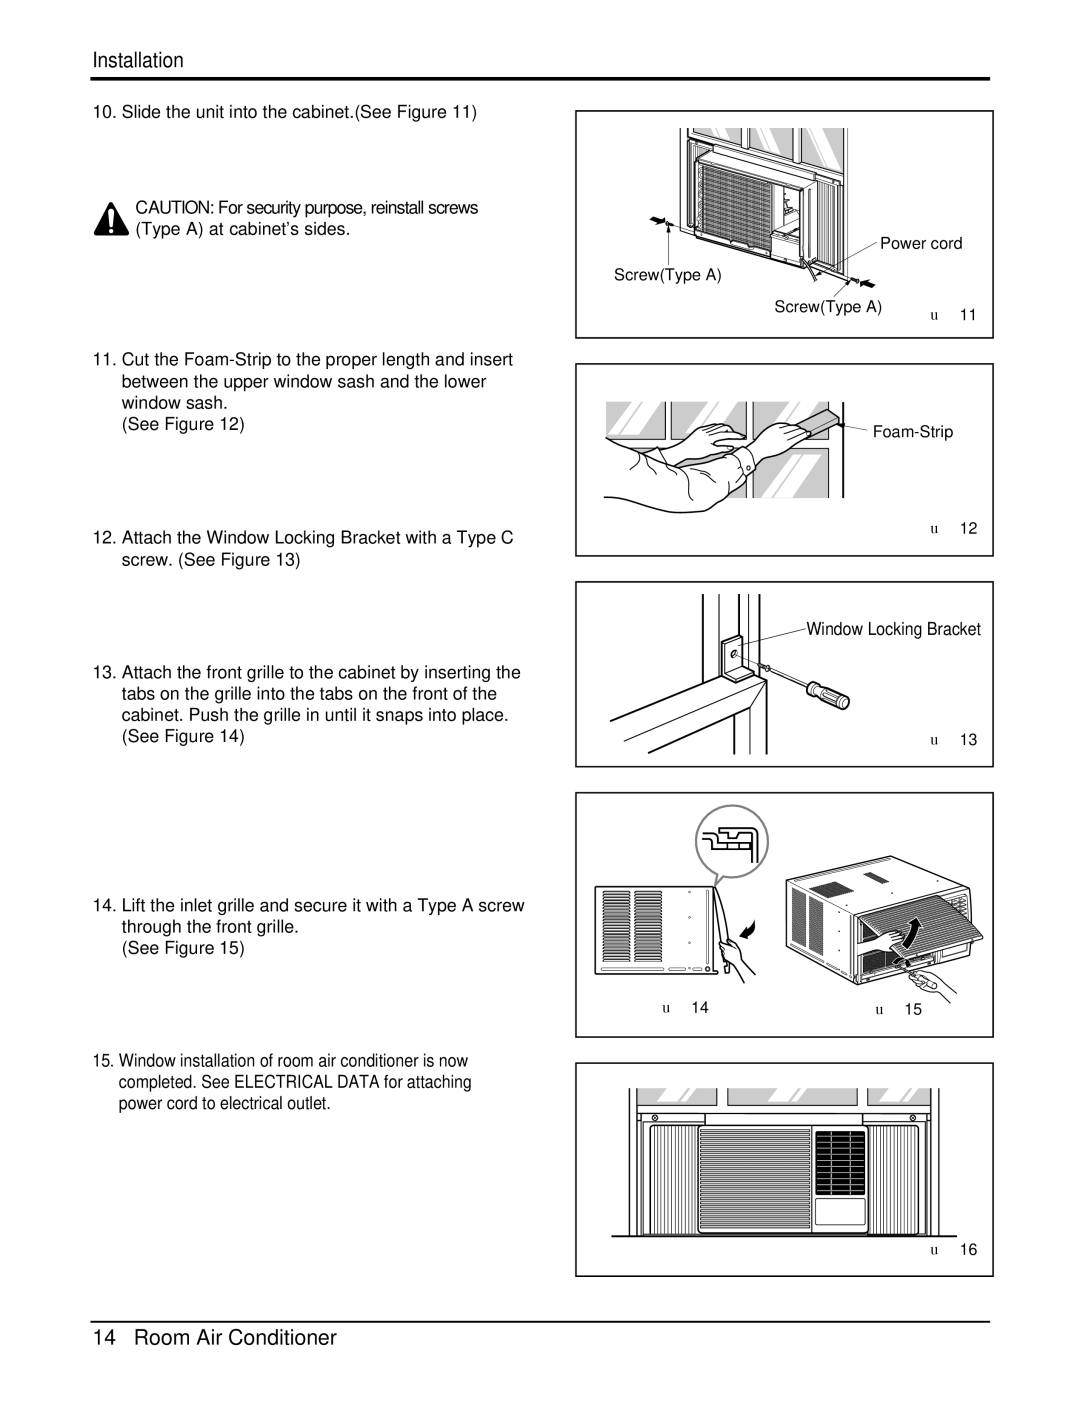
10. Slide the unit into the cabinet.(See Figure 11)
CAUTION: For security purpose, reinstall screws (Type A) at cabinet's sides.
11.Cut the
(See Figure 12)
12.Attach the Window Locking Bracket with a Type C screw. (See Figure 13)
13.Attach the front grille to the cabinet by inserting the tabs on the grille into the tabs on the front of the cabinet. Push the grille in until it snaps into place. (See Figure 14)
14.Lift the inlet grille and secure it with a Type A screw through the front grille.
(See Figure 15)
15.Window installation of room air conditioner is now completed. See ELECTRICAL DATA for attaching power cord to electrical outlet.
Power cord | |
Screw(Type A) |
|
Screw(Type A) | Figure 11 |
| |
![]()
Figure 12
 Window Locking Bracket
Figure 13
Figure 14 | Figure 15 |
Figure 16 |
14Room Air Conditioner