Disassembly
3. MOTOR
1. | Remove the cabinet. |
|
2. | Remove the evaporator. |
|
3. | Remove the orifice. |
|
4. | Remove the blower. |
|
5. | Remove the fan. |
|
6. | Remove the control box cover and housing of the |
|
| motor in the control box. |
|
7. | Remove the 2 screws which fasten the motor from |
|
| the mount motor. (See Figure 23) |
|
8. | Remove the motor. |
|
9. | Figure 23 | |
| removal procedure, above.(See Figure 23) |


 Electrical
 Parts
Parts


1. OVERLOAD PROTECTOR
1. Remove the cabinet.
2. Remove the nut which fastens the terminal cover.
3. Remove the terminal cover. (See Figure 24)
4. Remove all the leads from the overload protector.
5. Remove the overload protector.
6.
Figure 24
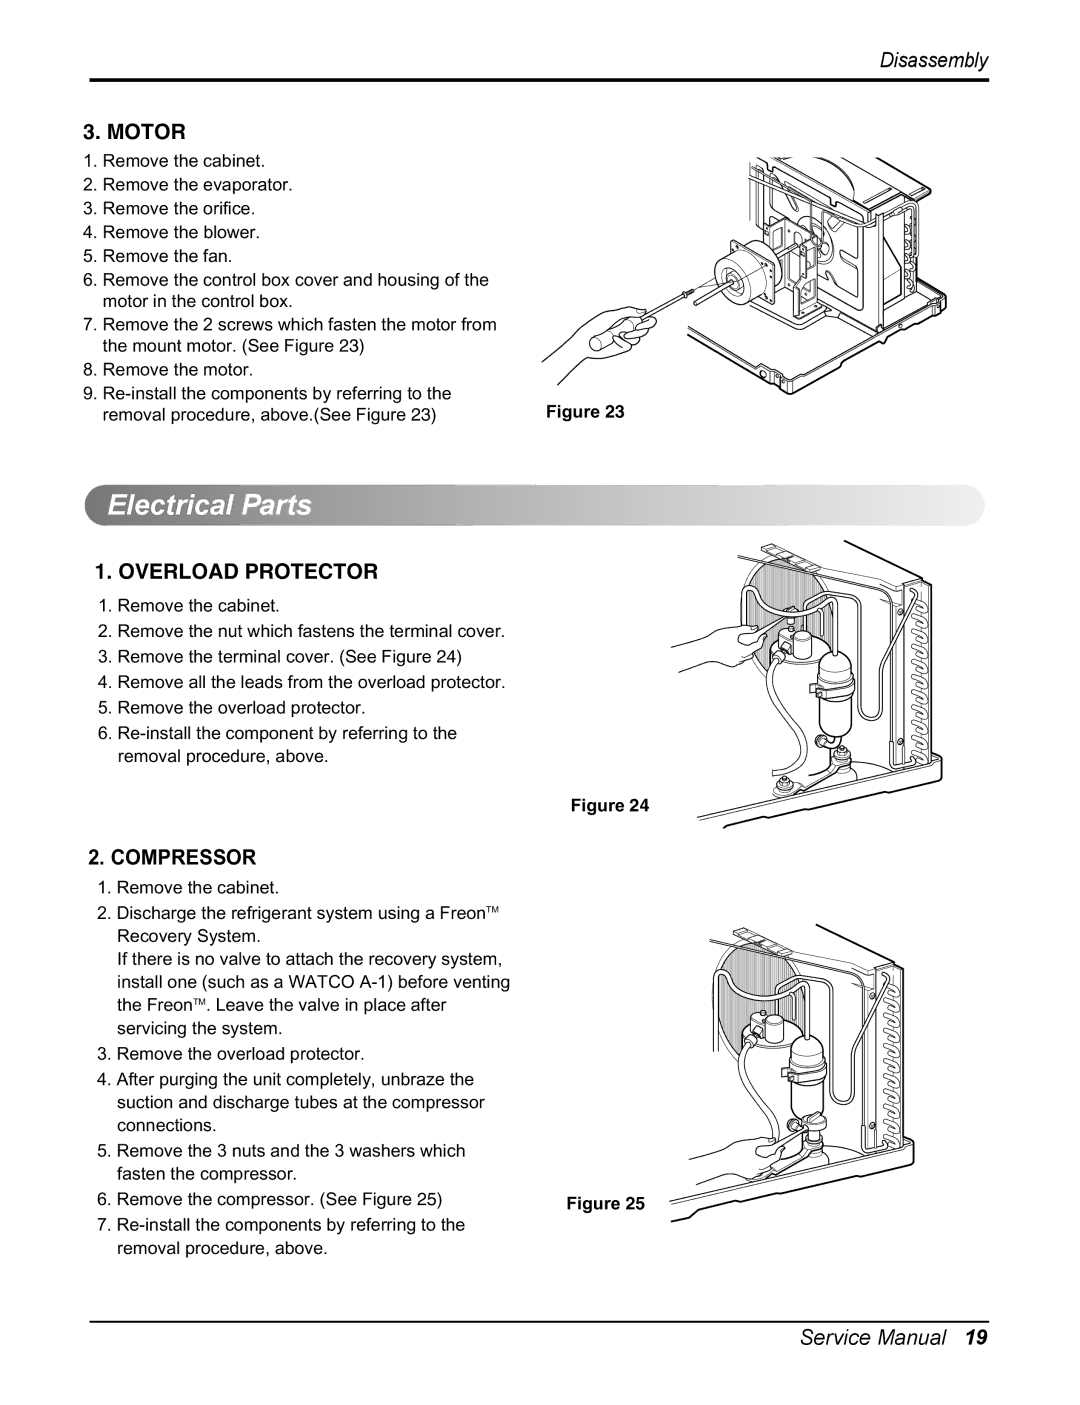
2.COMPRESSOR
1.Remove the cabinet.
2.Discharge the refrigerant system using a FreonTM
| Recovery System. |
|
| If there is no valve to attach the recovery system, |
|
| install one (such as a WATCO |
|
| the FreonTM. Leave the valve in place after |
|
| servicing the system. |
|
3. | Remove the overload protector. |
|
4. | After purging the unit completely, unbraze the |
|
| suction and discharge tubes at the compressor |
|
| connections. |
|
5. | Remove the 3 nuts and the 3 washers which |
|
| fasten the compressor. |
|
6. | Remove the compressor. (See Figure 25) | Figure 25 |
7.
Service Manual 19