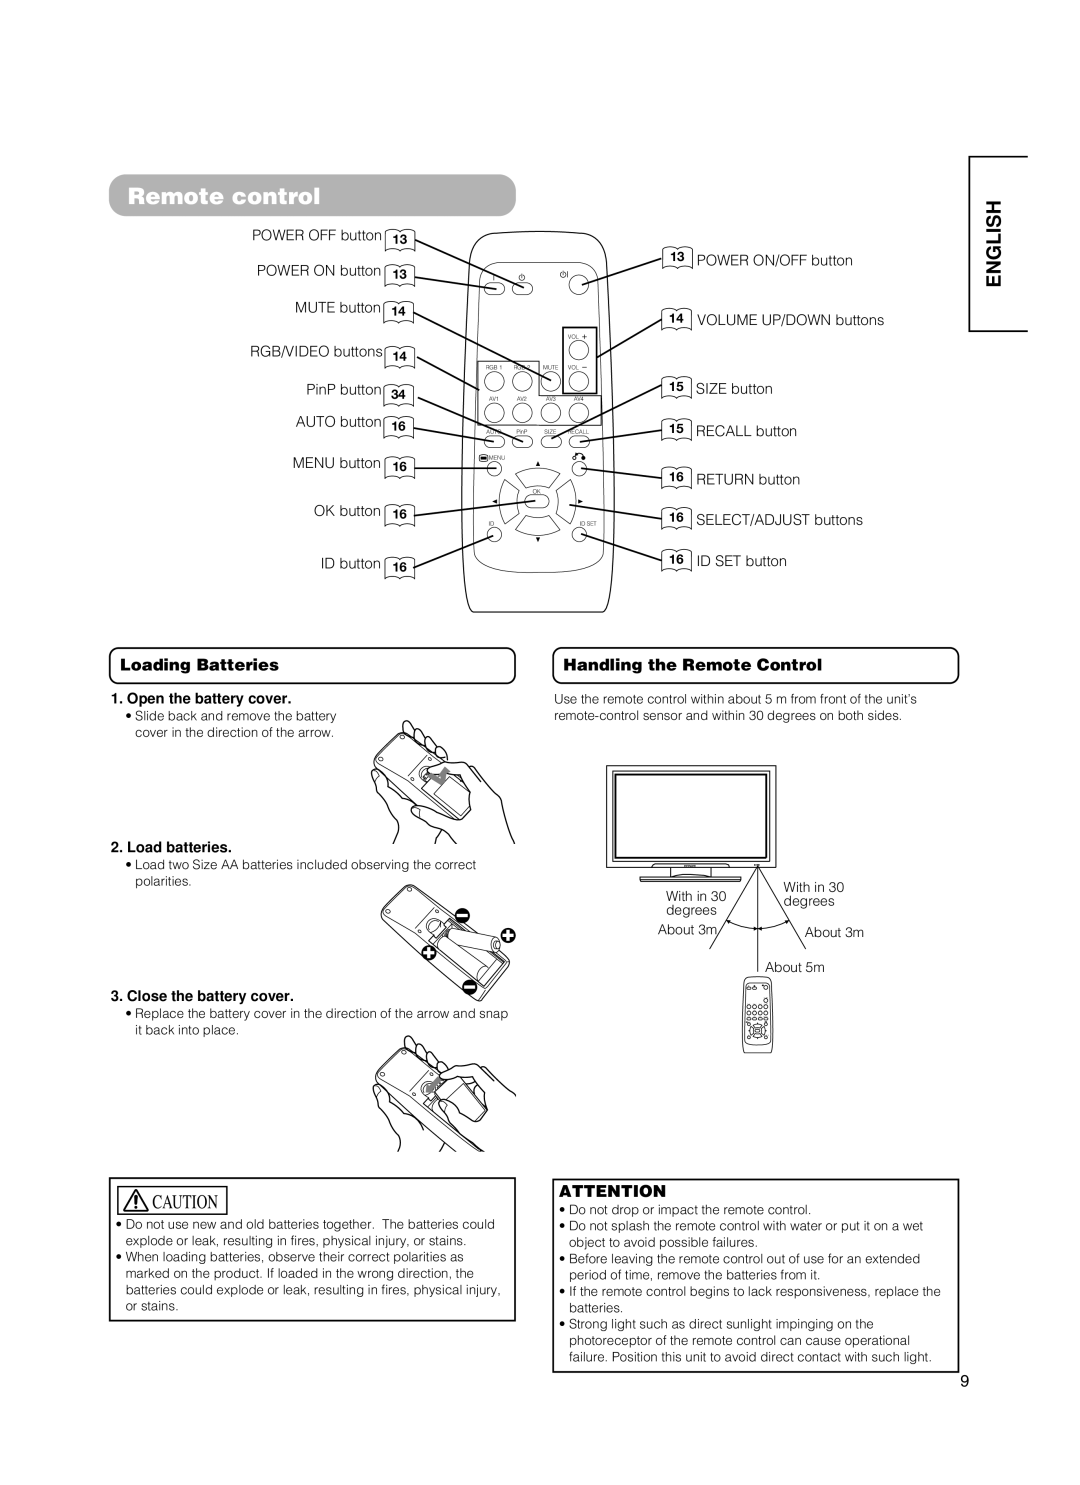
Remote control
POWER OFF button 13
POWER ON button 13
MUTE button 14
RGB/VIDEO buttons 14
PinP button 34
AUTO button 16
MENU button 16
OK button 16
ID button 16
|
|
| VOL |
RGB 1 | RGB 2 | MUTE | VOL |
AV1 | AV2 | AV3 | AV4 |
AUTO | PinP | SIZE | RECALL |
MENU |
|
|
|
|
| OK |
|
ID |
|
| ID SET |
13POWER ON/OFF button
14VOLUME UP/DOWN buttons
15SIZE button
15RECALL button
16RETURN button
16SELECT/ADJUST buttons
16ID SET button
ENGLISH
Loading Batteries
1. Open the battery cover.
•Slide back and remove the battery
cover in the direction of the arrow.
2.Load batteries.
•Load two Size AA batteries included observing the correct polarities.
3.Close the battery cover.
•Replace the battery cover in the direction of the arrow and snap it back into place.
Handling the Remote Control
Use the remote control within about 5 m from front of the unit’s
With in 30
With in 30 degrees degrees
About 3m | About 3m |
About 5m
![]()
![]() CAUTION
CAUTION
•Do not use new and old batteries together. The batteries could explode or leak, resulting in fires, physical injury, or stains.
•When loading batteries, observe their correct polarities as marked on the product. If loaded in the wrong direction, the batteries could explode or leak, resulting in fires, physical injury, or stains.
ATTENTION
•Do not drop or impact the remote control.
•Do not splash the remote control with water or put it on a wet object to avoid possible failures.
•Before leaving the remote control out of use for an extended period of time, remove the batteries from it.
•If the remote control begins to lack responsiveness, replace the batteries.
•Strong light such as direct sunlight impinging on the photoreceptor of the remote control can cause operational failure. Position this unit to avoid direct contact with such light.
9