INSTALLING THE CUTTING TOOLS
Always push the red STOP button before changing cutters.
Slicing, Shredding, Grating, and Julienne Cutting
1.Pull the locking handle forward and swing the feed cylinder out to the rear.
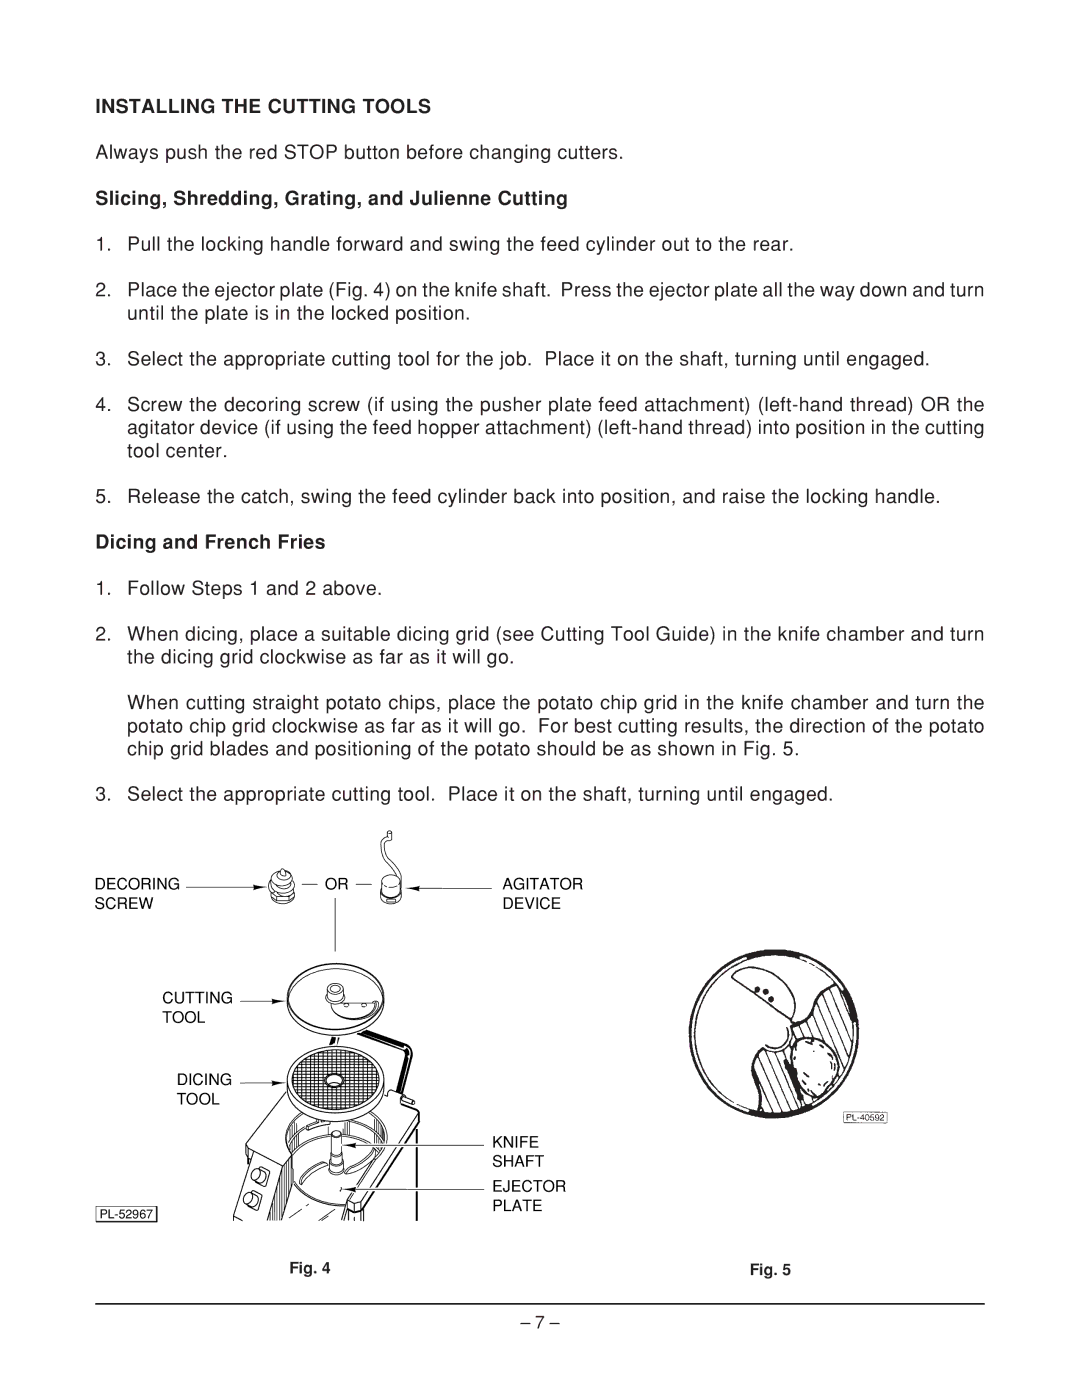
2.Place the ejector plate (Fig. 4) on the knife shaft. Press the ejector plate all the way down and turn until the plate is in the locked position.
3.Select the appropriate cutting tool for the job. Place it on the shaft, turning until engaged.
4.Screw the decoring screw (if using the pusher plate feed attachment)
5.Release the catch, swing the feed cylinder back into position, and raise the locking handle.
Dicing and French Fries
1.Follow Steps 1 and 2 above.
2.When dicing, place a suitable dicing grid (see Cutting Tool Guide) in the knife chamber and turn the dicing grid clockwise as far as it will go.
When cutting straight potato chips, place the potato chip grid in the knife chamber and turn the potato chip grid clockwise as far as it will go. For best cutting results, the direction of the potato chip grid blades and positioning of the potato should be as shown in Fig. 5.
3.Select the appropriate cutting tool. Place it on the shaft, turning until engaged.
DECORING | OR |
SCREW |
|
CUTTING
TOOL
DICING
TOOL
AGITATOR DEVICE
KNIFE
SHAFT
EJECTOR PLATE
Fig. 4 | Fig. 5 |
– 7 –