INSTALLING AND REMOVING THE FEED ATTACHMENTS
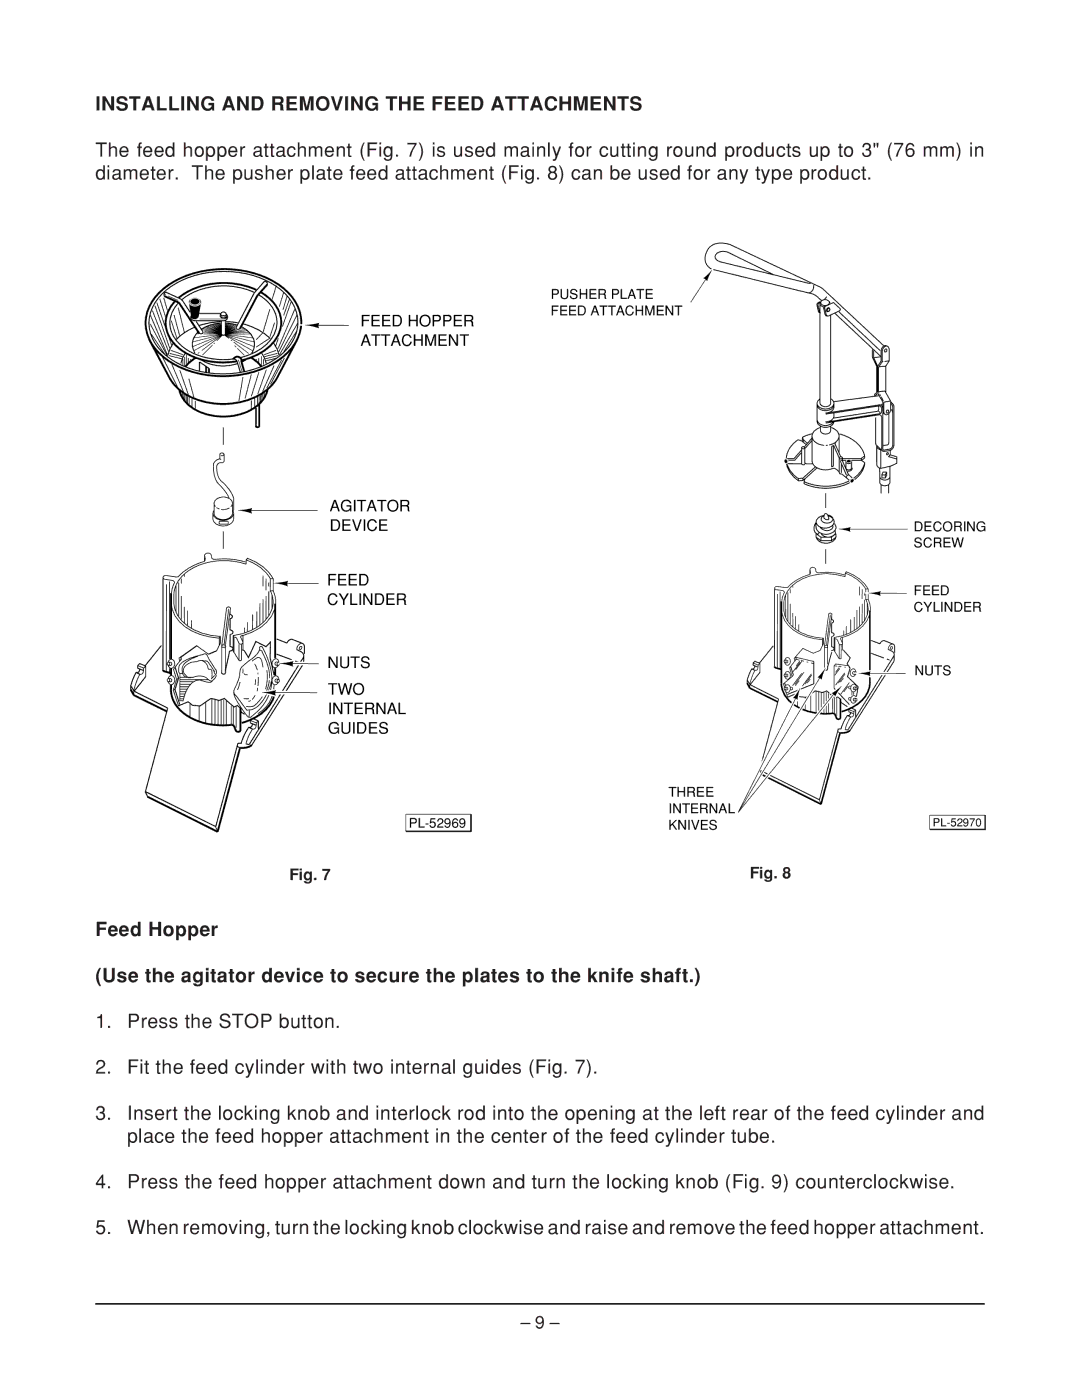
The feed hopper attachment (Fig. 7) is used mainly for cutting round products up to 3" (76 mm) in diameter. The pusher plate feed attachment (Fig. 8) can be used for any type product.
FEED HOPPER ATTACHMENT
AGITATOR
DEVICE
FEED
CYLINDER
NUTS
TWO
INTERNAL
GUIDES
PUSHER PLATE
FEED ATTACHMENT
THREE
INTERNAL
DECORING SCREW
FEED CYLINDER
NUTS
| KNIVES | |
Fig. 7 | Fig. 8 | |
Feed Hopper
(Use the agitator device to secure the plates to the knife shaft.)
1.Press the STOP button.
2.Fit the feed cylinder with two internal guides (Fig. 7).
3.Insert the locking knob and interlock rod into the opening at the left rear of the feed cylinder and place the feed hopper attachment in the center of the feed cylinder tube.
4.Press the feed hopper attachment down and turn the locking knob (Fig. 9) counterclockwise.
5.When removing, turn the locking knob clockwise and raise and remove the feed hopper attachment.
– 9 –