Optiflex Installation and Setup Guide
•Voltage Trigger and Output Programming commands are interchangeable for turning on a camera.
•“All Cameras” function captures a single frame from each camera.
•NTSC Advance function allows you to step through the video of all cameras sequentially, one camera at a time, and then the Guard Tour. It does not support video capturing.
Mounting Optiflex
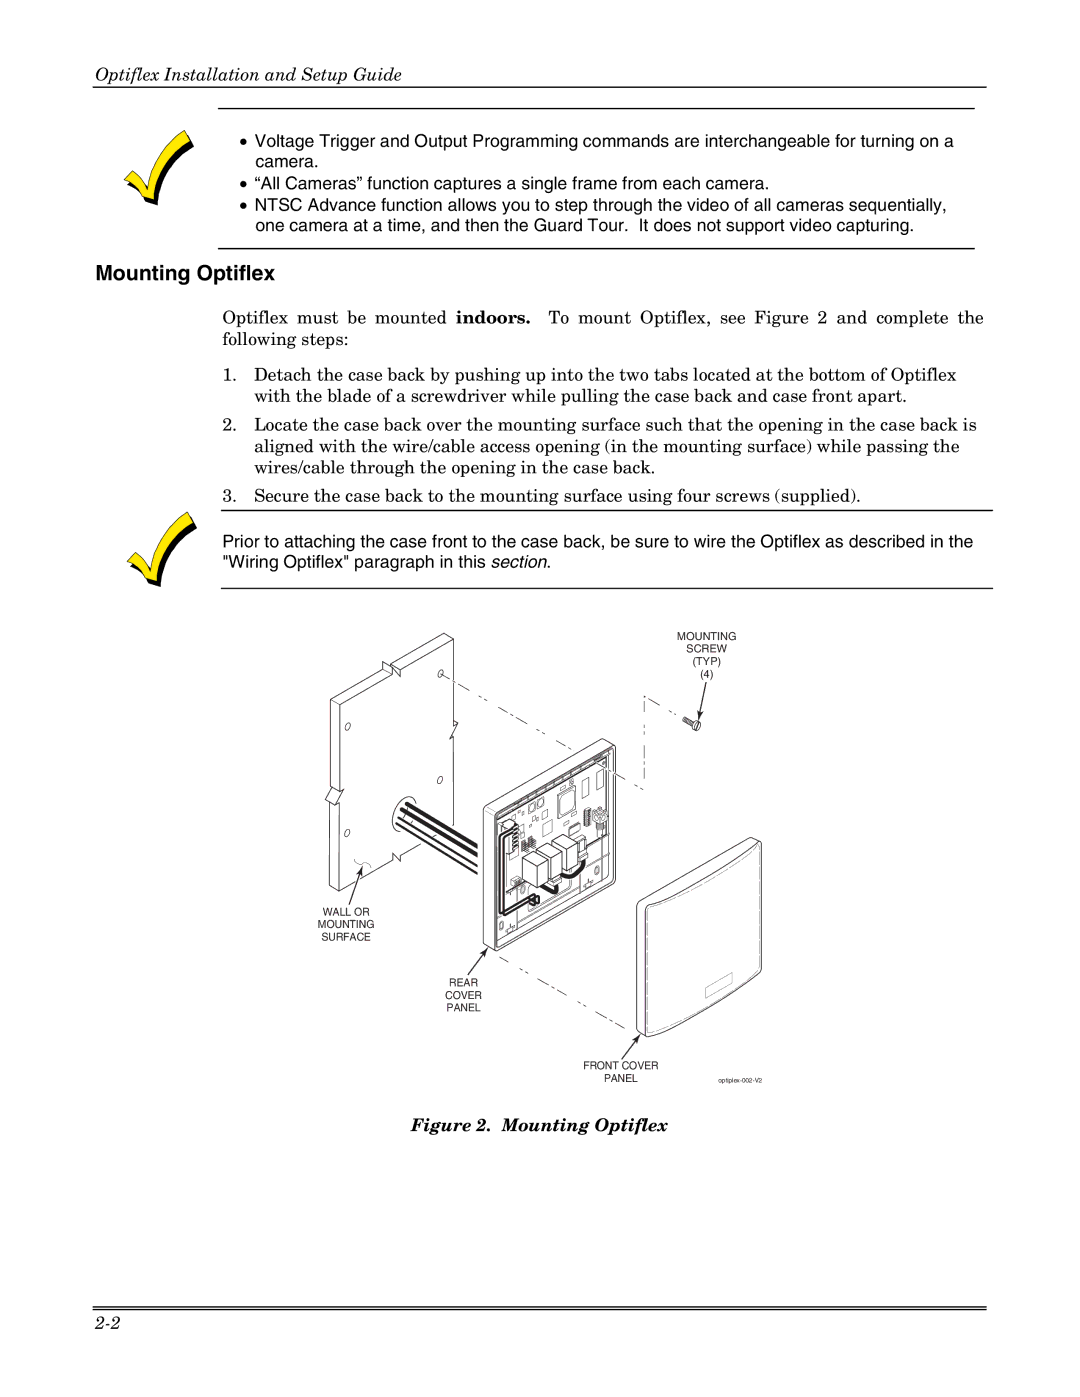
Optiflex must be mounted indoors. To mount Optiflex, see Figure 2 and complete the following steps:
1.Detach the case back by pushing up into the two tabs located at the bottom of Optiflex with the blade of a screwdriver while pulling the case back and case front apart.
2.Locate the case back over the mounting surface such that the opening in the case back is aligned with the wire/cable access opening (in the mounting surface) while passing the wires/cable through the opening in the case back.
3.Secure the case back to the mounting surface using four screws (supplied).
Prior to attaching the case front to the case back, be sure to wire the Optiflex as described in the "Wiring Optiflex" paragraph in this section.
MOUNTING
SCREW
(TYP)
(4)
ON |
12345678 |
WALL OR
MOUNTING
SURFACE
REAR
COVER
PANEL
FRONT COVER
PANEL