4.To secure the
7.Insert the two screws, securing the retaining bar in place.
5.Reattach the screw holding the bracket in place.
8.Place the computer in an upright position.
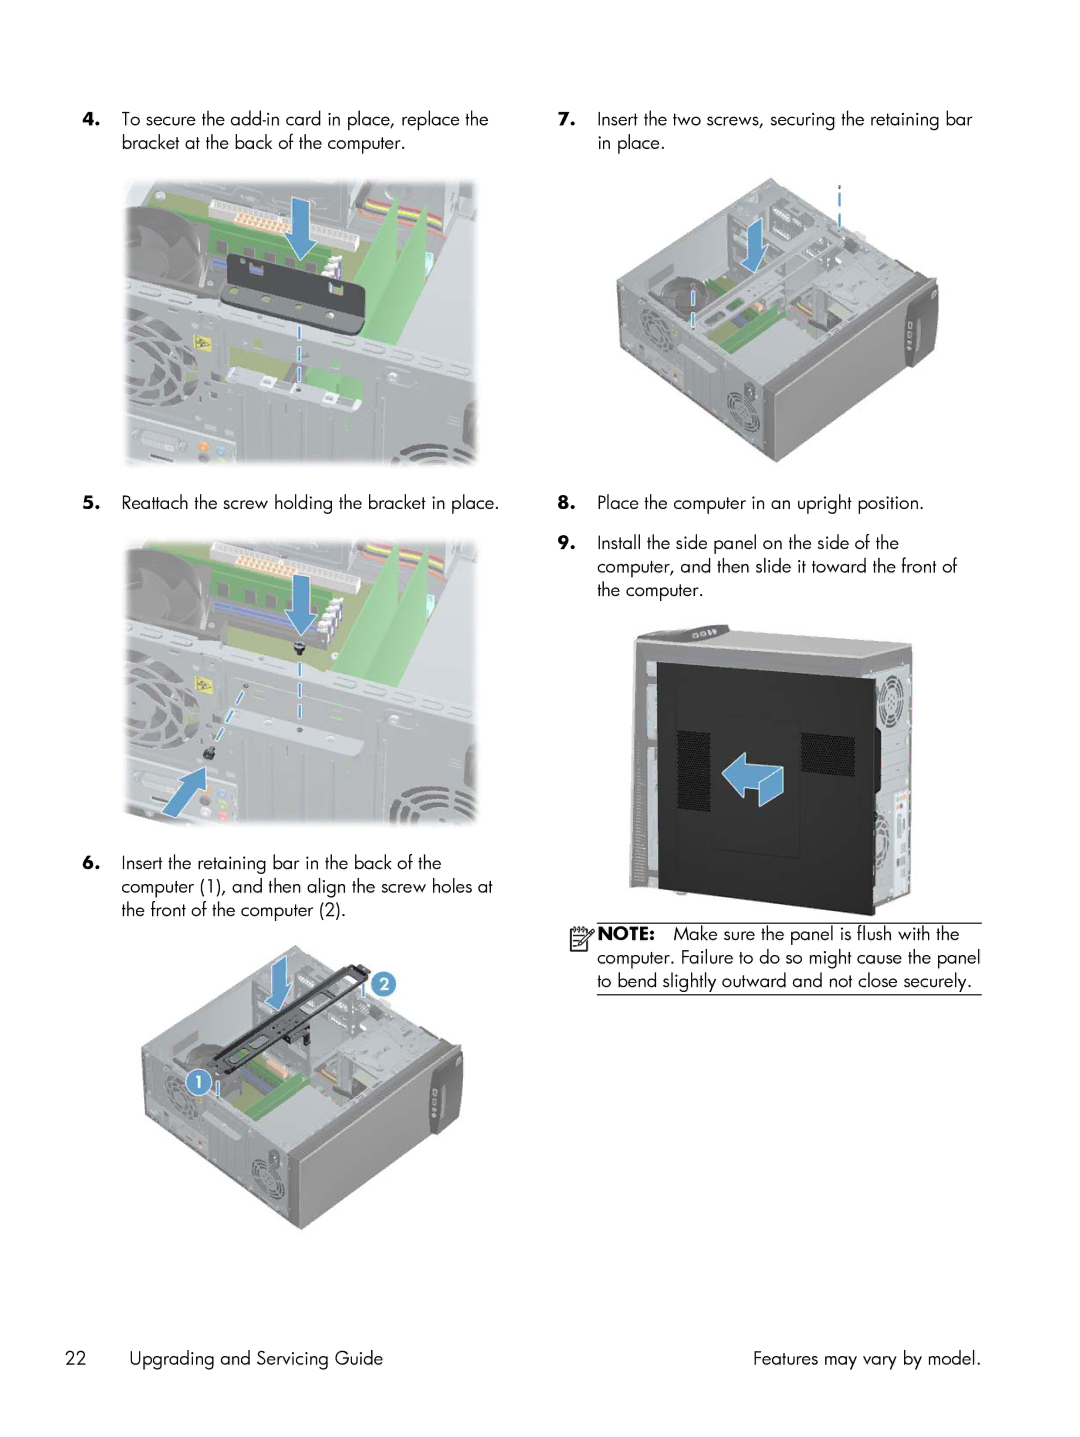
9.Install the side panel on the side of the computer, and then slide it toward the front of the computer.
6.Insert the retaining bar in the back of the computer (1), and then align the screw holes at the front of the computer (2).
![]()
![]()
![]()
![]() NOTE: Make sure the panel is flush with the computer. Failure to do so might cause the panel to bend slightly outward and not close securely.
NOTE: Make sure the panel is flush with the computer. Failure to do so might cause the panel to bend slightly outward and not close securely.
22 | Upgrading and Servicing Guide | Features may vary by model. |