Removing and
Replacing a CD/DVD
Drive
Computer features may vary by model.
10 – 15 minutes
Removing the CD/DVD drive
1.Remove any media or storage devices such as CDs, DVDs, and USB.
2.Close all programs, and then shut down your operating system.
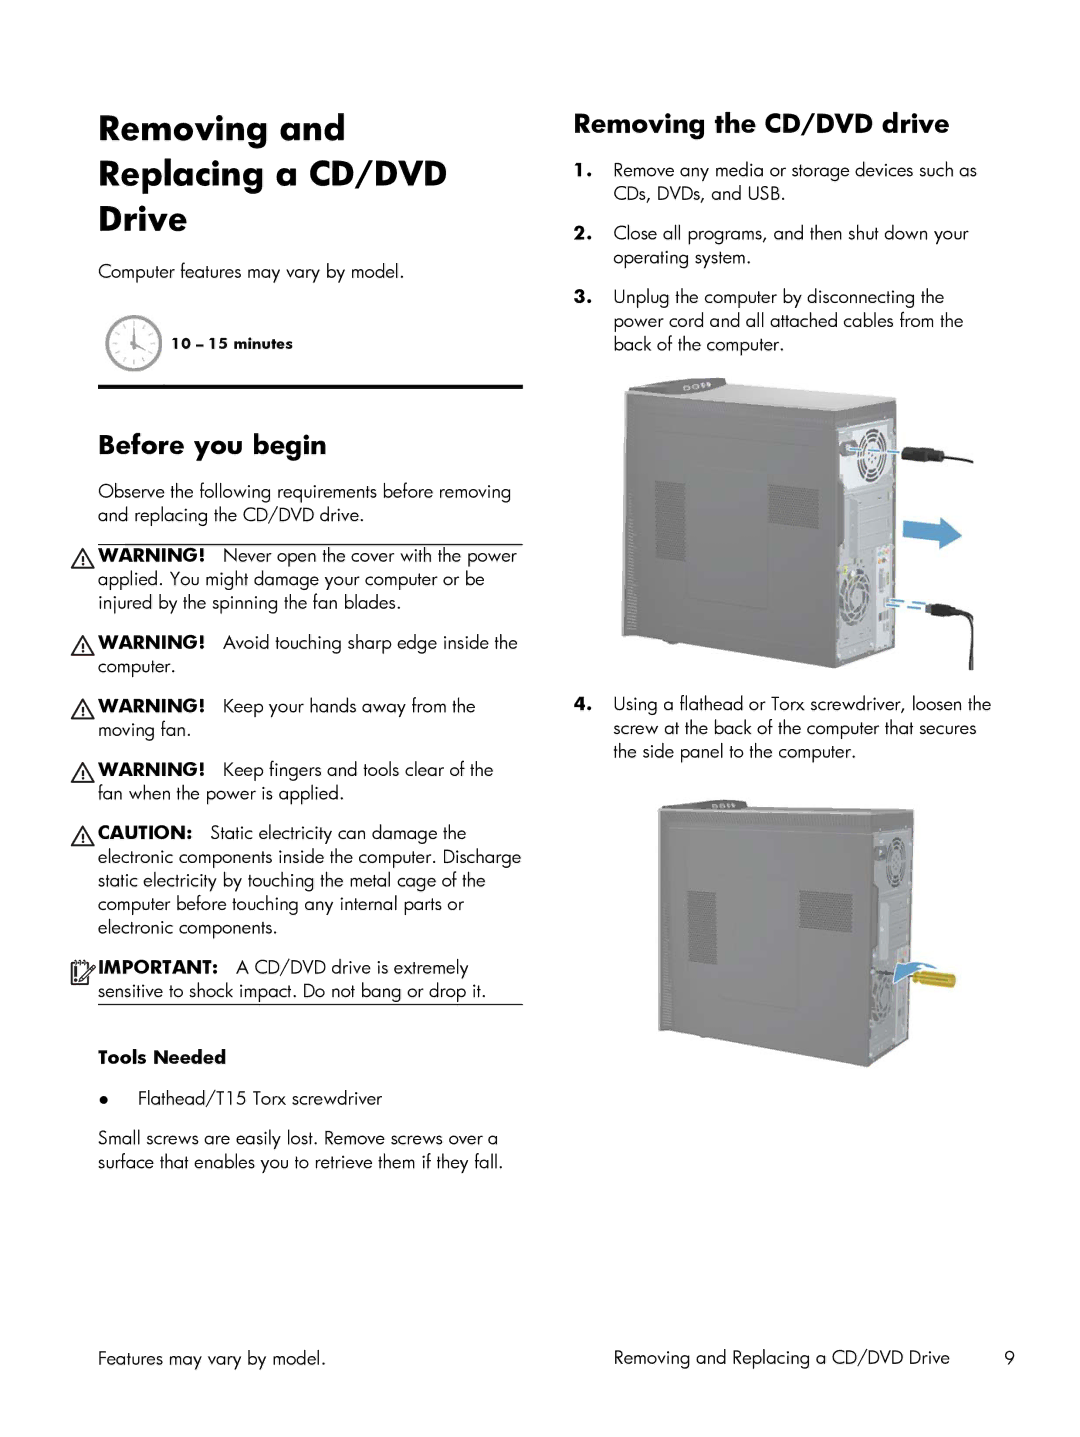
3.Unplug the computer by disconnecting the power cord and all attached cables from the back of the computer.
Before you begin
Observe the following requirements before removing and replacing the CD/DVD drive.
WARNING! Never open the cover with the power applied. You might damage your computer or be injured by the spinning the fan blades.
WARNING! Avoid touching sharp edge inside the computer.
WARNING! Keep your hands away from the moving fan.
WARNING! Keep fingers and tools clear of the fan when the power is applied.
CAUTION: Static electricity can damage the electronic components inside the computer. Discharge static electricity by touching the metal cage of the computer before touching any internal parts or electronic components.
![]()
![]()
![]()
![]() IMPORTANT: A CD/DVD drive is extremely sensitive to shock impact. Do not bang or drop it.
IMPORTANT: A CD/DVD drive is extremely sensitive to shock impact. Do not bang or drop it.
Tools Needed
●Flathead/T15 Torx screwdriver
Small screws are easily lost. Remove screws over a surface that enables you to retrieve them if they fall.
4.Using a flathead or Torx screwdriver, loosen the screw at the back of the computer that secures the side panel to the computer.
Features may vary by model. | Removing and Replacing a CD/DVD Drive | 9 |