Using OmniBook Disk Drives
Replacing a Hard Drive
Back up any personal or data files that reside on drive C. You can back up the files to a tape drive, a network drive, a PC card, or a floppy disk.
1.Back up your files.
∙If you’re using Windows 95, use the Backup utility (Start, Programs, Accessories, System Tools, Backup, Backup tab).
∙If you’re using Windows for Workgroups, back up individual files (File Manager) or use a commercial
2.Exit Windows.
∙If you’re using Windows 95, use the Shut Down option from the Start menu.
∙If you’re using Windows for Workgroups, exit Windows, then press CTRL+ALT+blue On/Off button simultaneously.
3.Important: Turn off the OmniBook, unplug the adapter, and remove the battery.
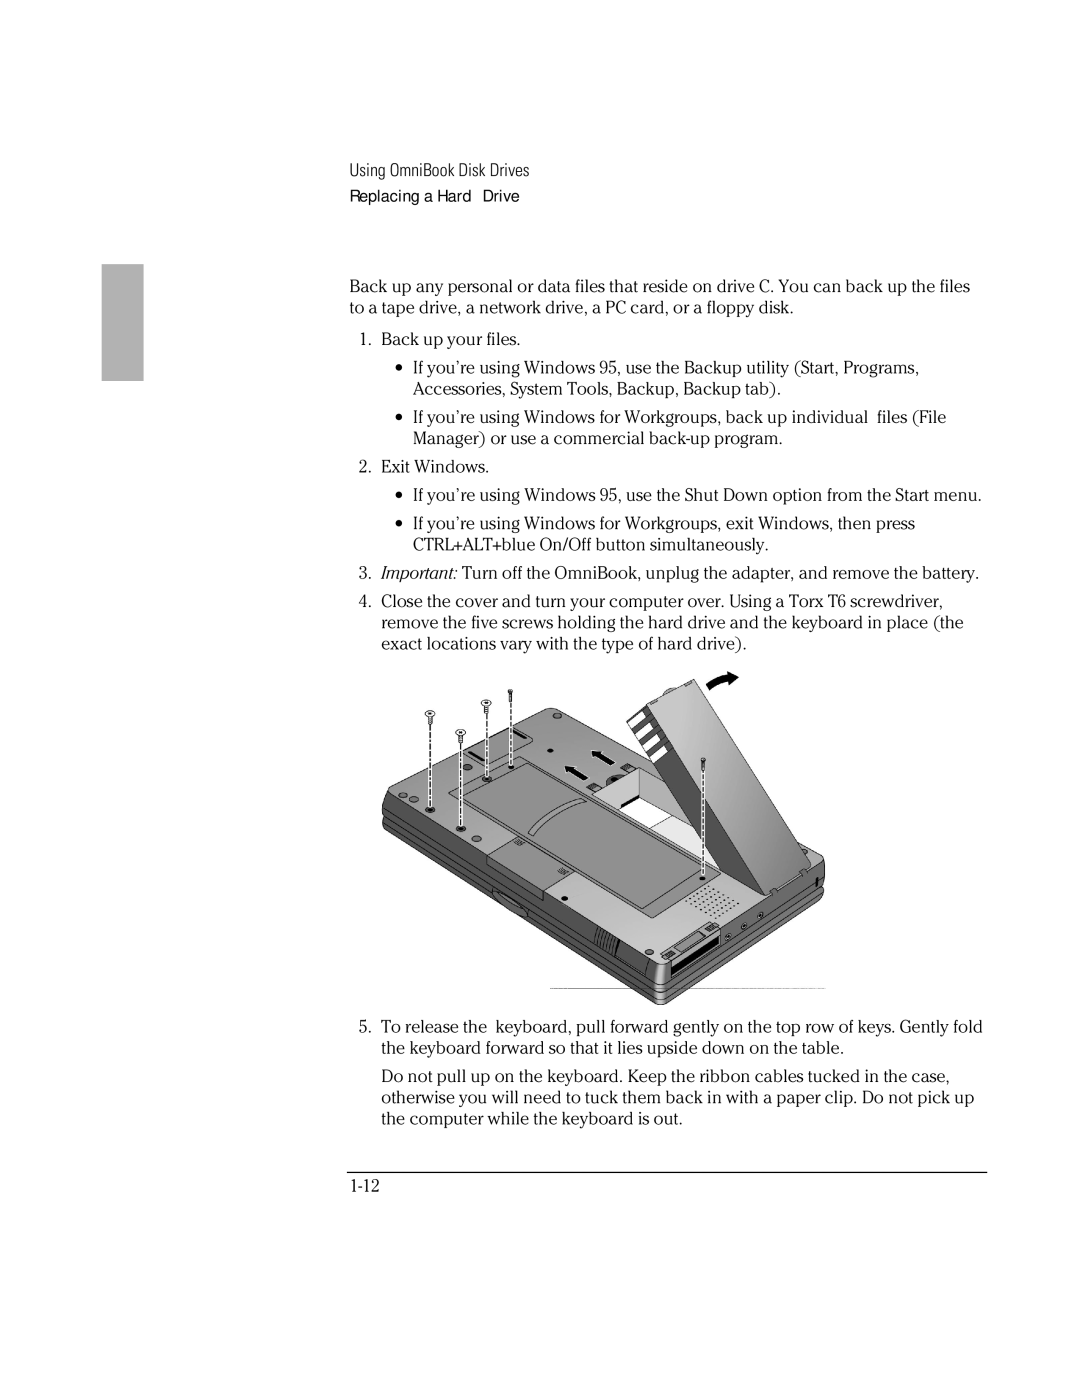
4.Close the cover and turn your computer over. Using a Torx T6 screwdriver, remove the five screws holding the hard drive and the keyboard in place (the exact locations vary with the type of hard drive).
5.To release the keyboard, pull forward gently on the top row of keys. Gently fold the keyboard forward so that it lies upside down on the table.
Do not pull up on the keyboard. Keep the ribbon cables tucked in the case, otherwise you will need to tuck them back in with a paper clip. Do not pick up the computer while the keyboard is out.