C A U T I O N
C A U T I O N
Using OmniBook Disk Drives
Installing a Floppy Disk Drive
To remove a floppy disk drive
Always wait until all disk activity stops before ejecting a disk or unplugging a cable. The light on the front of the floppy disk drive is on when the OmniBook is reading from or writing to the floppy disk drive.
1.Squeeze the tabs on the large cable plug and hold firmly while pulling the plug from the back of the floppy drive.
2.Squeeze the tabs on the small cable plug and hold firmly while pulling the plug from the back of the OmniBook.
To insert or remove a floppy disk
Do not remove a floppy disk while the OmniBook is actively reading or writing data. Wait until the floppy drive is done
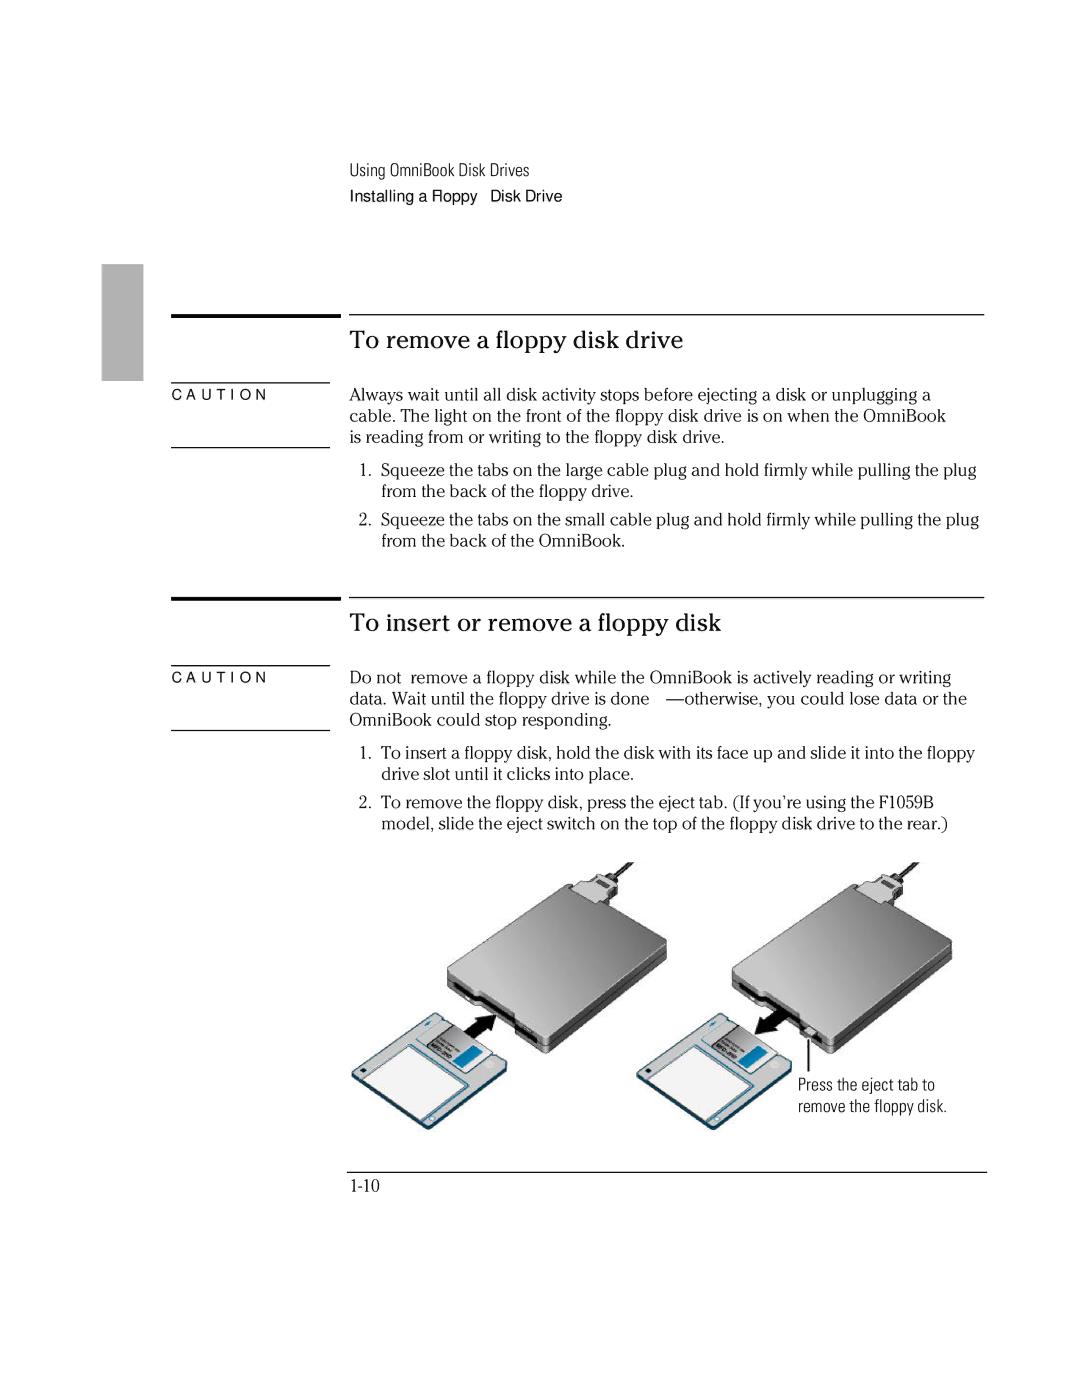
1.To insert a floppy disk, hold the disk with its face up and slide it into the floppy drive slot until it clicks into place.
2.To remove the floppy disk, press the eject tab. (If you’re using the F1059B model, slide the eject switch on the top of the floppy disk drive to the rear.)
Press the eject tab to
remove the floppy disk.