INSTALLATION
Electrical Connections
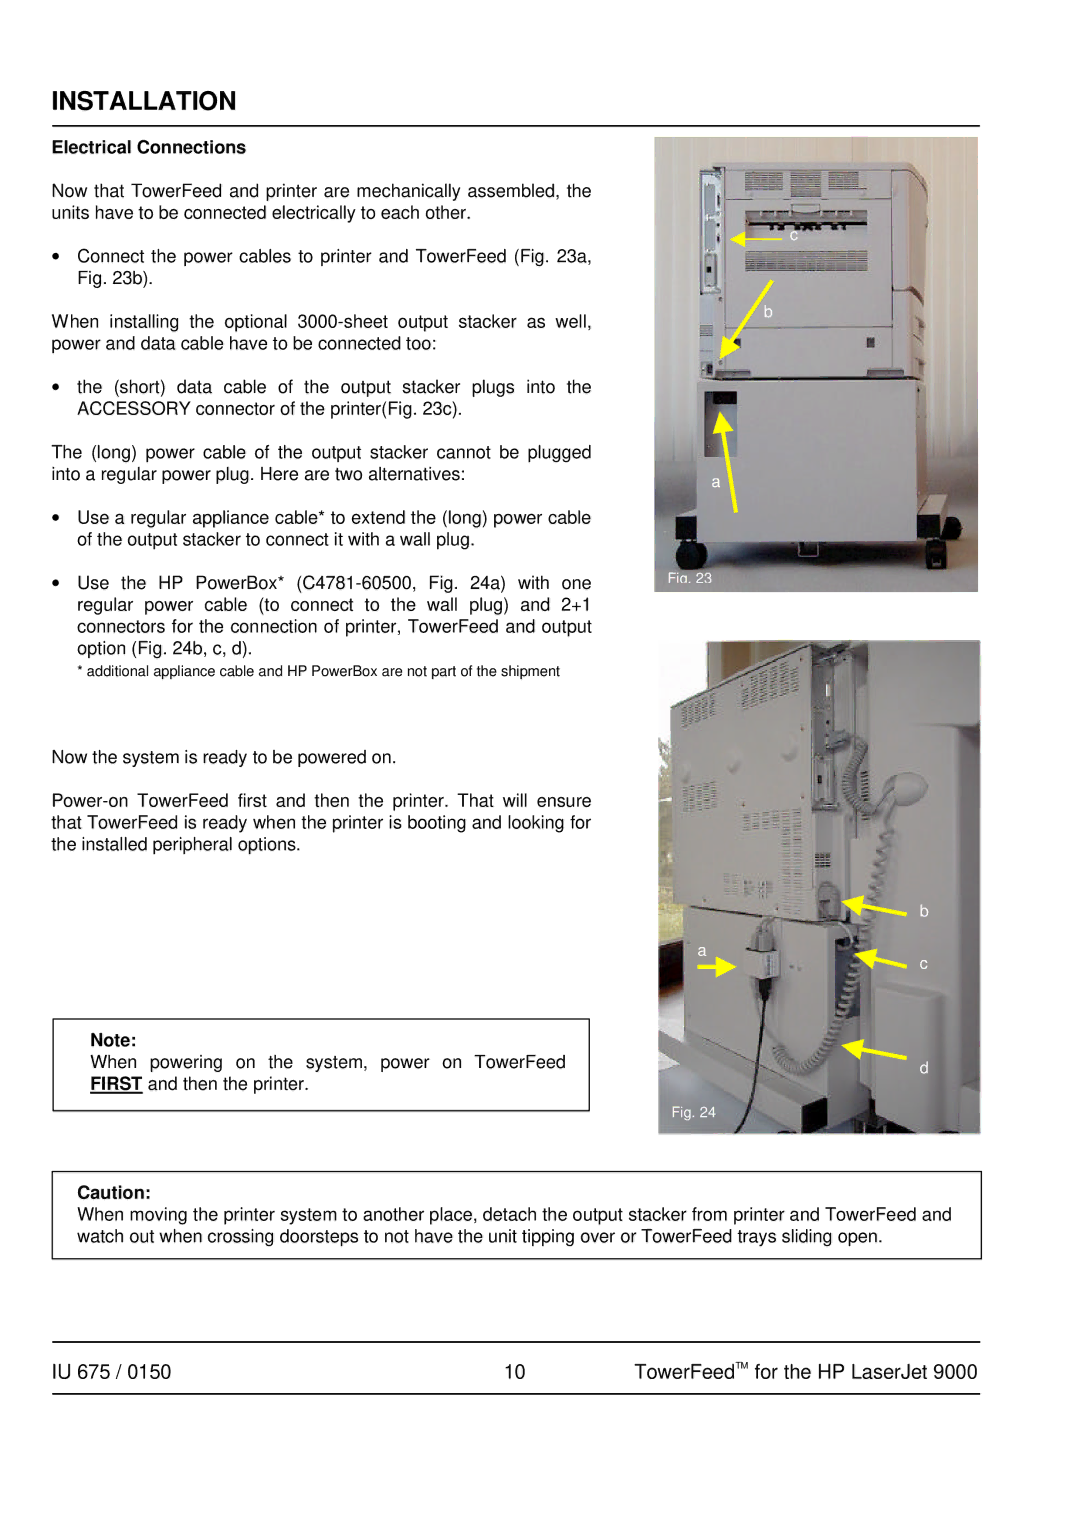
Now that TowerFeed and printer are mechanically assembled, the units have to be connected electrically to each other.
∙Connect the power cables to printer and TowerFeed (Fig. 23a, Fig. 23b).
When installing the optional
∙the (short) data cable of the output stacker plugs into the ACCESSORY connector of the printer(Fig. 23c).
The (long) power cable of the output stacker cannot be plugged into a regular power plug. Here are two alternatives:
∙Use a regular appliance cable* to extend the (long) power cable of the output stacker to connect it with a wall plug.
∙Use the HP PowerBox*
*additional appliance cable and HP PowerBox are not part of the shipment
Now the system is ready to be powered on.
Note:
When powering on the system, power on TowerFeed FIRST and then the printer.
c
b
a
Fig. 23
b
a
c
d
Fig. 24
Caution:
When moving the printer system to another place, detach the output stacker from printer and TowerFeed and watch out when crossing doorsteps to not have the unit tipping over or TowerFeed trays sliding open.
IU 675 / 0150 | 10 | TowerFeedTM for the HP LaserJet 9000 |
|
|
|
