OPERATING
Operating
Loading Paper
∙Pull open the tray you wish to load until it reaches the stop or remove it completely for more convenient loading.
∙Make sure that the right paper guide is in the LOAD position by firmly pushing it to its right stop.
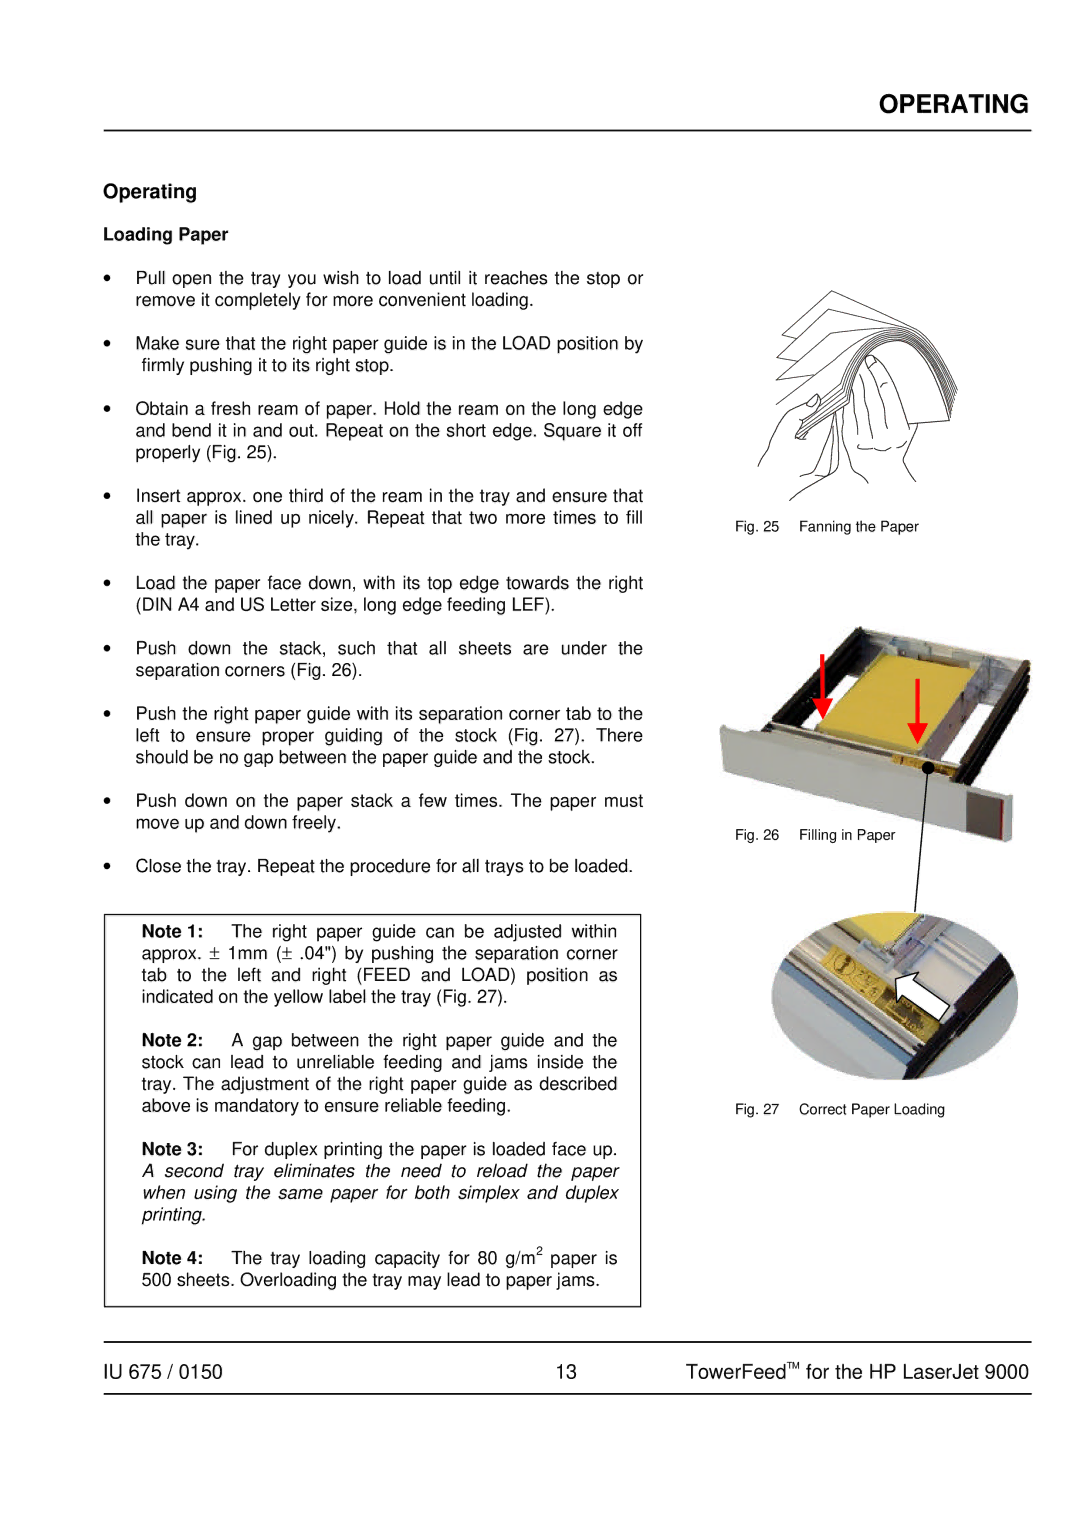
∙Obtain a fresh ream of paper. Hold the ream on the long edge and bend it in and out. Repeat on the short edge. Square it off properly (Fig. 25).
∙Insert approx. one third of the ream in the tray and ensure that all paper is lined up nicely. Repeat that two more times to fill the tray.
∙Load the paper face down, with its top edge towards the right (DIN A4 and US Letter size, long edge feeding LEF).
∙Push down the stack, such that all sheets are under the separation corners (Fig. 26).
∙Push the right paper guide with its separation corner tab to the left to ensure proper guiding of the stock (Fig. 27). There should be no gap between the paper guide and the stock.
∙Push down on the paper stack a few times. The paper must move up and down freely.
∙Close the tray. Repeat the procedure for all trays to be loaded.
Note 1: The right paper guide can be adjusted within approx. ± 1mm (± .04") by pushing the separation corner tab to the left and right (FEED and LOAD) position as indicated on the yellow label the tray (Fig. 27).
Note 2: A gap between the right paper guide and the stock can lead to unreliable feeding and jams inside the tray. The adjustment of the right paper guide as described above is mandatory to ensure reliable feeding.
Note 3: For duplex printing the paper is loaded face up. A second tray eliminates the need to reload the paper when using the same paper for both simplex and duplex printing.
Note 4: The tray loading capacity for 80 g/m2 paper is 500 sheets. Overloading the tray may lead to paper jams.
Fig. 25 Fanning the Paper
Fig. 26 Filling in Paper
Fig. 27 Correct Paper Loading
IU 675 / 0150 | 13 | TowerFeedTM for the HP LaserJet 9000 |
|
|
|
