INSTALLATION
Assembling Stand and 3000-sheet Output Stacker (optional)
Required Tools
The following list shows the tools that are required to prepare and assemble the stand with the
∙Allan key 4mm (included in the accessories box, Fig. 2)
∙Torx hexagon key X20
∙Fork wrench 10mm or monkey wrench (2 pieces)
Note:
The required Torx key and fork / monkey wrenches are not part of the product shipment and must be obtained locally.
Preparation of the Output Stacker
The guiding bar has to be moved from the stacker to the stand. For that purpose proceed at follows:
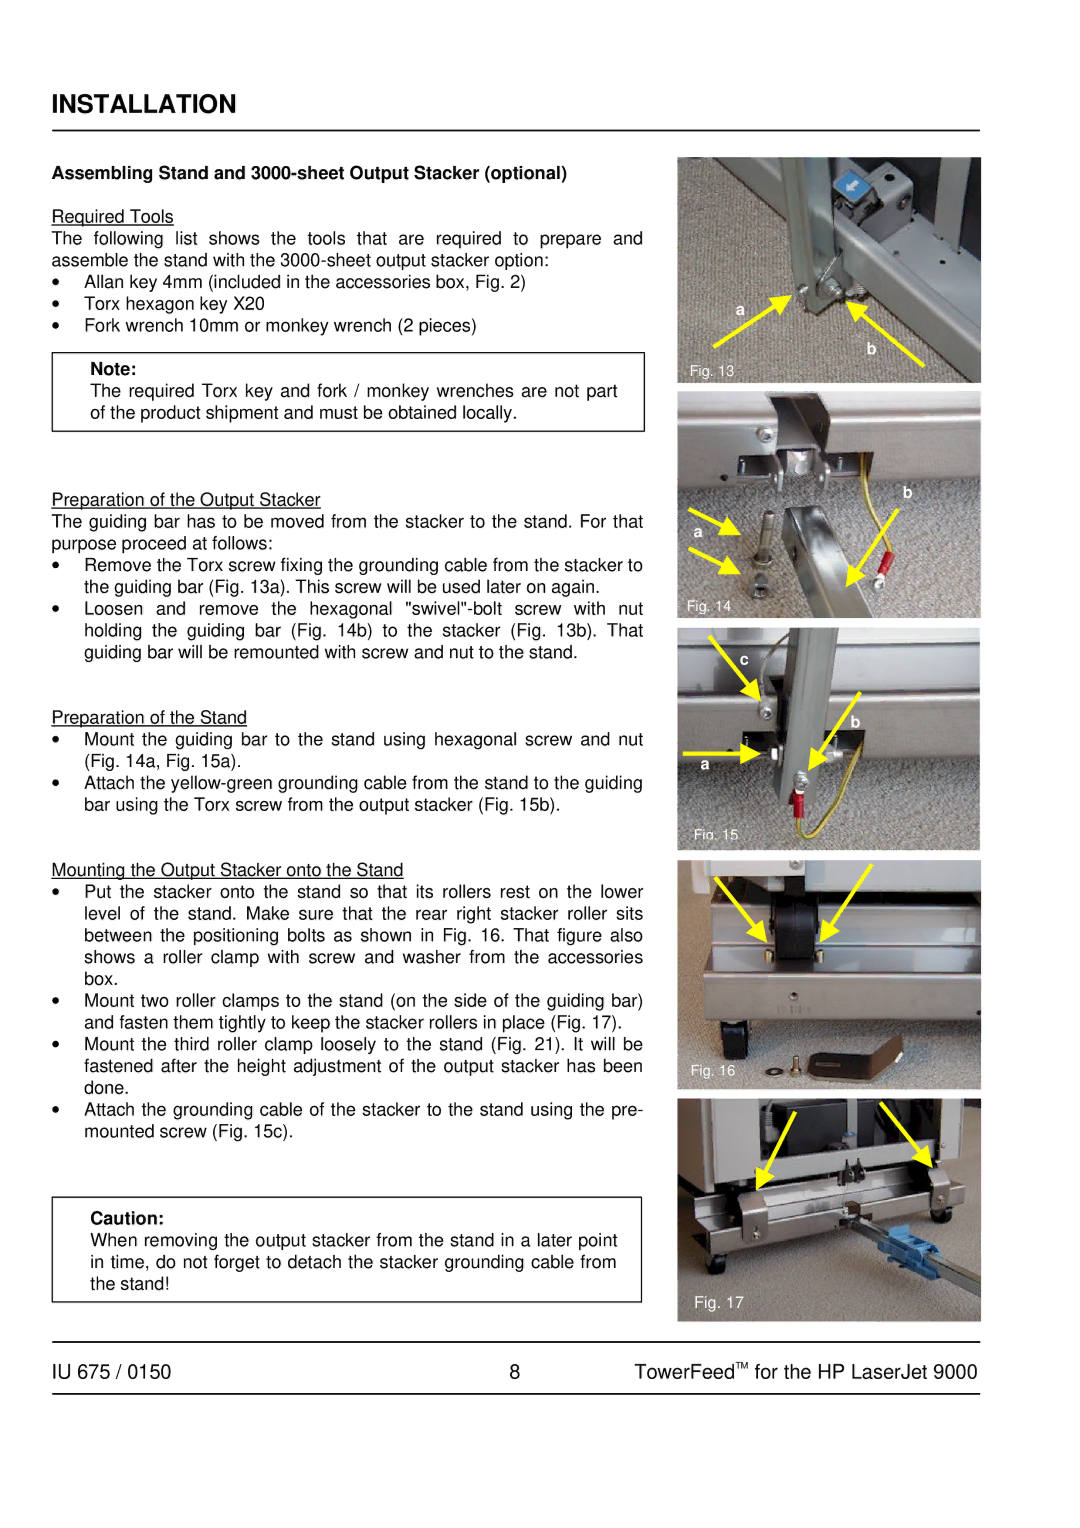
∙Remove the Torx screw fixing the grounding cable from the stacker to the guiding bar (Fig. 13a). This screw will be used later on again.
∙Loosen and remove the hexagonal
Preparation of the Stand
∙Mount the guiding bar to the stand using hexagonal screw and nut (Fig. 14a, Fig. 15a).
∙Attach the
Mounting the Output Stacker onto the Stand
∙Put the stacker onto the stand so that its rollers rest on the lower level of the stand. Make sure that the rear right stacker roller sits between the positioning bolts as shown in Fig. 16. That figure also shows a roller clamp with screw and washer from the accessories box.
∙Mount two roller clamps to the stand (on the side of the guiding bar) and fasten them tightly to keep the stacker rollers in place (Fig. 17).
∙Mount the third roller clamp loosely to the stand (Fig. 21). It will be fastened after the height adjustment of the output stacker has been done.
∙Attach the grounding cable of the stacker to the stand using the pre- mounted screw (Fig. 15c).
Caution:
When removing the output stacker from the stand in a later point in time, do not forget to detach the stacker grounding cable from the stand!
a
b
Fig. 13
b
a
Fig. 14
c
b
a
Fig. 15
Fig. 16
Fig. 17
IU 675 / 0150 | 8 | TowerFeedTM for the HP LaserJet 9000 |
|
|
|