Removing and Replacing a Removable 3.5-inch SATA Hard Drive
Some models are equipped with a Removable SATA Hard Drive Enclosure in the
![]() NOTE: Before you remove the old hard drive, be sure to back up the data from the old hard drive so that you can transfer the data to the new hard drive. Also, if you are replacing the primary hard drive, make sure you have created a Recovery Disc Set to restore the operating system, software drivers, and any software applications that were preinstalled on the computer. If you do not have this CD set, select Start > HP Backup and Recovery and create it now.
NOTE: Before you remove the old hard drive, be sure to back up the data from the old hard drive so that you can transfer the data to the new hard drive. Also, if you are replacing the primary hard drive, make sure you have created a Recovery Disc Set to restore the operating system, software drivers, and any software applications that were preinstalled on the computer. If you do not have this CD set, select Start > HP Backup and Recovery and create it now.
1.Unlock the hard drive carrier with the key provided and slide the carrier out of the enclosure.
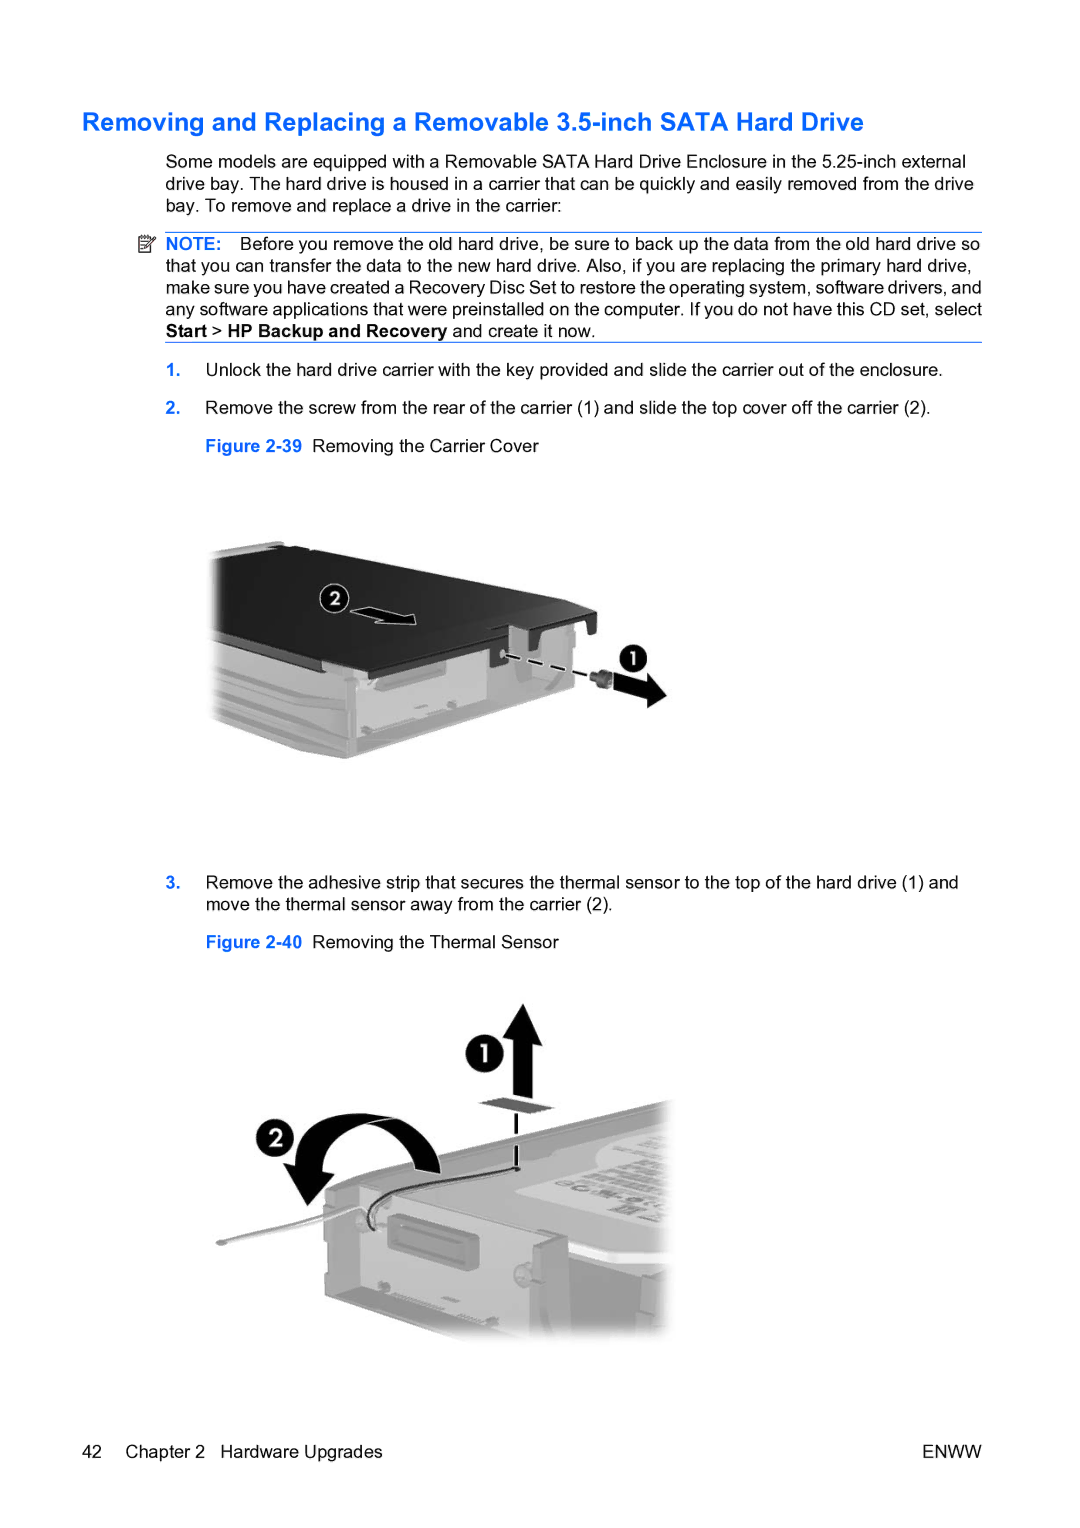
2.Remove the screw from the rear of the carrier (1) and slide the top cover off the carrier (2). Figure
3.Remove the adhesive strip that secures the thermal sensor to the top of the hard drive (1) and move the thermal sensor away from the carrier (2).
Figure 2-40 Removing the Thermal Sensor
42 Chapter 2 Hardware Upgrades | ENWW |