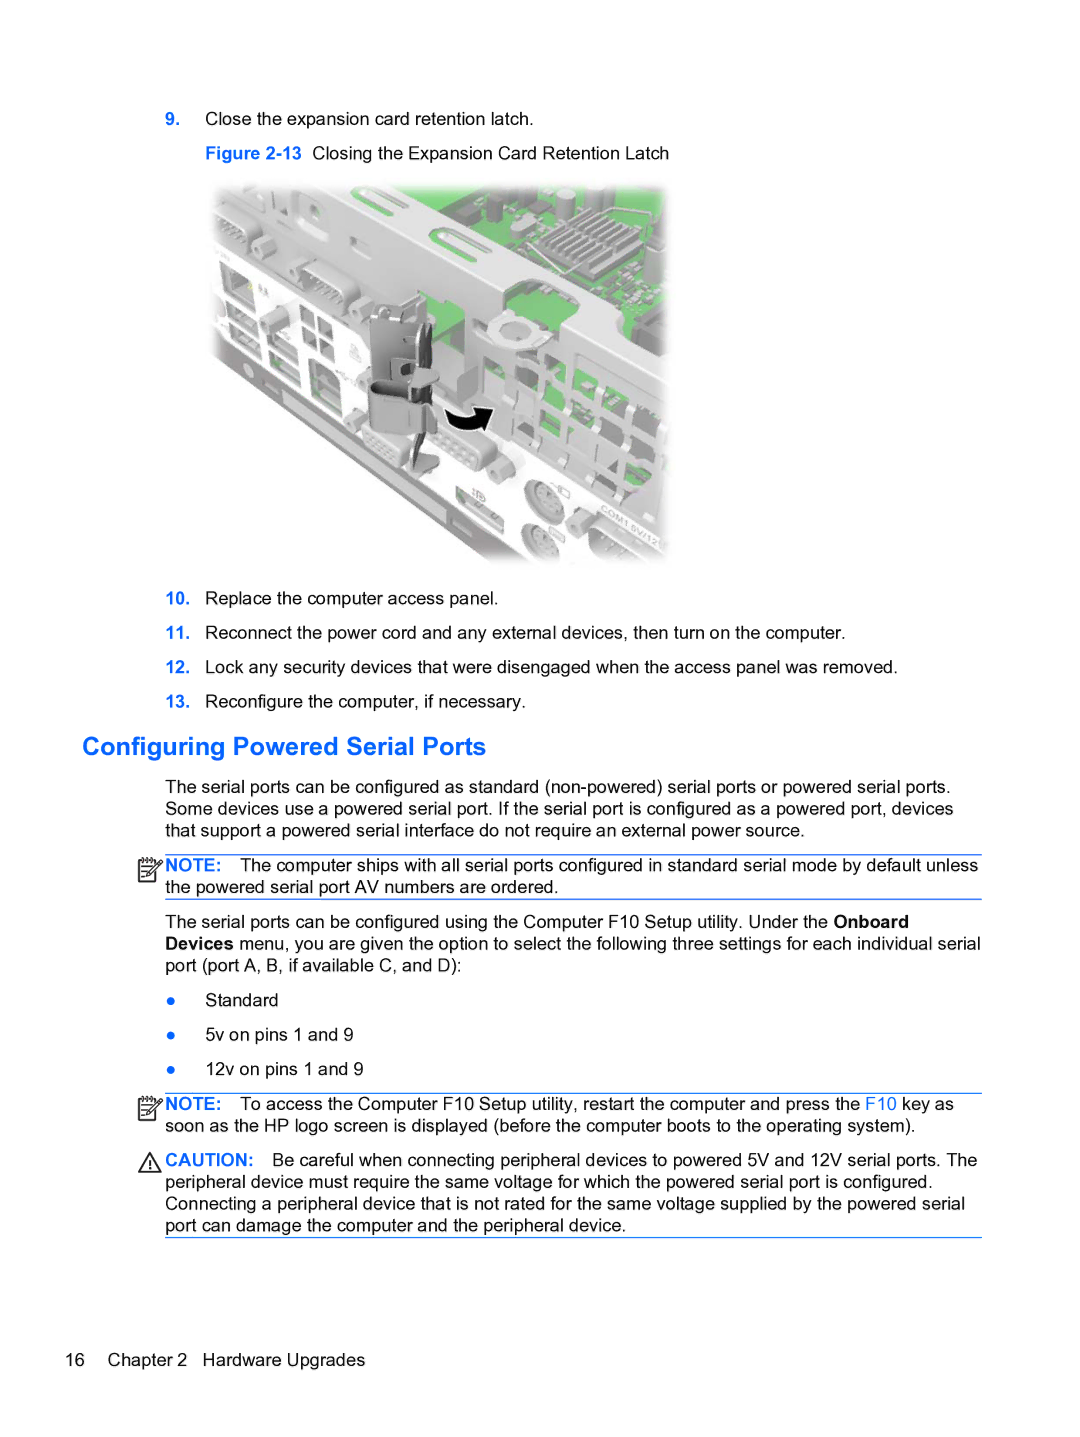
9.Close the expansion card retention latch.
Figure 2-13 Closing the Expansion Card Retention Latch
10.Replace the computer access panel.
11.Reconnect the power cord and any external devices, then turn on the computer.
12.Lock any security devices that were disengaged when the access panel was removed.
13.Reconfigure the computer, if necessary.
Configuring Powered Serial Ports
The serial ports can be configured as standard
![]()
![]()
![]()
![]() NOTE: The computer ships with all serial ports configured in standard serial mode by default unless the powered serial port AV numbers are ordered.
NOTE: The computer ships with all serial ports configured in standard serial mode by default unless the powered serial port AV numbers are ordered.
The serial ports can be configured using the Computer F10 Setup utility. Under the Onboard Devices menu, you are given the option to select the following three settings for each individual serial port (port A, B, if available C, and D):
●Standard
●5v on pins 1 and 9
●12v on pins 1 and 9
![]()
![]()
![]()
![]() NOTE: To access the Computer F10 Setup utility, restart the computer and press the F10 key as soon as the HP logo screen is displayed (before the computer boots to the operating system).
NOTE: To access the Computer F10 Setup utility, restart the computer and press the F10 key as soon as the HP logo screen is displayed (before the computer boots to the operating system).
CAUTION: Be careful when connecting peripheral devices to powered 5V and 12V serial ports. The peripheral device must require the same voltage for which the powered serial port is configured. Connecting a peripheral device that is not rated for the same voltage supplied by the powered serial port can damage the computer and the peripheral device.
16 Chapter 2 Hardware Upgrades