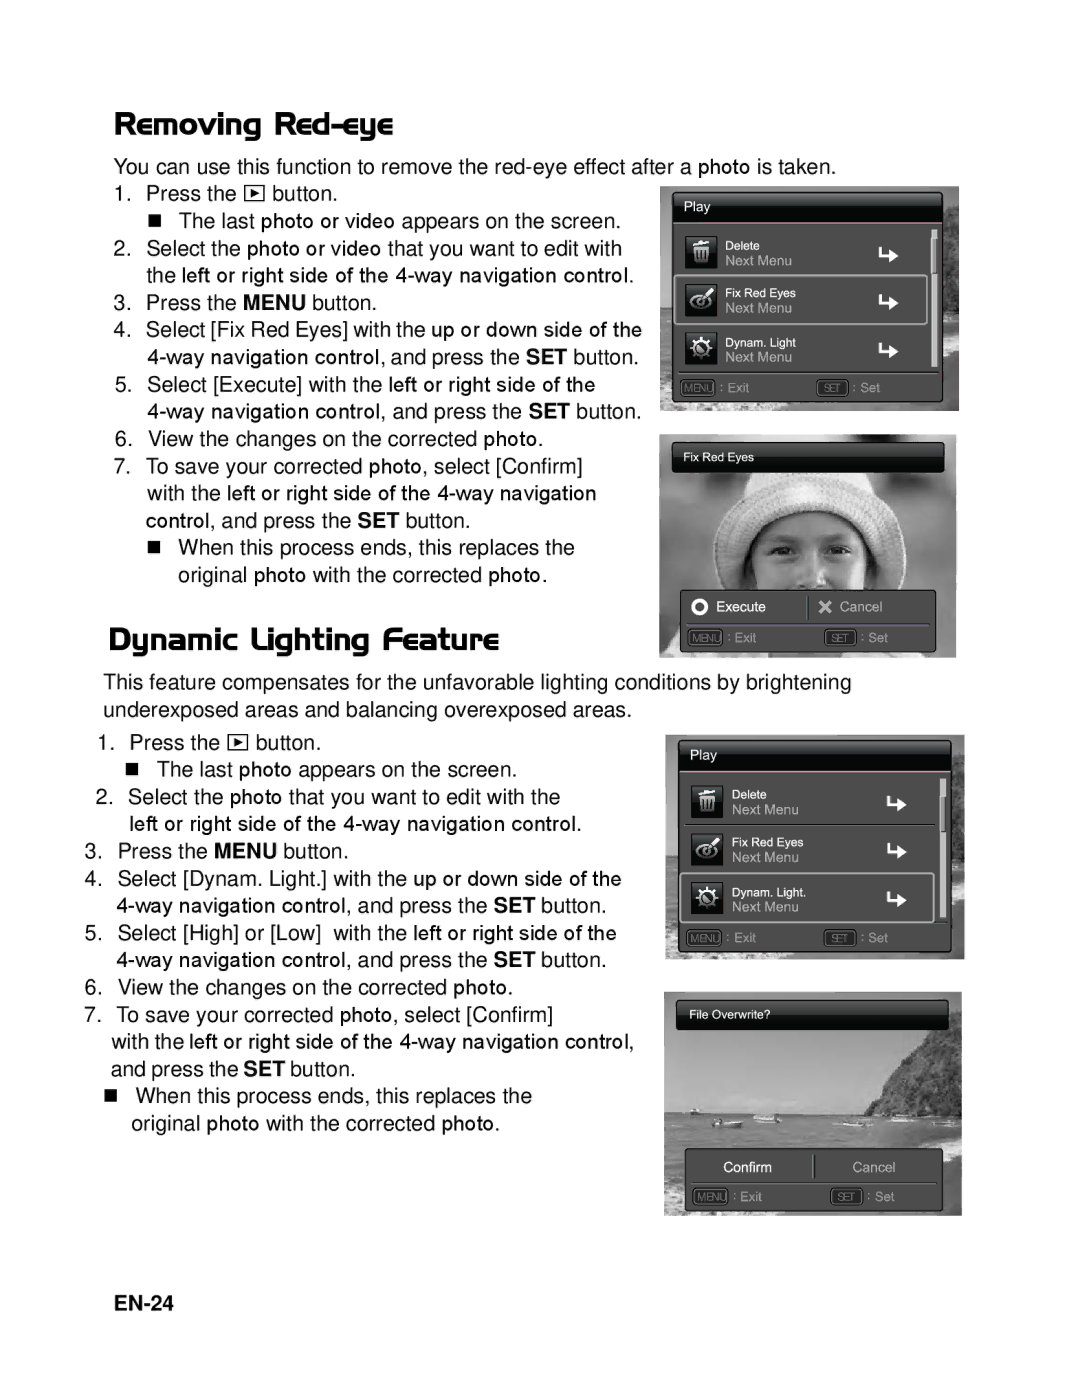
Removing Red-eye
You can use this function to remove the
1.Press the 7 button.
The last photo or video appears on the screen.
2.Select the photo or video that you want to edit with the left or right side of the
3.Press the MENU button.
4.Select [Fix Red Eyes] with the up or down side of the
5.Select [Execute] with the left or right side of the
4-way navigation control, and press the SET button.
6.View the changes on the corrected photo.
7.To save your corrected photo, select [Confirm] with the left or right side of the
When this process ends, this replaces the original photo with the corrected photo.
Dynamic Lighting Feature
MENU ; | SET ; |
MENU ; | SET ; |
This feature compensates for the unfavorable lighting conditions by brightening
underexposed areas and balancing overexposed areas.
1.Press the 7 button.
The last photo appears on the screen.
2.Select the photo that you want to edit with the left or right side of the
3.Press the MENU button.
4.Select [Dynam. Light.] with the up or down side of the
5.Select [High] or [Low] with the left or right side of the
6.View the changes on the corrected photo.
7.To save your corrected photo, select [Confirm]
with the left or right side of the
When this process ends, this replaces the original photo with the corrected photo.
MENU ; | SET ; |
MENU ; | SET ; |