Using the LEDs for troubleshooting
If you cannot resolve a problem, contact customer service at www.hp.com/support.
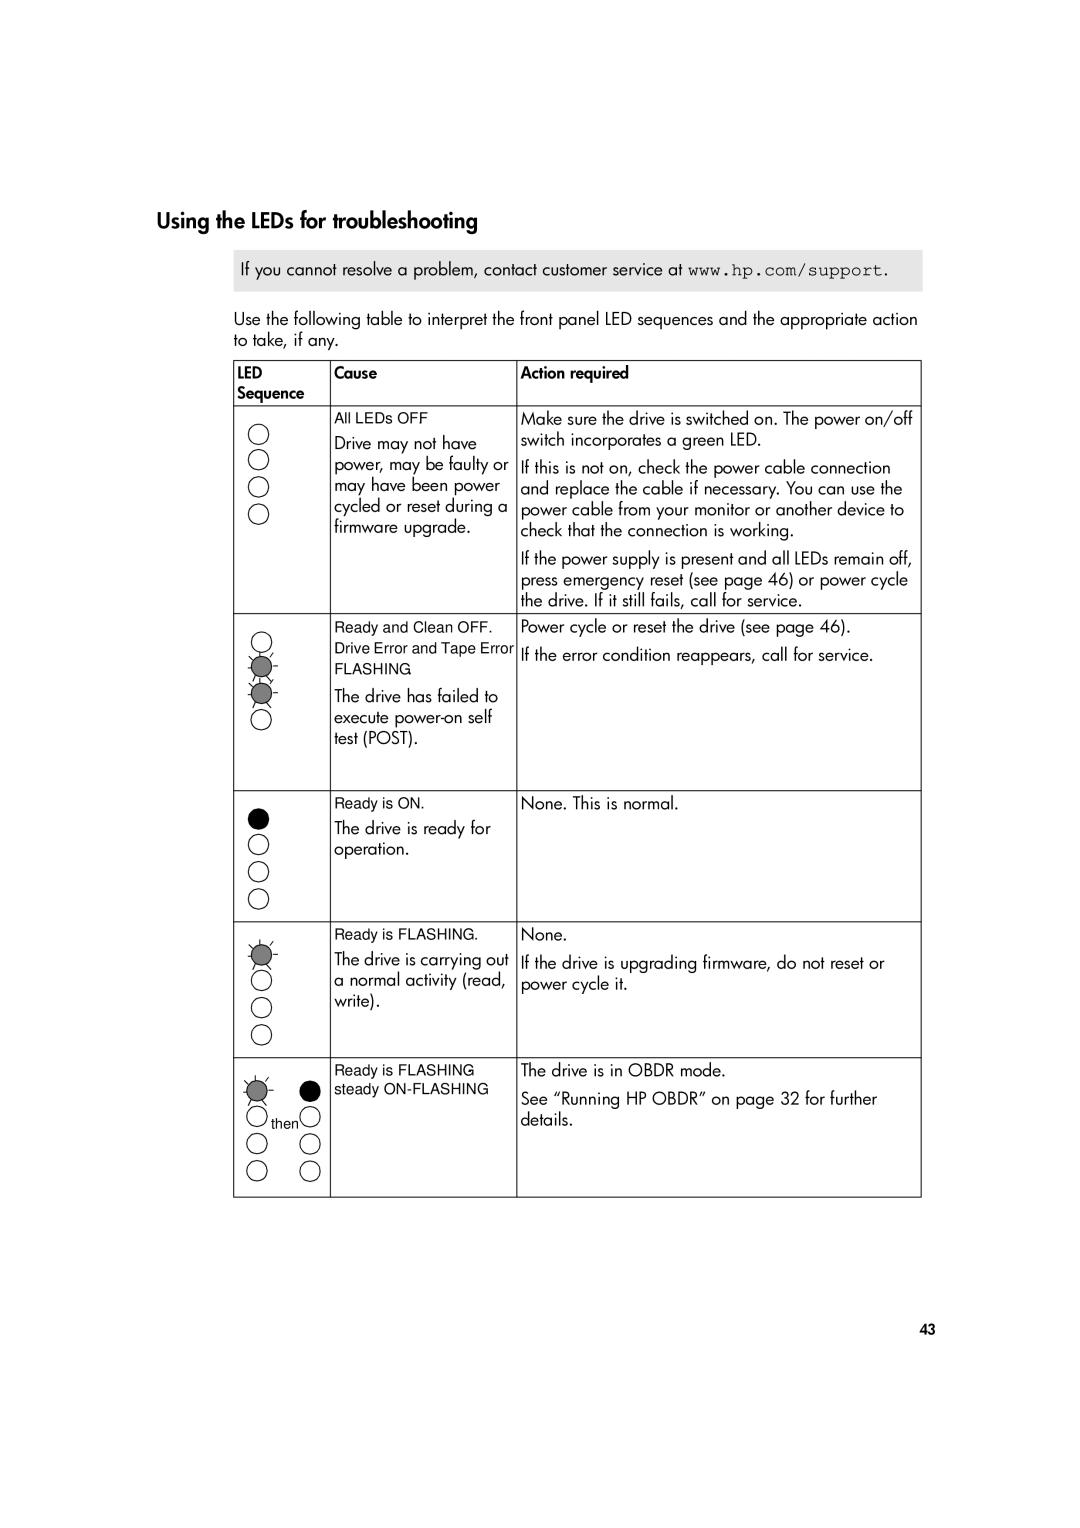
Use the following table to interpret the front panel LED sequences and the appropriate action to take, if any.
LED | Cause | Action required | |
Sequence |
|
| |
|
| All LEDs OFF. | Make sure the drive is switched on. The power on/off |
|
| Drive may not have | switch incorporates a green LED. |
|
| power, may be faulty or | If this is not on, check the power cable connection |
|
| may have been power | and replace the cable if necessary. You can use the |
|
| cycled or reset during a | power cable from your monitor or another device to |
|
| firmware upgrade. | check that the connection is working. |
|
|
| If the power supply is present and all LEDs remain off, |
|
|
| press emergency reset (see page 46) or power cycle |
|
|
| the drive. If it still fails, call for service. |
|
| Ready and Clean OFF. | Power cycle or reset the drive (see page 46). |
|
| Drive Error and Tape Error | If the error condition reappears, call for service. |
|
| ||
|
| ||
|
| FLASHING. |
|
The drive has failed to execute
|
|
| Ready is ON. | None. This is normal. |
|
|
| The drive is ready for |
|
|
|
| operation. |
|
|
|
|
|
|
|
|
| Ready is FLASHING. | None. |
|
|
| ||
|
|
| The drive is carrying out | If the drive is upgrading firmware, do not reset or |
|
|
| a normal activity (read, | power cycle it. |
|
|
| write). |
|
|
|
|
|
|
|
|
| Ready is FLASHING- | The drive is in OBDR mode. |
|
|
| steady | See “Running HP OBDR” on page 32 for further |
|
|
|
| |
|
|
| then | details. |
43