HP V4218TU, V4201XX, V4200, V4000T, V4209TU, V4203XX, V4322EA Removing the PC Card Assembly Screws

Models: V4333EA V4387EA V4332EA V4233TU V4200 V4332US V4320EA V4232TU V4325US V4212TU V4219TU V4354EA V4209TU V4220TU V4217EA V4218TU V4230TU V4322EA V4201XX V4376EA V4310NR V4245US V4000T V4382EA V4227TU V4335EA V4217TU V4275EA V4203XX V4377EA V4222TU V4223TU V4214TU

1 273
Download 273 pages 36.66 Kb
Page 183
Image 183

Removal and Replacement Procedures

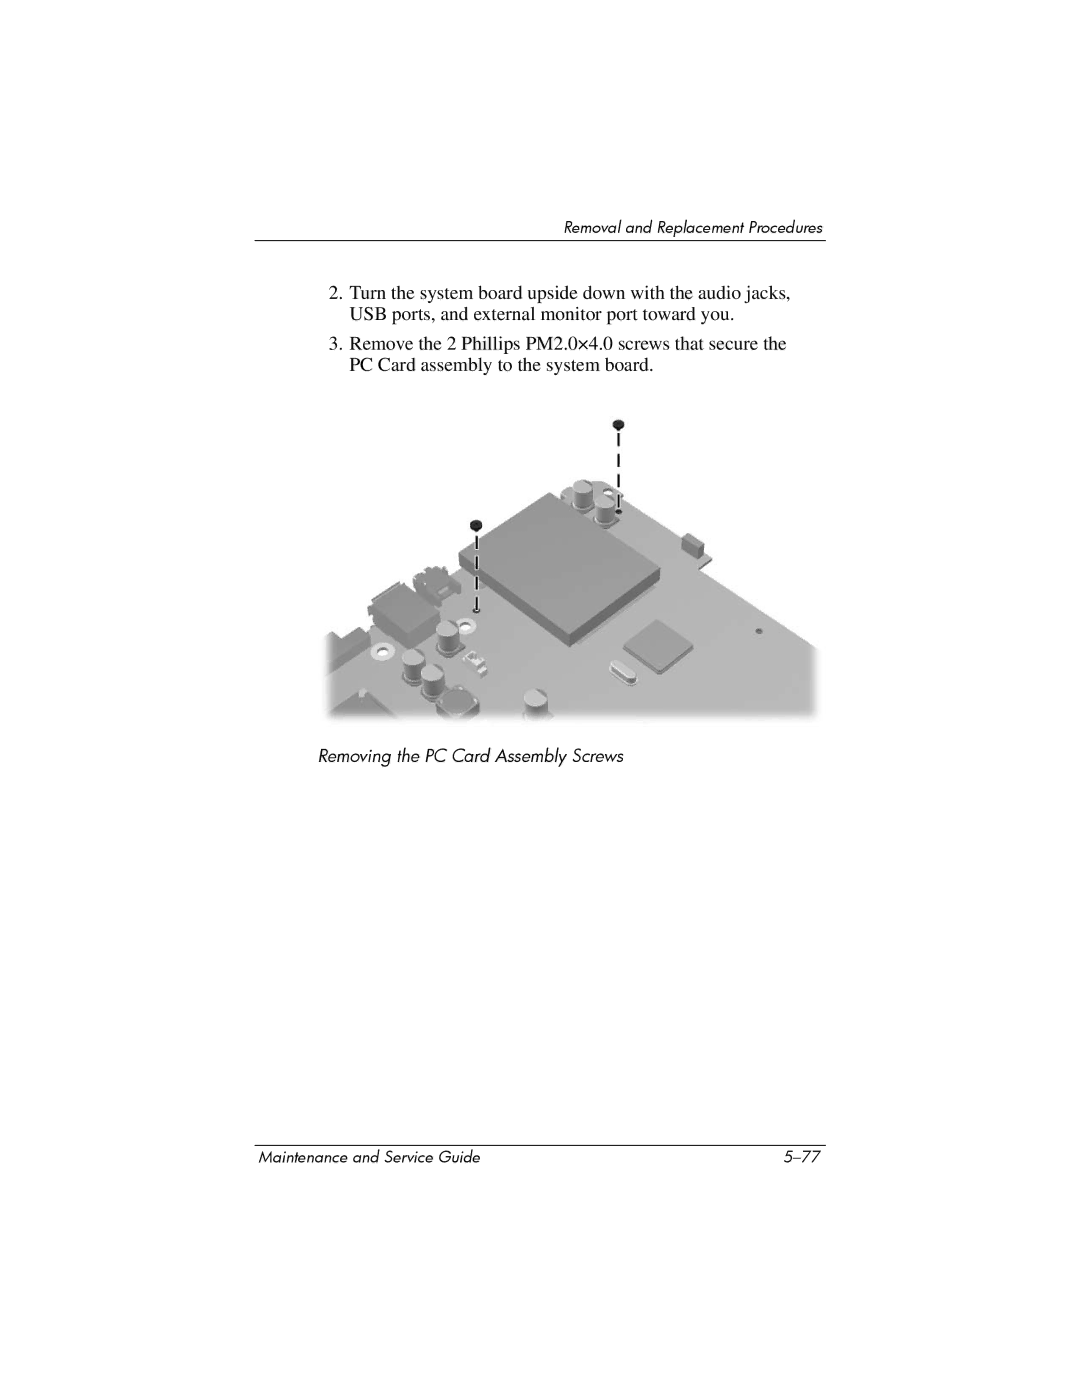
2.Turn the system board upside down with the audio jacks, USB ports, and external monitor port toward you.

3.Remove the 2 Phillips PM2.0×4.0 screws that secure the PC Card assembly to the system board.

Removing the PC Card Assembly Screws

Maintenance and Service Guide

5–77

Page 183
Image 183
HP V4218TU, V4201XX, V4200, V4000T, V4209TU, V4203XX, V4322EA, V4354EA, V4275EA, V4245US manual Removing the PC Card Assembly Screws