2

WARNING: Positive terminal must be connected fi rst to prevent sparks from accidental grounding.

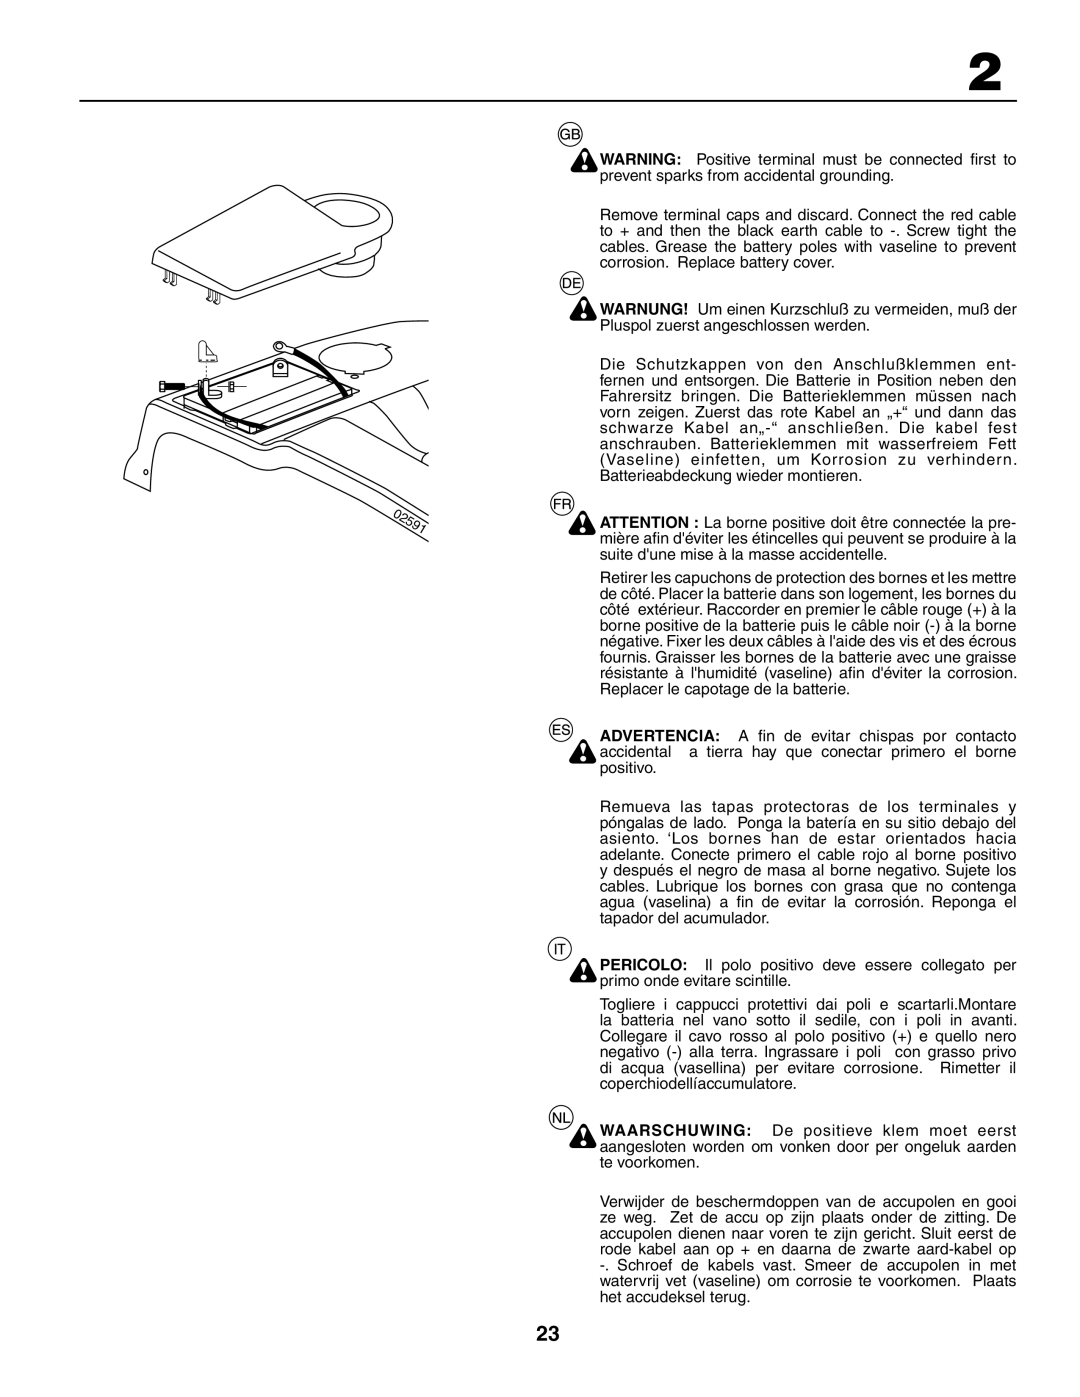
Remove terminal caps and discard. Connect the red cable to + and then the black earth cable to -. Screw tight the cables. Grease the battery poles with vaseline to prevent corrosion. Replace battery cover.

WARNUNG! Um einen Kurzschluß zu vermeiden, muß der Pluspol zuerst angeschlossen werden.

Die Schutzkappen von den Anschlußklemmen ent- fernen und entsorgen. Die Batterie in Position neben den Fahrersitz bringen. Die Batterieklemmen müssen nach vorn zeigen. Zuerst das rote Kabel an „+“ und dann das schwarze Kabel an„-“ anschließen. Die kabel fest anschrauben. Batterieklemmen mit wasserfreiem Fett (Vaseline) einfetten, um Korrosion zu verhindern. Batterieabdeckung wieder montieren.

ATTENTION : La borne positive doit être connectée la pre- mière afi n d'éviter les étincelles qui peuvent se produire à la suite d'une mise à la masse accidentelle.

Retirer les capuchons de protection des bornes et les mettre de côté. Placer la batterie dans son logement, les bornes du côté extérieur. Raccorder en premier le câble rouge (+) à la borne positive de la batterie puis le câble noir (-) à la borne négative. Fixer les deux câbles à l'aide des vis et des écrous fournis. Graisser les bornes de la batterie avec une graisse résistante à l'humidité (vaseline) afi n d'éviter la corrosion. Replacer le capotage de la batterie.

ADVERTENCIA: A fi n de evitar chispas por contacto accidental a tierra hay que conectar primero el borne positivo.

Remueva las tapas protectoras de los terminales y póngalas de lado. Ponga la batería en su sitio debajo del asiento. ‘Los bornes han de estar orientados hacia adelante. Conecte primero el cable rojo al borne positivo y después el negro de masa al borne negativo. Sujete los cables. Lubrique los bornes con grasa que no contenga agua (vaselina) a fi n de evitar la corrosión. Reponga el tapador del acumulador.

PERICOLO: Il polo positivo deve essere collegato per primo onde evitare scintille.

Togliere i cappucci protettivi dai poli e scartarli.Montare la batteria nel vano sotto il sedile, con i poli in avanti. Collegare il cavo rosso al polo positivo (+) e quello nero negativo (-) alla terra. Ingrassare i poli con grasso privo di acqua (vasellina) per evitare corrosione. Rimetter il coperchiodellíaccumulatore.

WAARSCHUWING: De positieve klem moet eerst aangesloten worden om vonken door per ongeluk aarden te voorkomen.

Verwijder de beschermdoppen van de accupolen en gooi ze weg. Zet de accu op zijn plaats onder de zitting. De accupolen dienen naar voren te zijn gericht. Sluit eerst de rode kabel aan op + en daarna de zwarte aard-kabel op -. Schroef de kabels vast. Smeer de accupolen in met watervrij vet (vaseline) om corrosie te voorkomen. Plaats het accudeksel terug.

23

Page 23
Image 23
Husqvarna CTH210xp, CTH150 XP instruction manual

CTH210xp, CTH150 XP specifications

The Husqvarna CTH150 XP and CTH210 XP are exceptional lawn tractors designed for efficient mowing and robust performance, making them ideal choices for homeowners and small property managers. Known for their innovative technologies and user-friendly features, these models stand out in the crowded market of riding mowers.

The CTH150 XP features a powerful 15 HP Kohler engine, providing ample power for tackling various lawn terrains. With its 42-inch cutting deck, this tractor ensures a wide and efficient cutting path, allowing users to cover more ground in less time. The CTH210 XP, on the other hand, is equipped with an even more robust 21 HP engine, paired with a 46-inch cutting deck, making it suitable for larger properties and tougher mowing conditions.

Both models come with Husqvarna's Pedal-operated transmission system, which allows for seamless speed adjustments while keeping hands free for steering. This feature promotes more control and a smoother mowing experience. Additionally, they incorporate a reinforced cutting deck construction that enhances durability and performance, ensuring that users can rely on their mower for years to come.

One of the standout technologies in both the CTH150 XP and CTH210 XP is the ClearCutâ„¢ cutting system. This advanced system delivers superior cutting performance by utilizing a deep deck design that improves grass flow, resulting in a better cut quality and even grass distribution. Users can choose from multiple cutting heights, adjusted easily from the operator's seat, to achieve the desired lawn appearance.

In terms of maintenance, both models are designed with hassle-free access to critical components, making routine checks and servicing straightforward. The large fuel tank allows for extended mowing sessions without frequent refueling stops, a significant advantage for larger lawns.

Comfort is also paramount in the design of the CTH150 XP and CTH210 XP. Featuring ergonomically designed seats, users can enjoy a comfortable ride even during extended mowing sessions. The control panel is strategically placed for easy access to vital functions, and the overall design ensures optimal visibility while mowing, enhancing safety and precision.

In summary, the Husqvarna CTH150 XP and CTH210 XP represent cutting-edge lawn tractor technology, combining powerful engines, durable construction, advanced cutting systems, and user-centric design. These models are perfect for anyone looking to achieve a well-manicured lawn efficiently and comfortably.