with this drive. Using the wrong size screws might damage the drive. Thread the screws in loosely to check their position. Usually two screws are used on each side.
3.Check to ensure that the alignment is correct, and then tighten the screws to secure the drive. Do not overtighten.
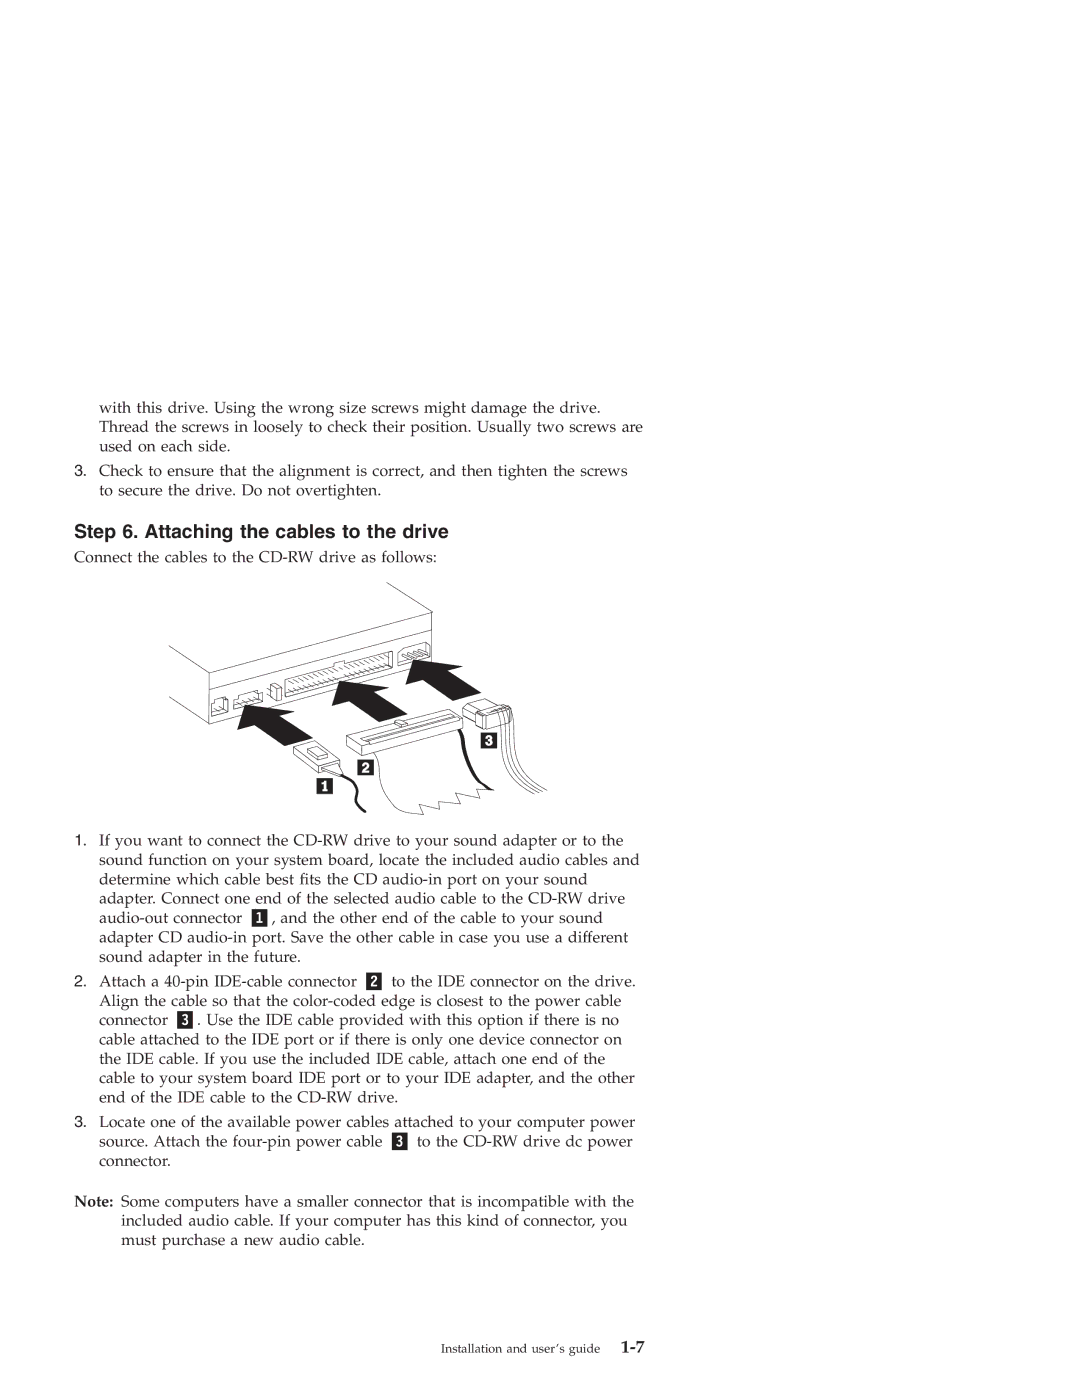
Step 6. Attaching the cables to the drive
Connect the cables to the
1.If you want to connect the
adapter. Connect one end of the selected audio cable to the
2. Attach a | to the IDE connector on the drive. | |
Align the cable so that the | ||
connector | . Use the IDE cable provided with this option if there is no | |
cable attached to the IDE port or if there is only one device connector on the IDE cable. If you use the included IDE cable, attach one end of the cable to your system board IDE port or to your IDE adapter, and the other end of the IDE cable to the
3.Locate one of the available power cables attached to your computer power
source. Attach the | to the |
connector. |
|
Note: Some computers have a smaller connector that is incompatible with the included audio cable. If your computer has this kind of connector, you must purchase a new audio cable.
Installation and user’s guide |