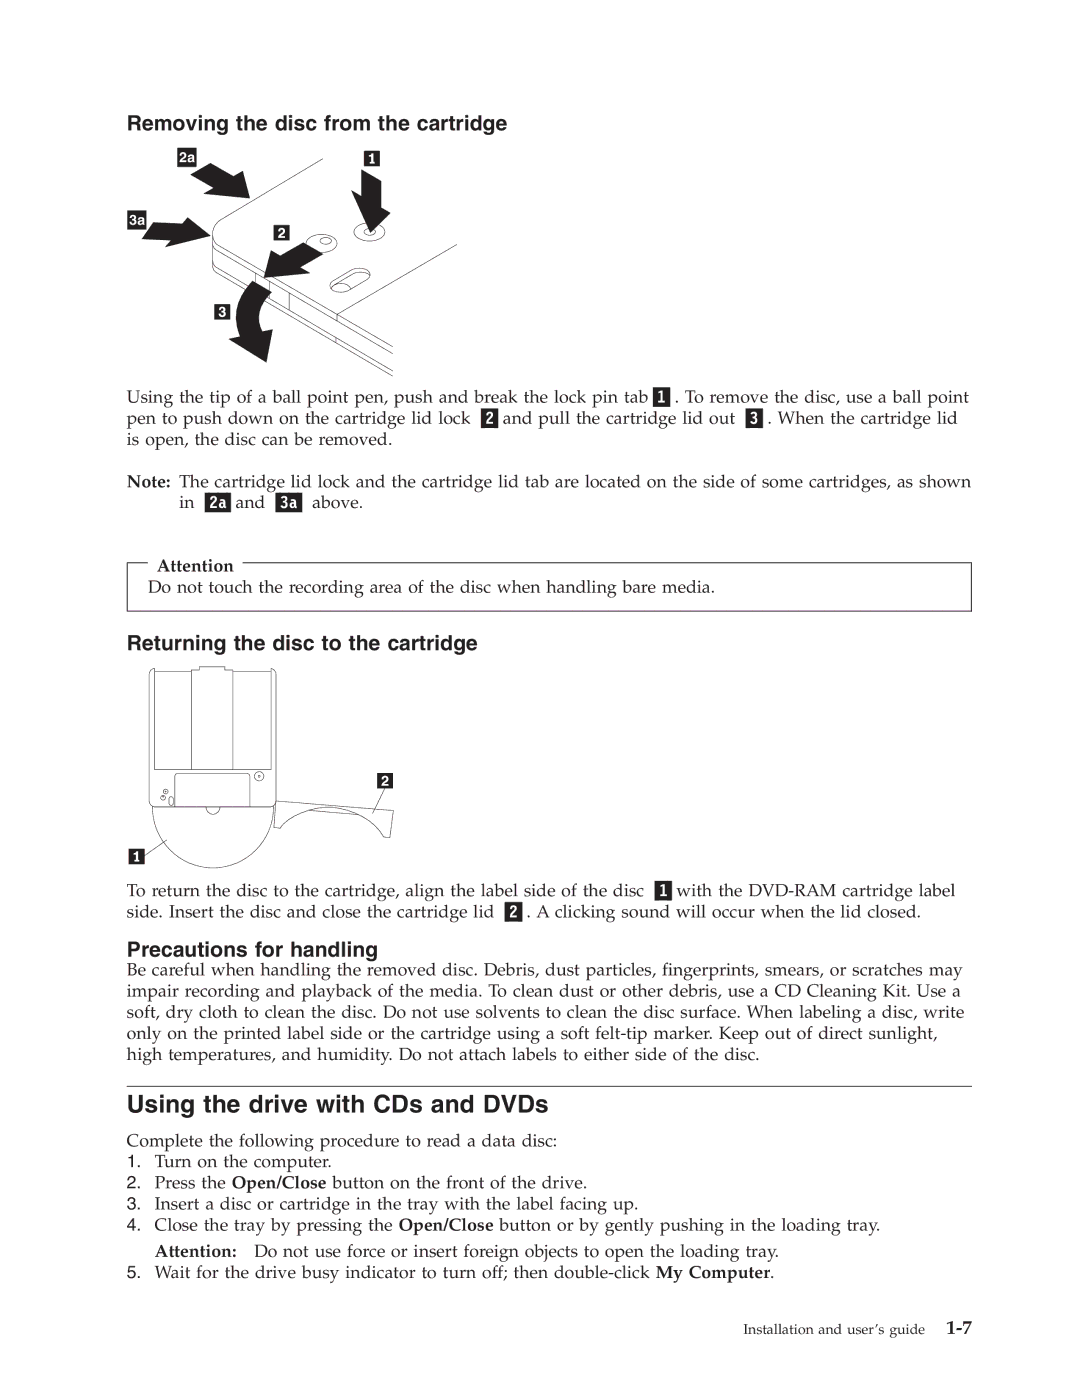
Removing the disc from the cartridge
2a
3a
Using the tip of a ball point pen, push and break the lock pin tab . To remove the disc, use a ball point
pen to push down on the cartridge lid lock | and pull the cartridge lid out | . When the cartridge lid |
is open, the disc can be removed. |
|
|
Note: The cartridge lid lock and the cartridge lid tab are located on the side of some cartridges, as shown
in and above.
Attention
Do not touch the recording area of the disc when handling bare media.
Returning the disc to the cartridge
To return the disc to the cartridge, align the label side of the disc | with the | |
side. Insert the disc and close the cartridge lid | . A clicking sound will occur when the lid closed. | |
Precautions for handling
Be careful when handling the removed disc. Debris, dust particles, fingerprints, smears, or scratches may impair recording and playback of the media. To clean dust or other debris, use a CD Cleaning Kit. Use a soft, dry cloth to clean the disc. Do not use solvents to clean the disc surface. When labeling a disc, write only on the printed label side or the cartridge using a soft
Using the drive with CDs and DVDs
Complete the following procedure to read a data disc:
1.Turn on the computer.
2.Press the Open/Close button on the front of the drive.
3.Insert a disc or cartridge in the tray with the label facing up.
4.Close the tray by pressing the Open/Close button or by gently pushing in the loading tray. Attention: Do not use force or insert foreign objects to open the loading tray.
5.Wait for the drive busy indicator to turn off; then
Installation and user’s guide