Installing the drive
Complete the following steps to install the drive:
Step 1. Opening the computer
1.Turn off the computer and all attached devices.
2.Unplug all power cords from the computer and all attached devices.
3.Remove the cover from the computer. Refer to your computer documentation for instructions on removing the computer cover.
Step 2. Unpacking the drive
1.Before opening the antistatic bag that the drive is packed in, touch the bag to an unpainted metal surface for at least two seconds. This drains the static electricity from the package and your body.
2.Remove the drive from the bag.
If you must put the drive down, place the antistatic bag on a flat, padded surface, and place the drive on the antistatic bag.
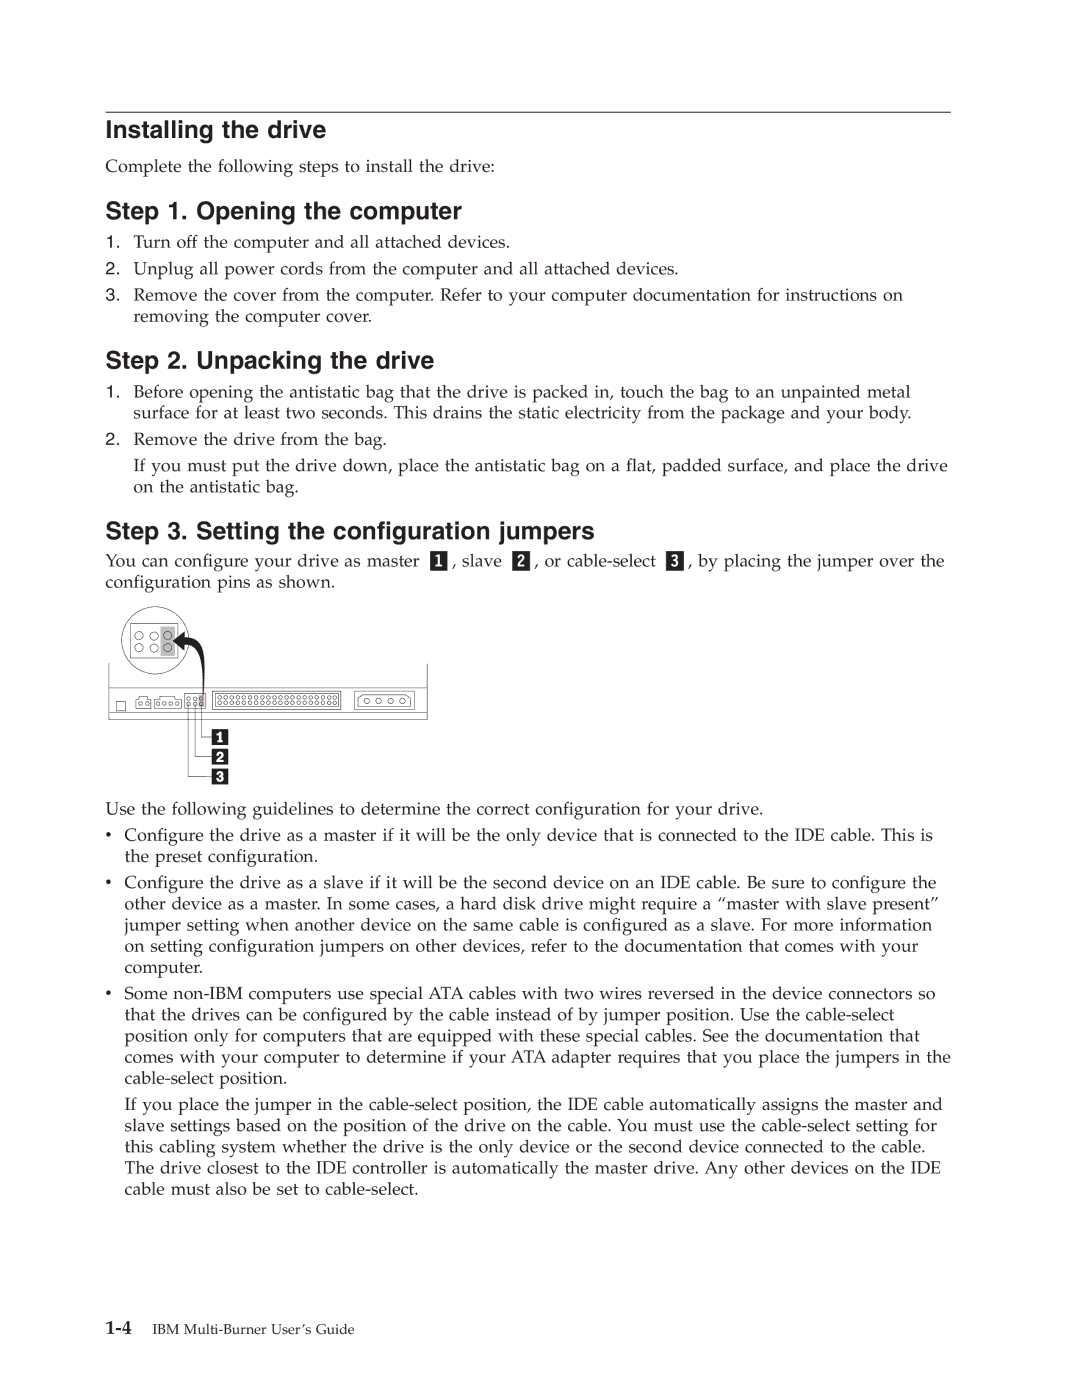
Step 3. Setting the configuration jumpers
You can configure your drive as master , slave , or
Use the following guidelines to determine the correct configuration for your drive.
vConfigure the drive as a master if it will be the only device that is connected to the IDE cable. This is the preset configuration.
vConfigure the drive as a slave if it will be the second device on an IDE cable. Be sure to configure the other device as a master. In some cases, a hard disk drive might require a “master with slave present” jumper setting when another device on the same cable is configured as a slave. For more information on setting configuration jumpers on other devices, refer to the documentation that comes with your computer.
vSome
If you place the jumper in the
The drive closest to the IDE controller is automatically the master drive. Any other devices on the IDE cable must also be set to