Advanced feature for presentation (Continue)
ENGLISH
Super impose (Picture in Picture)
One of the special features of this unit is the picture-
1.Press the PinP button on the remote control.
•Pressing the PinP button repeatedly will select on and off.
2.Select the desired external input source of the sub image by using the RGB, VIDEO or CARD button.
•You can change the frame position and the frame size by using the
To recapture the picture of sub screen
3Press the – or + button.
•By each press of the button will recapture the picture of sub screen.
To switch Main image and sub image
4Press the ![]() or
or ![]() buttons on the control panel (or $ or % buttons on the remote control).
buttons on the control panel (or $ or % buttons on the remote control).
To switch still picture and playback picture between Main image and Sub image
5 Press the ª or º buttons on the control panel (or { or } buttons on the remote control) .
6.Press the PinP button on the remote control. The sub image will be disappear.
•In PinP mode, the sub image will become still pictures. When the main image is set to PC1 or PC2, the sub image will become moving pictures.
•In PinP mode, the sound of the moving pictures will be heard.
•The sub image may vibrate. If this is the case, select the image again by pressing the
•In PinP mode you cannot adjust the zoom/focus.
•Ajusting contrast, brightness, tint or color isn't available in PinP mode.
•To use different PC card (PC card 1, PC card 2) on both Main image and Sub image is not available.
•When the main and sub images are set to PC1 or PC2, images can be selected only from the same group of the same
•By setting the AUTO PIP on the PinP/EXPAND menu to ON, the position of the sub image will move automatically when the red frame indicating the EXPAND area overlap with the sub image.
Expand
By pressing the EXPAND button on the remote con- trol, you can view the detailed image of the picture.
Setting the Expand mode
1.Press the MENU button once to display the on- screen menu.
2.Press the ![]() or
or ![]() buttons on the control panel (or $ or % buttons on the remote control) to select PinP/EXPAND.
buttons on the control panel (or $ or % buttons on the remote control) to select PinP/EXPAND.
3.Press the ª or º buttons on the control panel (or
{or } buttons on the remote control).
4.Press the ![]() or
or ![]() buttons on the control panel (or $ or % buttons on the remote control) to select ZOOM MODE, POSITION or SIZE.
buttons on the control panel (or $ or % buttons on the remote control) to select ZOOM MODE, POSITION or SIZE.
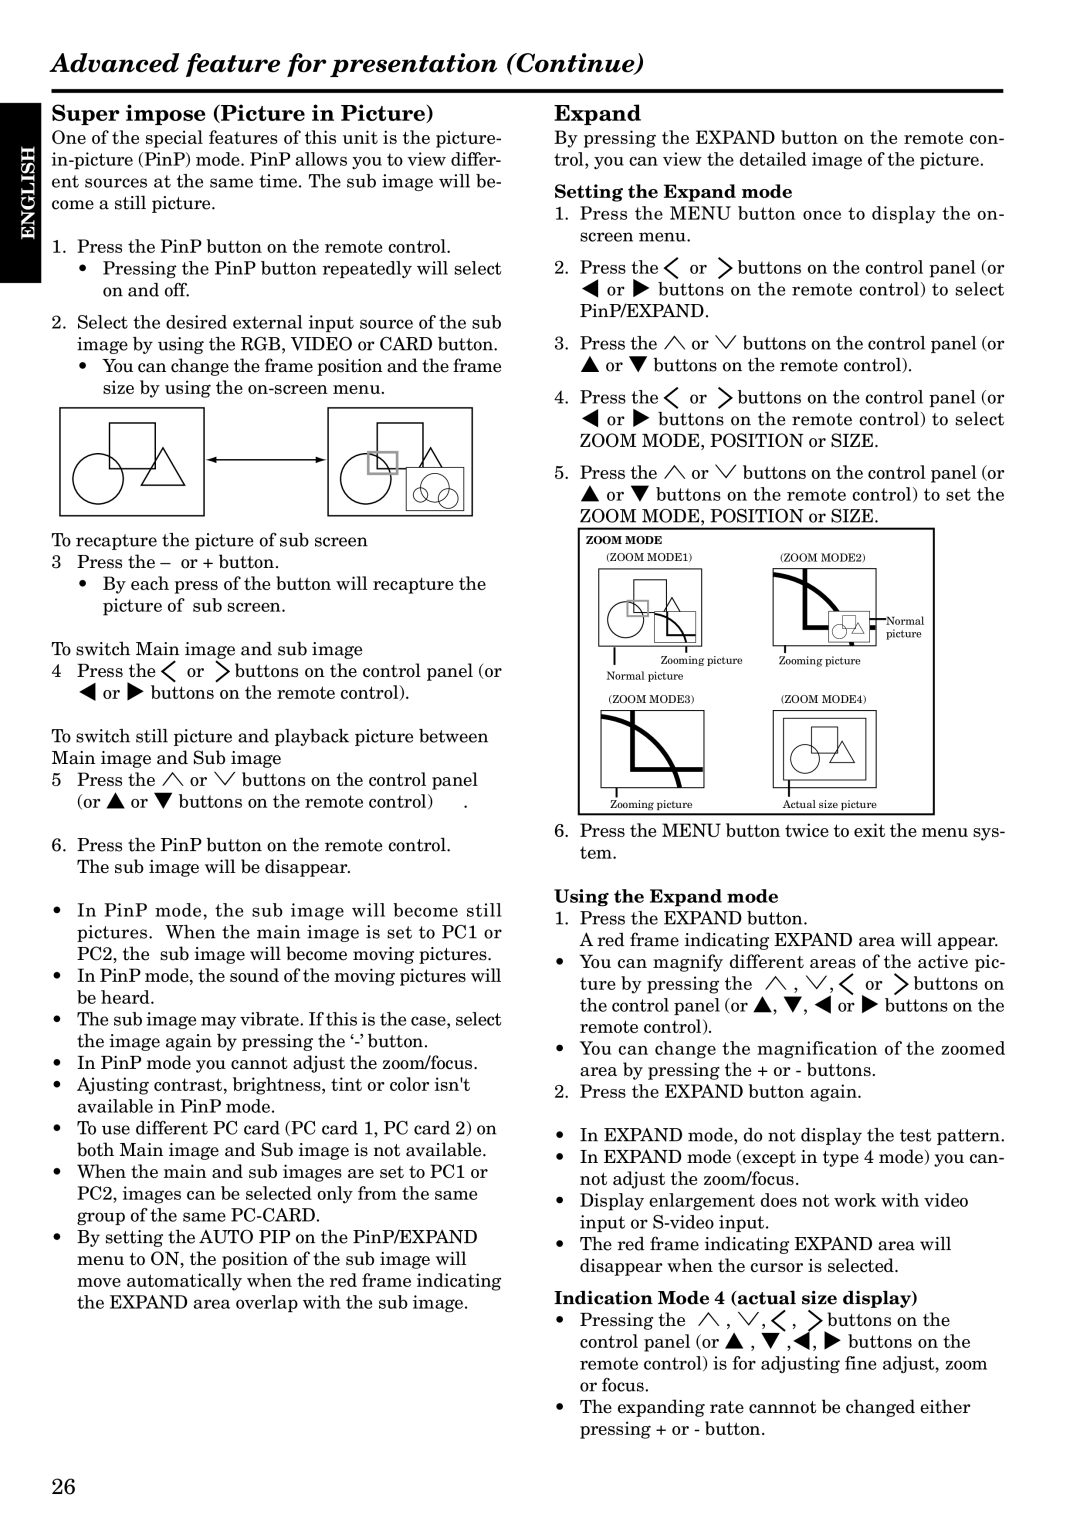
5.Press the ª or º buttons on the control panel (or
{or } buttons on the remote control) to set the
ZOOM MODE, POSITION or SIZE.
ZOOM MODE
(ZOOM MODE1) | (ZOOM MODE2) |
Normal picture
|
|
|
|
|
|
| Zooming picture | Zooming picture | |||
Normal picture |
|
| |||
(ZOOM MODE3) | (ZOOM MODE4) | ||||
|
|
|
|
|
|
|
|
|
|
|
|
|
|
|
|
|
|
|
|
|
|
|
|
Zooming picture | Actual size picture |
6.Press the MENU button twice to exit the menu sys- tem.
Using the Expand mode
1. Press the EXPAND button.
A red frame indicating EXPAND area will appear.
•You can magnify different areas of the active pic-
ture by pressing the ª , º, ![]() or
or ![]() buttons on the control panel (or {, }, $ or % buttons on the remote control).
buttons on the control panel (or {, }, $ or % buttons on the remote control).
•You can change the magnification of the zoomed area by pressing the + or - buttons.
2. Press the EXPAND button again.
•In EXPAND mode, do not display the test pattern.
•In EXPAND mode (except in type 4 mode) you can- not adjust the zoom/focus.
•Display enlargement does not work with video input or
•The red frame indicating EXPAND area will disappear when the cursor is selected.
Indication Mode 4 (actual size display)
•Pressing the ª , º, ![]() ,
, ![]() buttons on the control panel (or { , } ,$, % buttons on the remote control) is for adjusting fine adjust, zoom or focus.
buttons on the control panel (or { , } ,$, % buttons on the remote control) is for adjusting fine adjust, zoom or focus.
•The expanding rate cannnot be changed either pressing + or - button.
26