Scenario Descriptions
Scenario 3
Existing DHCP Server on the
LAN
If your LAN uses an existing DHCP server, complete the following steps to get Internet access through the DSL or cable modem.
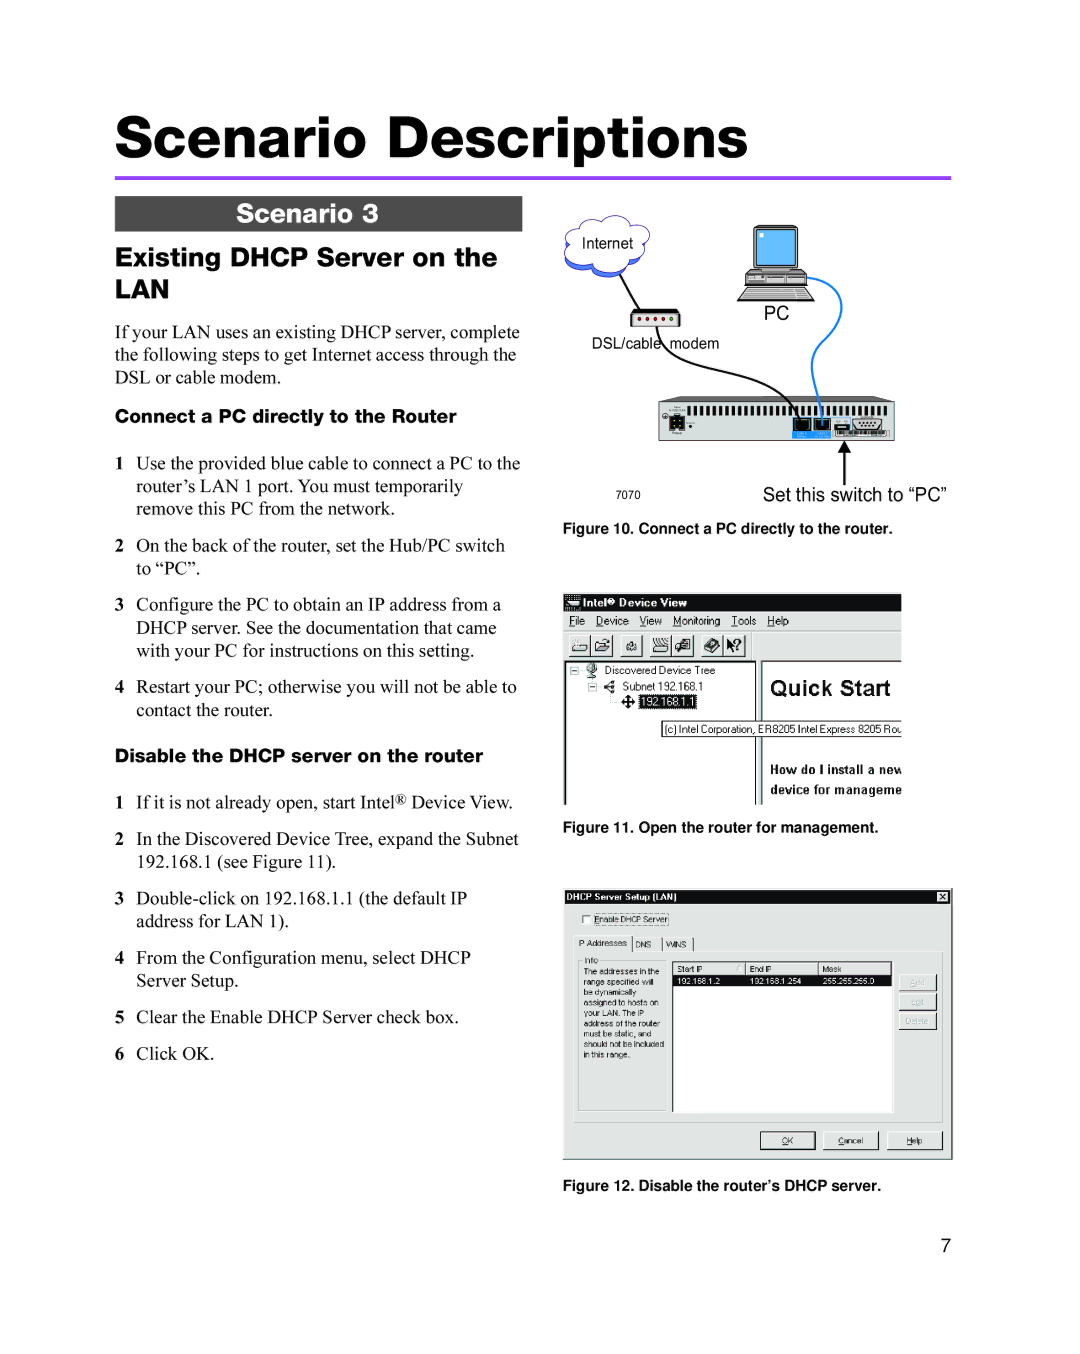
Connect a PC directly to the Router
1Use the provided blue cable to connect a PC to the router’s LAN 1 port. You must temporarily remove this PC from the network.
2On the back of the router, set the Hub/PC switch to “PC”.
3Configure the PC to obtain an IP address from a DHCP server. See the documentation that came with your PC for instructions on this setting.
4Restart your PC; otherwise you will not be able to contact the router.
Disable the DHCP server on the router
1If it is not already open, start Intel® Device View.
2In the Discovered Device Tree, expand the Subnet 192.168.1 (see Figure 11).
3
4From the Configuration menu, select DHCP Server Setup.
5Clear the Enable DHCP Server check box.
6Click OK.
Internet
PC
DSL/cable modem
Input |
|
|
|
|
5.1VDC/2.6A |
|
|
|
|
|
|
|
| Console |
| Recovery |
| Hub | PC |
|
| II | X | |
Power | WAN | LAN 2 | LAN 1 |
|
|
| 10 Mbps | 10 / 100 Mbps |
|
7070 | Set this switch to “PC” |
Figure 10. Connect a PC directly to the router.
Figure 11. Open the router for management.
Figure 12. Disable the router’s DHCP server.
7